Taking a good photo of yourself is about more than just a quick snap. It’s about knowing how to use the right light, finding flattering angles, and using a few simple tools like a tripod or timer. The secret is to treat it like a mini-photoshoot—you’re planning a self-portrait, not just taking a stretched-out selfie.
Why Your Self-Portraits Matter More Than Ever

Let's be honest, knowing how to take a great photo of yourself feels like a modern-day superpower. In a world where your online image is often your first handshake, it’s not just about getting more likes—it’s about crafting a digital presence that actually looks like you.
We've all been there: scrolling through a camera roll full of weird shadows, awkward poses, and photos that just don't capture our real personality. This guide is here to cut through that frustration and show you the real-world techniques professionals use to create stunning images.
Building Your Personal and Professional Brand
A high-quality self-portrait is the cornerstone of a strong online identity. It’s often the first impression you make, whether you’re a job seeker, a freelancer building a client base, or an entrepreneur telling your brand's story.
Think about it:
- Your LinkedIn profile: A polished, professional headshot conveys competence and can be the deciding factor for a recruiter. A blurry or poorly lit photo does the exact opposite.
- Social media presence: Consistent, high-quality images help build a recognizable personal brand that connects with your audience on a human level.
- Creative portfolios: For artists, designers, and creators, a compelling self-portrait can showcase both personality and professionalism at the same time.
In today's creator economy, your image is your brand's currency. A great photo builds trust, conveys personality, and makes you memorable long after someone scrolls past.
The Power of Authenticity
When you master the art of the self-portrait, you take control of your own narrative. You get to capture yourself in your best light—literally and figuratively—showcasing your authentic self without needing to rely on anyone else.
This is especially vital for creators just starting out. For instance, understanding what a nanoinfluencer is shows just how critical authentic, high-quality images are for building genuine trust with a niche audience.
Consider this guide your personal workshop. By the end, you'll know how to turn your own phone into a powerful tool for creating incredible self-portraits—no professional photographer required.
Planning Your Shot for Professional Results

A great self-portrait doesn’t happen by accident. It starts way before you’re staring into the camera lens, trying to figure out what to do with your hands. The secret is simple: a little bit of planning.
Instead of just winging it and hoping for the best, you need to ask yourself one critical question before you do anything else: What is this photo for?
The answer to that question changes everything. It dictates your outfit, your background, and even your expression. Getting this right is the difference between a photo you love and a hundred you end up deleting.
Define Your Photo's Goal
The entire vibe of your photo hinges on its purpose. Are you trying to land a new client on LinkedIn or share a weekend update on Instagram? Each goal requires a completely different strategy.
Let's break down a few common scenarios:
- Professional Headshot: The goal here is to look competent, trustworthy, and approachable. Think clean backgrounds, classic outfits, and a confident but friendly expression.
- Social Media Lifestyle Shot: This is all about showing personality and authenticity. You have more freedom to play with interesting locations, candid poses, and outfits that reflect your personal style.
- Creative Portfolio: This is your chance to be bold. Experiment with artistic lighting, unconventional props, and a wardrobe that makes a statement about your creative work.
Takeaway: Every great photo has a purpose. Knowing your "why" before you start shooting is the single most effective way to ensure your final image communicates the exact message you intend.
Once you’ve nailed down your goal, the rest of the pieces start to fall into place. First up: finding the right setting.
Choose Your Location and Background
Don't underestimate the power of your background. It's not just "the stuff behind you"—it’s a key part of the story. A busy, cluttered background is the fastest way to ruin a good photo because it pulls all the attention away from you.
For a classic professional shot, your best bet is often a simple, neutral-colored wall. Light gray, beige, or even a deep navy can make you pop and keep the focus where it belongs.
If you’re going for something with a bit more character, look for simple textures. An exposed brick wall, a tidy bookshelf, or a simple outdoor setting can add depth without being distracting.
The key is intentionality. Your background should support the photo, not compete with you for the spotlight. For a deeper dive into choosing the perfect setting, our guide on creating amazing professional headshots is packed with ideas.
Select Your Wardrobe and Props
Your clothes are a huge part of the message you're sending. Just like your background, your outfit needs to align with the photo's goal.
Wardrobe Tips for Impact:
- Go for Solid Colors: For anything professional, solid colors are a safe and powerful bet. They’re timeless and won't distract from your face. Jewel tones like emerald, sapphire, and burgundy tend to look fantastic on everyone.
- Play with Texture: Want to add some visual interest without resorting to busy patterns? Think texture. A cable-knit sweater, a classic denim jacket, or a silk blouse adds a layer of depth that the camera loves.
- Fit is Everything: This is non-negotiable. Wear clothes that fit you well and, most importantly, make you feel good. If you're tugging at an awkward shirt, that discomfort will show up in the final shot.
Props can be your secret weapon for making a pose feel less awkward, but only if they make sense. A coffee mug can give your hands something to do for a casual shot, while holding a notebook or tablet can work in a professional context.
The best props feel like a natural extension of you and your story. Don't grab something just for the sake of it; choose items you'd actually use.
Nailing Your Settings and Finding the Light
You don’t need a fancy DSLR to take incredible photos of yourself. The phone in your pocket is more than powerful enough, but the secret is learning how to take control of it. Just pointing and shooting rarely works out. A few simple tweaks can be the difference between a photo you delete and one you can't wait to share.
First thing's first: always use the rear-facing camera. I know, it feels weird when you can't see yourself on the screen. But the camera on the back of your phone has a much bigger and better sensor than the selfie cam up front. This isn't a small difference—we're talking sharper images, richer colors, and dramatically higher quality.
The next enemy to conquer is camera shake, which is the number one cause of blurry photos. You can prop your phone on a stack of books in a pinch, but a cheap tripod is a total game-changer. Add a tiny Bluetooth remote, and you've basically got your own personal photographer. You can step back, get comfortable, and fire off shots without ever touching the screen.
It’s All About the Light
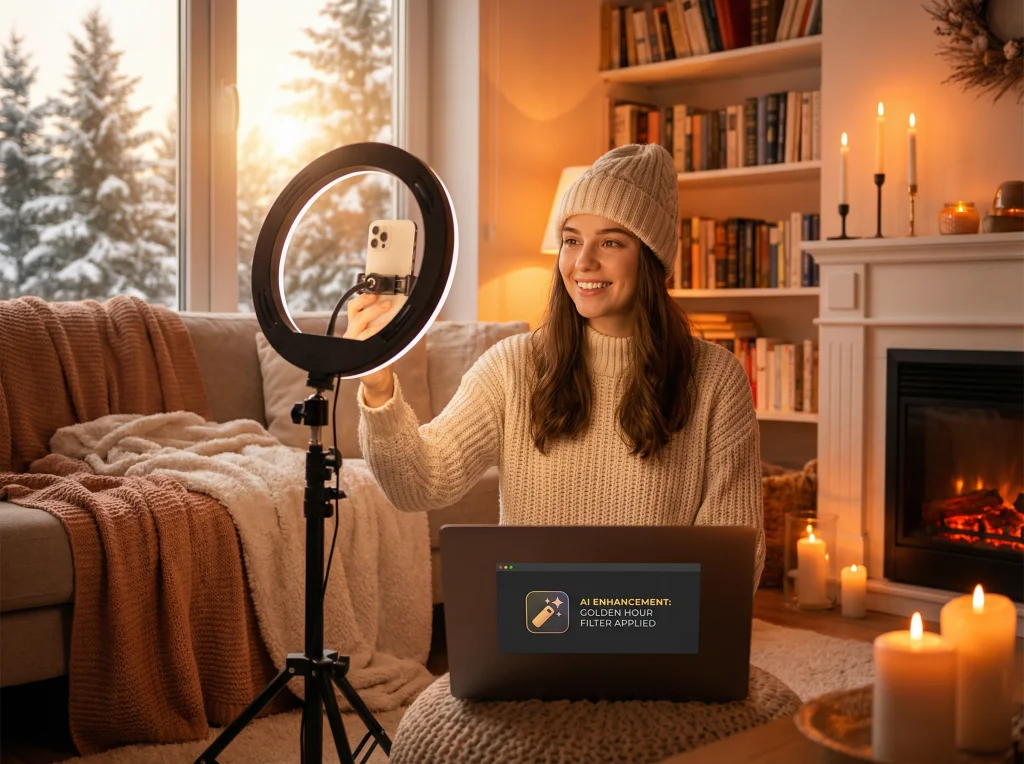
If you take one thing away from this guide, let it be this: great lighting is everything. It can smooth your skin, add a sparkle to your eyes, and instantly make your photo look more professional. The best part? The most flattering light in the world is completely free.
Natural light is your best friend. Find the biggest window in your home and position yourself so you’re facing the light. This bathes your face in soft, even light, erasing harsh shadows and giving you a natural, healthy glow. If the direct sun feels a little too strong, a simple white curtain acts as a perfect diffuser, softening the light beautifully.
The key to nailing those shots yourself: lighting is everything. Studies from Selfiecity, which crunched thousands of Instagram selfies across global cities, show that natural light dramatically improves quality—aim for the 'golden hour' just after sunrise or before sunset when light is soft and flattering, reducing harsh shadows by up to 70% compared to midday snaps. You can explore the full research on self-portrait photography trends and discover more insights.
Whatever you do, avoid standing with a window or bright light behind you. This is called backlighting, and it forces your camera into an impossible choice: either the background will be completely blown out, or you’ll be turned into a dark silhouette. Always, always face your light source.
Golden Hour vs. Midday Sun
Not all daylight is the same. The time of day you shoot has a massive impact on the mood and quality of your photos.
- Midday Sun (Avoid at all costs): Shooting between roughly 11 AM and 2 PM is a recipe for unflattering photos. The sun is directly overhead, casting harsh, dark shadows under your eyes, nose, and chin. It's the least forgiving light you can find.
- Golden Hour (The Magic Window): This is that perfect slice of time just after sunrise and right before sunset. The sun is low in the sky, casting a warm, soft, golden light that makes everyone look amazing. It’s a portrait photographer’s secret weapon.
- Overcast Days (Surprisingly Perfect): Don't let a cloudy day stop you! The clouds act like a giant softbox in the sky, diffusing the sunlight to create perfectly even, shadow-free light. It’s absolutely ideal for portraits.
Taking Control of Your Smartphone Camera
Okay, you've got your phone set up and you've found that gorgeous light. Now it's time to tell your camera exactly what to do with a couple of quick adjustments.
Lock Your Focus and Exposure
Ever set up the perfect shot, only for your camera to decide to focus on the bookshelf behind you at the last second? There’s an easy fix. On almost any smartphone, just tap and hold on the screen where you want to focus (your face). A little yellow box or "AE/AF LOCK" will pop up. This means your focus and brightness are now locked in place.
This is a non-negotiable step when you're using a self-timer. You can lock focus on the exact spot where you'll be standing, hit the timer, and get into position, confident that the shot will be perfectly sharp.
Manually Adjust the Brightness
Once your focus is locked, a little sun icon or slider will usually appear next to the focus box. This is your secret weapon for nailing the exposure.
- Slide Up: Makes the image brighter. Perfect for when your shot looks a little too dark or moody.
- Slide Down: Makes the image darker. This is great for preventing bright spots, like your forehead or a white shirt, from looking blown out and losing all their detail.
This one simple adjustment gives you so much creative control. Combine these easy gear and lighting tricks, and you'll be taking photos of yourself that look both professional and genuinely you. For even more inspiration on photography techniques, check out our guide on the Photo AI Studio blog.
Finding Flattering Angles and Natural Poses
Let's be honest, feeling awkward the second a camera points your way is completely normal. It's probably the biggest hurdle most people face when trying to take a good photo of themselves. The gut reaction is to freeze up and strike some stiff, unnatural pose.
But here’s the secret: the key isn't to hold a pose, it's to create movement and interesting shapes with your body. Think about it—anything viewed straight-on looks flat and a little boring. The same goes for you. By introducing angles, you create depth and dynamism, turning a static snapshot into a much more compelling portrait.
The Power of the 45-Degree Angle
One of the oldest tricks in the photography book is also one of the most effective: avoid facing the camera head-on. A straight-on shot, like a passport photo, can make you appear wider and less dynamic.
Instead, try turning your body so your shoulders are at a rough 45-degree angle to the lens. This simple twist instantly creates a more slimming silhouette and adds a sense of depth to the image. From there, you can just turn your head back to face the camera. It’s a classic, confident look that works for almost everyone.
When you're posing, your real goal is to create triangles and gentle curves with your body. Notice the space between your arm and your waist, or the line formed from your shoulder to your tilted head. Our eyes are naturally drawn to these shapes, which keeps a photo from feeling rigid.
Mastering Your Head and Chin Angle
Once your body is angled, tiny adjustments with your head can make a massive difference. Don't just keep it perfectly level—a slight tilt can inject a ton of personality and warmth into the shot.
Here's a classic photographer's trick that feels incredibly weird but works wonders on camera: gently push your chin forward and then slightly down. I know, it feels like you're a turtle peeking out of its shell. But this one move defines your jawline, elongates your neck, and helps eliminate any hint of a double chin.
Interestingly, research points out that a slight upward head tilt is a common feature in attractive photos. You could try angling your face up a bit to mimic the 12.3° average head tilt for women (which is 50% higher than the 8.2° for men). It's a subtle tweak that can help your features pop without looking distorted. You can find more self-portrait trends and data on archivemarketresearch.com.
The best way to nail this is to practice in a mirror. See for yourself how these small movements change the entire look of your face.
This infographic breaks down the essential tools for a great self-portrait setup.

As you can see, it really comes down to three core things: using your phone's high-quality rear camera, keeping it steady with a tripod, and finding some soft window light.
Giving Your Hands Something to Do
"What do I do with my hands?" It’s the million-dollar question. Just letting them hang by your sides is a recipe for looking stiff and uncomfortable. The solution is simple: give them a job.
When your pose has a purpose, the photo instantly feels more candid and natural. Try a few of these:
- Interact with your hair: Gently tuck a strand behind your ear.
- Touch your face: Lightly rest your chin on your hand or touch your temple.
- Adjust your clothing: Fiddle with a cuff, smooth down your jacket, or play with a necklace.
- Use a prop: This is the easiest one! Hold a coffee mug, a book, or your phone.
These small, simple actions give your hands a purpose and erase that "I'm posing for a picture" stiffness. This is a game-changer if you’re trying to create the perfect profile picture that looks both professional and genuinely approachable.
Choose the Right Camera Angle
Just like the angle of your body, the camera's position can completely change the vibe of your photo. The height you place your camera at can dramatically alter how your features are perceived.
- Slightly Above Eye Level: This is the universal go-to for a reason. It's incredibly flattering, making your eyes look a bit larger while slimming your face and body. When in doubt, start here.
- Directly at Eye Level: This angle creates a real sense of connection and trust. It feels like you're looking right at the viewer, which is perfect for photos where you want to appear direct and build rapport.
- From a Low Angle: Use this one with caution. While shooting from below can create a feeling of power or make you look taller, it's often unflattering because it can emphasize your chin and nostrils.
To help you put it all together, here's a quick cheat sheet for matching your goal to the right pose and angle.
Effective Angles and Poses for Different Scenarios
| Goal | Recommended Camera Angle | Posing Tip |
|---|---|---|
| Professional Headshot | Directly at Eye Level | Angle body 45 degrees, turn head to camera, push chin forward and down slightly. |
| Friendly Social Media Post | Slightly Above Eye Level | Tilt head, interact with a prop (like a coffee cup), and have a genuine smile. |
| Confident, Powerful Look | Slightly Below Eye Level | Stand tall, place hands on hips to create triangles, and look directly into the lens. |
| Candid Lifestyle Shot | Eye Level or slightly above | Create motion—walk toward the camera, adjust your jacket, or laugh naturally. |
| Creative/Artsy Portrait | Experiment with all angles | Play with shadows, use your hands to frame your face, and try unconventional crops. |
By combining these techniques—angling your body, adjusting your head, keeping your hands busy, and picking the right camera height—you'll stop feeling like you're just striking a pose. Instead, you'll start creating self-portraits that are dynamic, engaging, and genuinely flattering.
Editing Your Photos with a Pro Touch
Taking the photo is really just the first step. The real magic, where a good shot becomes a great one, happens in the edit. Don't worry, you don't need to be a Photoshop wizard or spend years learning complicated software. A few smart tweaks can make all the difference.
The goal here is always enhancement, not a total overhaul. You want to look like the best version of yourself, not a completely different person. We'll start with the fundamentals you can adjust in just about any free photo editing app on your phone.
The Essential First Edits
Before you start playing with filters or fancy effects, you need to master the basic sliders. These three adjustments are the bedrock of a polished photo and will instantly level up your self-portraits.
- Brightness: This slider is your best friend for photos that feel a little too dark. A small bump in brightness can bring your features out of the shadows and give the entire image a more welcoming, open feel. It's a lifesaver for shots taken in less-than-perfect light.
- Contrast: Contrast adds that satisfying "pop" to your photos by making the darks darker and the lights lighter. It creates depth and dimension. Just be gentle here—a little bit goes a long way. Too much, and your photo will look harsh and unnatural.
- Saturation: Is the color in your photo looking a bit dull or washed out? A slight increase in saturation will make the colors more vibrant and full of life. Again, the key is subtlety. Push it too far, and you'll end up with an oversaturated, cartoonish look.
Think of these tools as digital salt and pepper. You’re just seasoning the image to bring out its natural flavor. And as you get your photos looking just right, remember that mastering Social Media Post Dimensions is key to making sure they look sharp everywhere you post them.
Unleash the Power of AI Photo Tools
While nailing the basics is crucial, the next level of photo refinement comes from AI. Tools like PhotoAI Studio act like your personal digital artist, automating the tedious stuff and unlocking creative options that used to be exclusive to professional photographers.
Imagine you need a killer headshot for your LinkedIn profile by tomorrow, but you have zero time for a photoshoot. With AI, you can upload a handful of casual photos and generate a flawless, studio-quality headshot. The AI learns what you look like and can place you in a professional setting with perfect lighting.
AI isn’t about faking it; it’s about efficiency. It handles the technical heavy lifting—like background removal, lighting adjustments, and even outfit changes—so you can focus on the final creative result.
This is a complete game-changer for anyone who needs high-quality images on a regular basis. For content creators and marketers, it gets even better. PhotoAI Studio's Face Swap or Clothes Try-On features let you test out outfits virtually. This has been shown to cut down on try-on failures by as much as 80% and can even be used to create user-generated content (UGC) style videos without ever needing a physical product sample. Discover more insights about AI's impact on content creation.
Beyond the Basics: Advanced AI Features
Modern AI tools go way beyond simple headshots. They offer solutions that can save you a staggering amount of time and effort, making it easier than ever to get the exact shot you need.
Think about these real-world scenarios:
- AI Background Changer: You snapped a great selfie, but the background is a mess. Instead of wrestling with clumsy selection tools, an AI can instantly erase the clutter and replace it with a clean office background, a cool cityscape, or a simple neutral wall.
- Photo Upscaling: You found a favorite photo from an old phone, but it's too small and pixelated to use for anything important. AI upscalers can intelligently increase the resolution, adding sharp detail and making it ready for print or a website.
- Virtual Try-Ons: If you run an e-commerce brand, you can use AI to generate images of yourself "modeling" your products without ever setting up a camera. It's a fast, cost-effective way to create a huge library of on-model product shots.
By combining your foundational editing skills with the power of these advanced tools, you have complete creative control. This two-part approach ensures you not only know how to take a good photo of yourself but can polish it to a professional shine, every single time.
Answering Your Top Self-Portrait Questions
Even with a solid game plan, a few questions always pop up. Let's tackle the most common hurdles people face when trying to get a great photo of themselves. Think of this as the troubleshooting guide to building your confidence behind (and in front of) the lens.
How Can I Take Good Full-Body Photos of Myself Without Help?
Taking a killer full-body shot by yourself isn't just possible—it's easy once you have the right setup. The single most important piece of gear is a decent tripod. It becomes your stand-in photographer, holding the camera steady and getting rid of those shaky, awkward-angle selfies for good.
Set your phone in the tripod around waist or chest height. This is the sweet spot for a natural, proportional look that avoids the weird distortion you get from shooting too high or too low. Instead of doing the mad dash back and forth, just use your phone's self-timer. Give yourself at least 10 seconds; you'll need the time to walk into the frame, relax, and strike your pose without feeling rushed.
Want to level up? A small Bluetooth remote shutter is a total game-changer. It lets you fire off multiple shots and make tiny adjustments to your pose without ever leaving your spot. Just remember to use your phone's main rear camera for the best quality, and make sure your whole body fits in the frame with a little breathing room.
What Are the Most Common Mistakes to Avoid When Taking Self-Portraits?
Almost every self-portrait fail boils down to one of three things: bad lighting, weird angles, or a chaotic background.
The number one offender is terrible lighting, especially backlighting. That’s when you stand with a bright light source, like a window, behind you. Your camera gets confused and turns you into a dark, featureless silhouette. The golden rule is simple: always face your light source.
Another classic mistake is shooting from a low angle. It might feel artsy in the moment, but pointing the camera up at your face can create unflattering shadows and distort your features. For consistently good results, keep the camera at eye level or just a little bit above.
Finally, people completely forget to check what's behind them. A messy room or a distracting background just pulls all the attention away from you. Before you start snapping away, do a quick scan. Find a clean, simple wall or a nice, uncluttered outdoor spot. You're the star of the show—make sure the background knows it.
A great photo is often the result of subtraction—removing distractions until only the essential elements remain. By controlling your light, angle, and background, you guide the viewer's eye exactly where you want it to go: on you.
I Feel Awkward Posing for Photos. How Can I Look More Natural?
Here's the secret: the key to looking natural is to stop trying to "pose." That static, frozen, "I'm having my picture taken" stance is what feels—and looks—so awkward. The solution is to introduce a little bit of movement and interaction.
Think about the small, natural things you do every day. Try slowly walking toward the camera, running a hand through your hair, adjusting the cuff on your jacket, or holding a prop like a coffee mug or a book. These simple, familiar actions trick your brain into relaxing and result in photos that feel candid and authentic.
Another pro-move is to lean on your camera’s burst mode. Just hold down the shutter button while you move through a few different actions or poses. This captures all those little in-between moments, and honestly, that's often where the magic happens. And never underestimate the power of a good playlist—putting on music that makes you feel confident and happy can completely change your vibe on camera.
Can AI Really Create a Professional Headshot That Looks Like Me?
Absolutely. We've come a long way from goofy filters and weird face-swapping apps. Modern AI platforms like Photo AI Studio use a much more sophisticated approach. You start by uploading a handful of your existing photos to train a personalized AI model.
This model doesn't just copy and paste; it learns your specific facial structure, your common expressions, and all the little details that make you look like you. Once it's trained, it can generate brand-new, photorealistic images of you in just about any scenario you can think of—different professional outfits, perfect studio lighting, you name it.
The results aren't some generic stock photo with your face slapped on. They're high-resolution, professional-quality headshots that truly maintain your likeness while showing you in the absolute best light. It's an incredibly powerful way to get a whole portfolio of polished headshots without the time or expense of a traditional photoshoot.
Ready to skip the setup and get straight to stunning results? With Photo AI Studio, you can generate hundreds of professional-quality headshots, lifestyle photos, and creative portraits in minutes. Stop stressing about lighting and angles—let AI create your perfect shot. Try Photo AI Studio today and see yourself in a new light!