So, you need a professional headshot. In the past, this meant one thing: finding a photographer. Today, you've got options. You can still go the traditional route, do it yourself with a decent smartphone, or even tap into AI for surprisingly fast and varied results.
Each path has its own pros and cons, really boiling down to your budget, how quickly you need the photo, and the level of quality you're aiming for.
Your Guide to a Standout Professional Headshot
Think of your headshot as your digital handshake. It’s often the very first impression you make on LinkedIn, your company website, or a professional portfolio. It’s a quiet but powerful piece of your personal brand, setting the tone for your competence and personality before anyone even reads your bio.
The pressure for a great image is real, and the market reflects it. The global business headshot photography market was valued at a whopping $2.5 billion in 2023, and it's on track to more than double in the next ten years. That's a lot of people realizing just how critical this one photo is.
Choosing Your Path
So, where do you start? Let’s break down the three main avenues you can take.
- Hire a Professional Photographer: This is the classic, premium choice. It's the right move for executives, actors, or anyone in a high-stakes, client-facing role where a flawless first impression is non-negotiable. You’re paying for expertise in lighting, posing, and retouching.
- Create a DIY Headshot: Armed with a modern smartphone and a bit of know-how, you can get a seriously good result on your own. This is a fantastic option for students, freelancers just getting started, or anyone who needs a quick update without the investment.
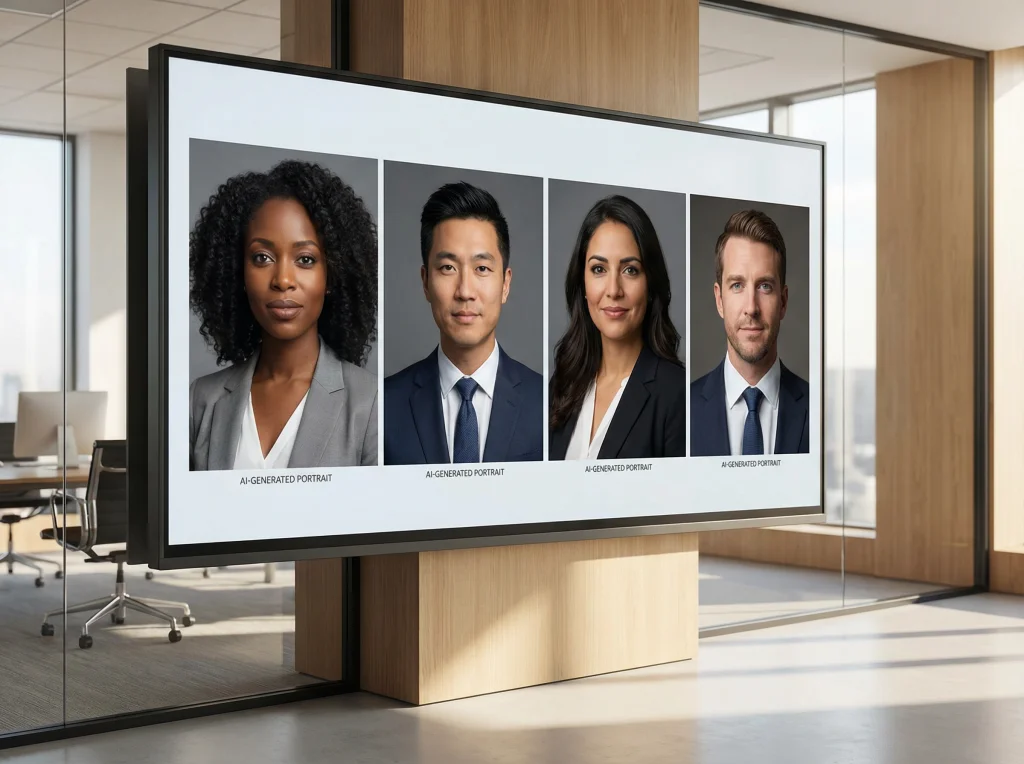
- Use an AI Headshot Generator: The new kid on the block. AI tools offer incredible speed and convenience, churning out dozens of studio-quality options from a handful of your casual photos. It’s a game-changer for remote teams needing consistent headshots or busy professionals who want a variety of looks.
To make this even simpler, here's a quick decision tree to help you figure out which path makes the most sense based on your priorities.
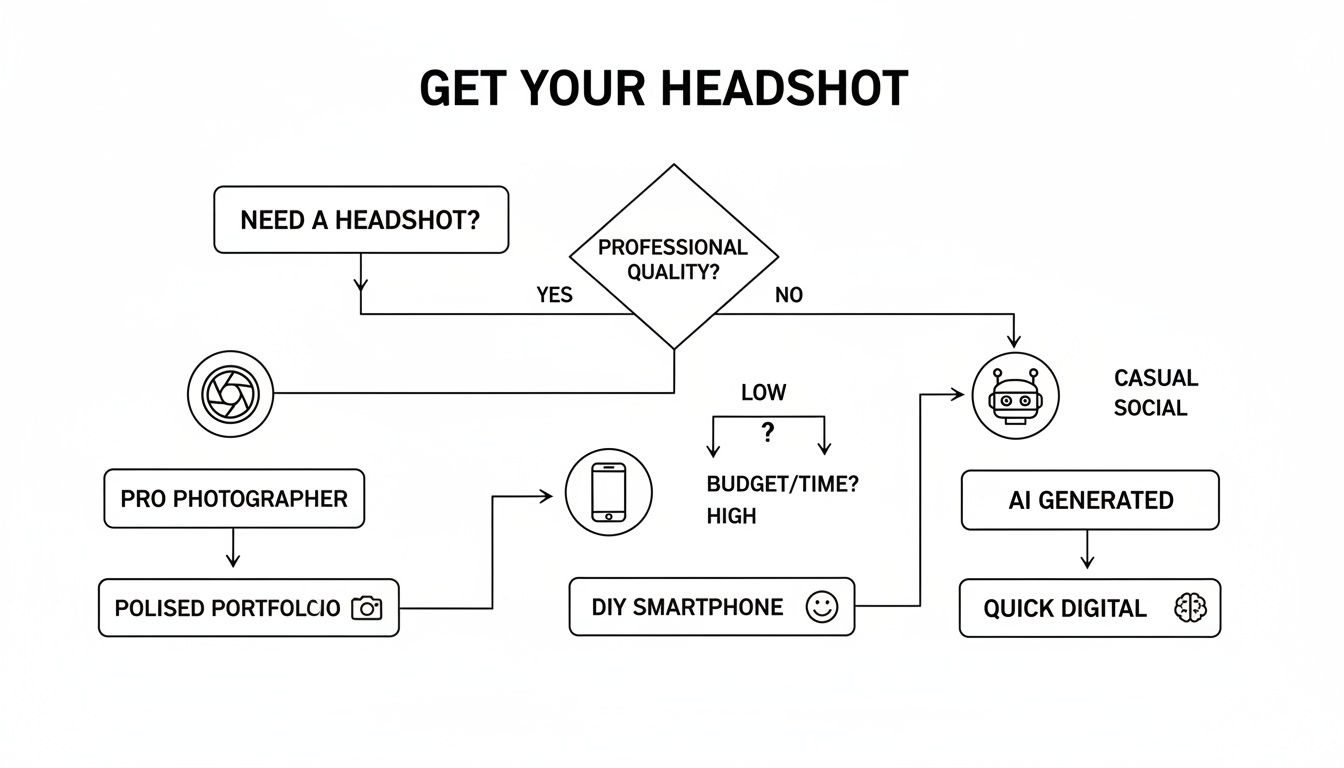
As you can see, your biggest constraints—be it budget, time, or the need for absolute perfection—will point you toward the best solution. If you want to dive deeper, this guide offers some great Professional Headshot Advice Your Ultimate Guide to Standout Portraits.
Three Paths to Your Perfect Headshot at a Glance
Still weighing your options? This table lays out the core differences between hiring a pro, doing it yourself, and using AI. It's a quick way to compare what you get for your time and money.
| Method | Typical Cost | Time Investment | Best For |
|---|---|---|---|
| Hire a Photographer | $250 - $1,500+ | 2-4 hours (session) + 1-2 weeks (editing) | Executives, actors, and anyone needing the absolute highest quality and expert direction. |
| DIY Headshot | $0 - $50 (for an app or simple gear) | 1-2 hours (shooting + editing) | Students, early-career professionals, or those on a tight budget needing a quick update. |
| AI Headshot Generator | $20 - $50 | Under 30 minutes (uploading + generation) | Busy professionals, remote teams, and anyone wanting speed, variety, and convenience. |
Ultimately, there's no single "best" way—only the best way for you. Your career, industry, and personal brand all play a role in deciding which path will give you the polished, professional image you need to stand out.
Nailing the Details Before You Even See a Camera
Let’s be honest: a great headshot is made long before the shutter clicks. All the little things you do beforehand are what separate a decent picture from a powerful personal branding tool. Getting this prep work right is critical whether you're hiring a pro, setting up your own shot, or using an AI service.
It all starts with what you wear. Your clothing’s job is to make you look good, not to steal the show. The goal is to pick something that feels comfortable, looks sharp, and matches the professional vibe you're going for.
Choosing Your Wardrobe
The clothes you pick set the tone instantly. Think of your outfit as the supporting cast and your face as the star. You need an ensemble that projects confidence without distracting from your expression.
When in doubt, go with solid colors. Jewel tones like emerald, sapphire, and deep reds are universally flattering on camera. You can also never go wrong with classic neutrals like navy, charcoal gray, or cream.
Pro Tip: Steer clear of busy patterns, big logos, and screamingly bright colors like neon yellow. They can make your photo feel dated in a hurry and pull the viewer's eye away from what really matters—you.
Pay attention to the neckline, too. V-necks and scoop necks tend to be flattering because they create the illusion of a longer neck. A classic collared shirt or a simple crew neck can also be a great choice, depending on your industry. I always recommend bringing a couple of different tops to a shoot; you never know what will look best under the lights until you try it.
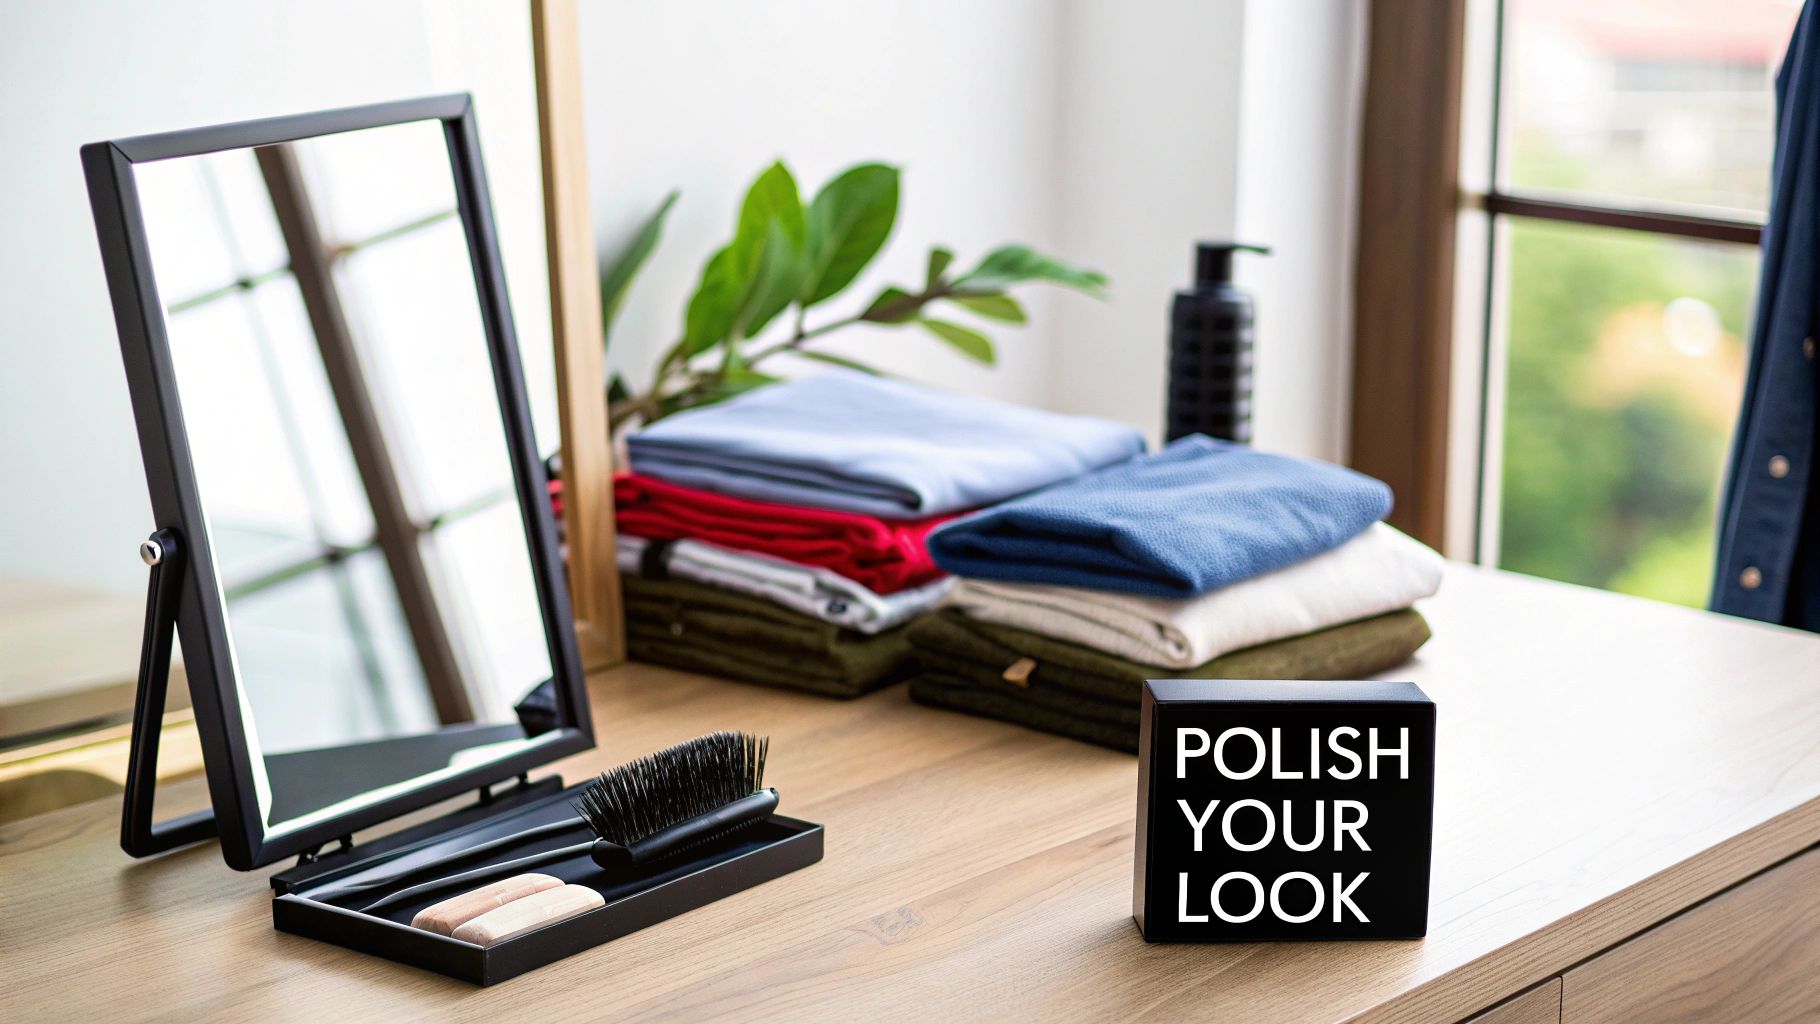
Personal Grooming for a Polished Look
With your outfits picked out, it's time to think about grooming. The aim isn't to look like a totally different person—it's to look like a polished, well-rested version of yourself. This is where the small details make a huge impact.
For your hair, you want a style that's neat and professional but still feels like you. This is not the time for a drastic new haircut or color. Give any new style at least a week to settle in. On the day of, just make sure your hair is clean and styled so it's not falling in your face.
Makeup should be natural, enhancing your features rather than covering them up. Even if you don’t typically wear it, a bit of translucent powder is a lifesaver for cutting down on shine from the lights. If you do wear makeup, stick to a matte finish and keep the tones neutral.
- Foundation: Go for a matte formula. It works wonders under bright studio lights.
- Eyes: A little neutral eyeshadow and mascara are perfect for definition. Avoid heavy eyeliner or anything with glitter.
- Lips: A neutral lipstick or balm is your best bet. Super glossy finishes can create distracting reflections.
And don't overlook the little things, like making sure your nails are clean and your skin is moisturized. These subtle cues add up to an overall impression of someone who is professional and detail-oriented.
Creating a Brief and Shot List
Finally, take a few minutes to think about what you actually want to achieve with this headshot. Putting together a simple brief or a shot list helps clarify your goals, whether you're directing yourself for a DIY photo or giving instructions to a photographer.
This isn't about writing a rigid script. It's about defining the mood and the message. Just ask yourself three questions:
- Where will this headshot live? (LinkedIn profile, company website, speaker bio?)
- What words should this photo bring to mind? (Approachable, authoritative, creative, trustworthy?)
- Are there any specific poses or expressions I like? (Smiling vs. serious, looking at the camera vs. off to the side?)
Your answers will help you build a quick shot list. For example, a consultant might want a shot that feels authoritative yet approachable, so they'd list one classic smiling-at-the-camera pose and another more candid, thoughtful one. This bit of planning ensures every minute of the shoot is focused and you walk away with headshots that truly capture your personal brand.
Working with a Professional Photographer
There are times when only the best will do. When you need an image that projects absolute confidence and broadcast-level quality, hiring a professional photographer is still the gold standard.
Going this route is less about just getting a picture taken and more about a collaborative partnership to build a powerful branding tool. You're paying for their expertise in lighting, their eye for posing, and their skill in retouching—all the subtle ingredients that are tough to get right on your own.
The trick, of course, is finding the right professional. All photographers are not created equal, and their specialty can make or break your final shot.
Finding the Right Photographer for You
Your hunt should begin and end with their portfolio. Don’t just find one or two photos you like; look for a consistent level of quality and a style that resonates across their entire body of work. Does it align with the professional image you want to project? If you're a corporate attorney, a portfolio packed with bright, sunny lifestyle shots for artists probably isn't the right fit.
Read client reviews like you're doing opposition research. Pay close attention to what people say about the experience. Was the photographer patient? Did they make people feel comfortable and relaxed? A great photographer is also a great director, someone who can coach you into an expression that looks confident and genuine, not stiff or forced.
It's also crucial to find a specialist whose work speaks to your industry. The main types you'll encounter are:
- Corporate Headshot Specialists: These are the masters of clean, consistent, and polished images. They deliver the kind of authoritative shots perfect for LinkedIn, company websites, and formal bios.
- Branding Photographers: They go way beyond a simple headshot. Their goal is to create an entire library of images that tell your personal brand's story, making them ideal for entrepreneurs, consultants, and public figures.
- Creative and Actor Headshot Photographers: This group is all about capturing personality and emotional range. They often use more dramatic lighting and creative backgrounds to make a statement.
Understanding the Process and Pricing
Once you've narrowed down your list, the process usually follows a predictable path. It kicks off with a consultation where you'll hash out your goals, wardrobe choices, and the overall vibe you're aiming for. This is where having your own brief or shot list is a huge advantage.
The shoot itself might sound intimidating, but a true pro knows how to make it feel easy. They’ll guide you through poses, fix your posture, and work with you to capture those fleeting moments of genuine expression. That expert direction is often the single biggest benefit of hiring a professional.
After the session, you'll typically get a gallery of unedited proofs to pick your favorites. The photographer then meticulously retouches your selections, enhancing them just enough to look polished without appearing fake. Finally, you get the high-resolution digital files.
A common pitfall is assuming photographers have a single, all-in price. The reality is that pricing structures vary wildly, so you need to know exactly what you’re paying for before you book.
Pricing models generally fall into a few camps:
- Session Fee: You pay a flat rate just for the photographer's time and talent during the shoot. The images themselves are purchased separately.
- Per-Image Cost: You pay for each final, retouched image you decide to keep.
- Package Deals: These are bundles that include the session fee plus a set number of retouched images, often offering the best value.
You can expect professional headshot pricing to vary significantly based on the photographer's experience and your needs. For individuals, rates often start around $325 for the first retouched image and $100 for each additional one, with some discounts for buying in bulk. For companies, corporate rates might begin at $500 for the first person's image, with similar pricing for extra photos.
If you want to get a feel for the market, you can always check out what a headshot photographer in New York might offer to see how prices and packages differ by location.
At the end of the day, hiring a professional is an investment in your personal brand. You aren't just buying a photo; you're paying for a tailored experience, technical mastery, and a final product that will work for you long after the session is over.
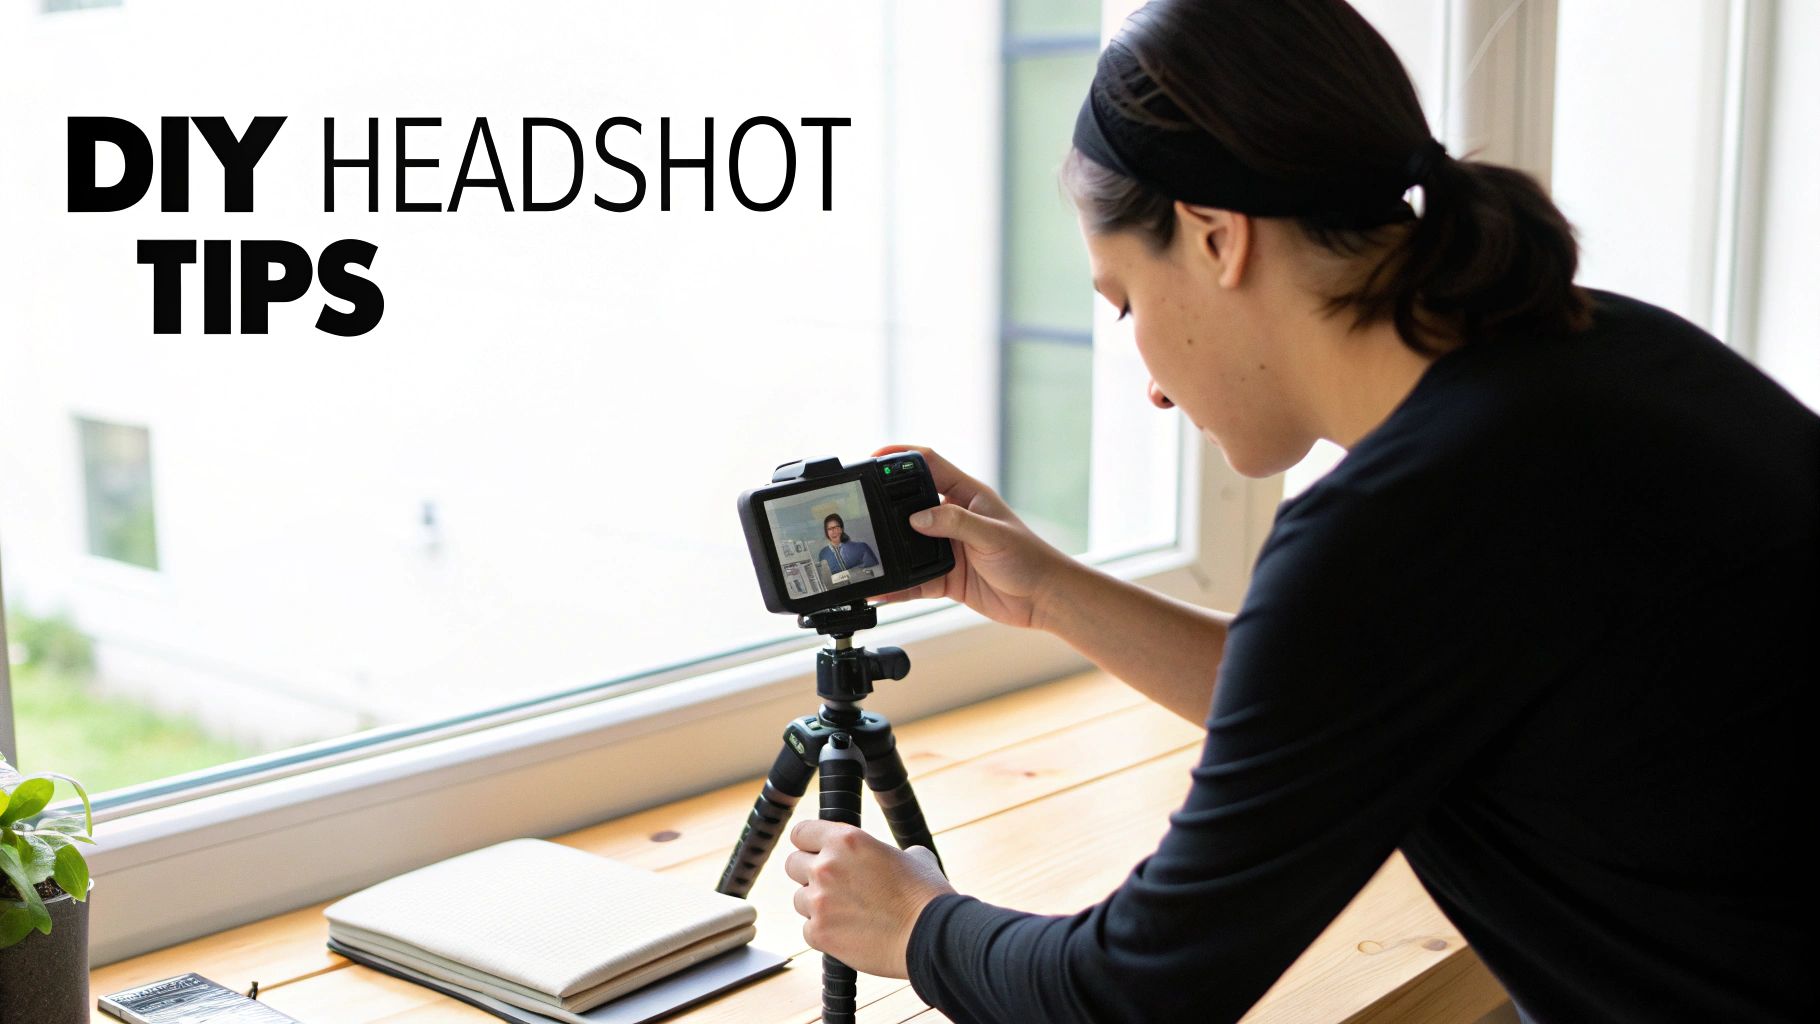
Creating a DIY Headshot That Looks Professional
Need a great headshot fast without draining your wallet? It's totally possible. With a few smart moves, you can capture a surprisingly polished and professional image right at home. And no, you don't need a fancy DSLR—the camera already on your smartphone is more than powerful enough for the job.
The real secret separating an amateur selfie from a pro-level headshot isn't the camera; it's the setup. A little time and some basic gear can give you results that honestly compete with more expensive options. Your most valuable tool? A simple tripod. It keeps your phone steady and makes framing consistent shots a breeze.
Mastering Light and Background
If you get one thing right, make it the lighting. It's the single most critical element. Bad lighting creates nasty shadows, flattens your features, and can make even the best camera spit out a grainy, low-quality image. The good news? You already have a professional-grade light source in your home: a window.
Natural light is soft, diffused, and incredibly flattering. To nail this, position yourself facing the window, about two to three feet back. This lets the light fall evenly across your face, erasing harsh shadows for a gentle, bright look. Just make sure to avoid direct, blazing sunlight, which causes squinting and creates blown-out highlights. An overcast day or a window that isn't getting direct sun is perfect—it acts like a giant, free softbox.
Your background is just as important because the goal is to keep the focus entirely on you.
- Keep It Simple: A plain, neutral-colored wall is your best friend here. Think light gray, cream, or a soft off-white. It’s a clean canvas that won’t distract anyone.
- Declutter Ruthlessly: Before you start shooting, look at what’s in the frame. Get rid of everything that pulls focus—picture frames, light switches, the corner of a bookcase, you name it.
- Create Some Separation: Stand a few feet away from your background. That little bit of distance creates a subtle depth that helps you pop right out of the image.
Posing with Confidence
Posing can feel incredibly awkward, I get it. But a few simple tweaks to your posture will make a huge difference. The goal is to look dynamic, not stiff or flat. Never, ever face the camera straight-on; it’s confrontational and unflattering, giving off major passport photo vibes.
Instead, angle your body about 45 degrees away from the camera, then turn your head back to face the lens. This small twist is a classic photographer's trick that immediately creates a more engaging posture. Then, bring your chin slightly down and push it forward. It feels weird, but trust me, it defines your jawline and kills any hint of a double chin on camera.
Key Takeaway: Your expression is where the real connection happens. Think about a great professional win or a happy memory to bring a genuine, confident smile to your eyes, not just your mouth. Snap a ton of shots and play around with different smiles, from a subtle, closed-mouth look to a full, warm grin.
Basic Edits for a Final Polish
Once you have a few shots you like, a little post-production can take your photo from good to great. You don't need Photoshop for this. Many free and easy-to-use mobile apps have all the tools you'll need.
The key is to make small, subtle adjustments. You want a polished version of yourself, not an airbrushed cartoon.
Here are the only edits you really need to worry about:
- Cropping: The classic headshot is framed from the chest up. This composition keeps the focus squarely on your face while showing just enough context.
- Brightness and Contrast: Bump up the brightness just a little to make the photo feel more vibrant and alive. Add a touch of contrast to make the colors pop and add some definition.
- Blemish Removal: Use a spot-healing tool to gently tap away any minor, temporary blemishes. Use this tool sparingly—the goal is to look natural, not flawless.
With these simple steps, you can create a DIY headshot that looks clean, modern, and genuinely professional. It’s a practical solution that proves you don’t need a big budget to make a killer first impression.
Using AI for Fast and Affordable Headshots
Let's talk about the newest player in the headshot game—one that's a lifesaver for busy professionals, remote teams, or frankly, anyone who dreads the idea of a traditional photoshoot. AI headshot generators have gone from a novelty to a seriously powerful alternative, capable of delivering a whole portfolio of studio-quality images in minutes.
The process is surprisingly simple. You just find a handful of your favorite casual photos, upload them, and the AI does the heavy lifting. Before you've finished your morning coffee, you'll have dozens of options with different outfits, professional backgrounds, and lighting styles to choose from.
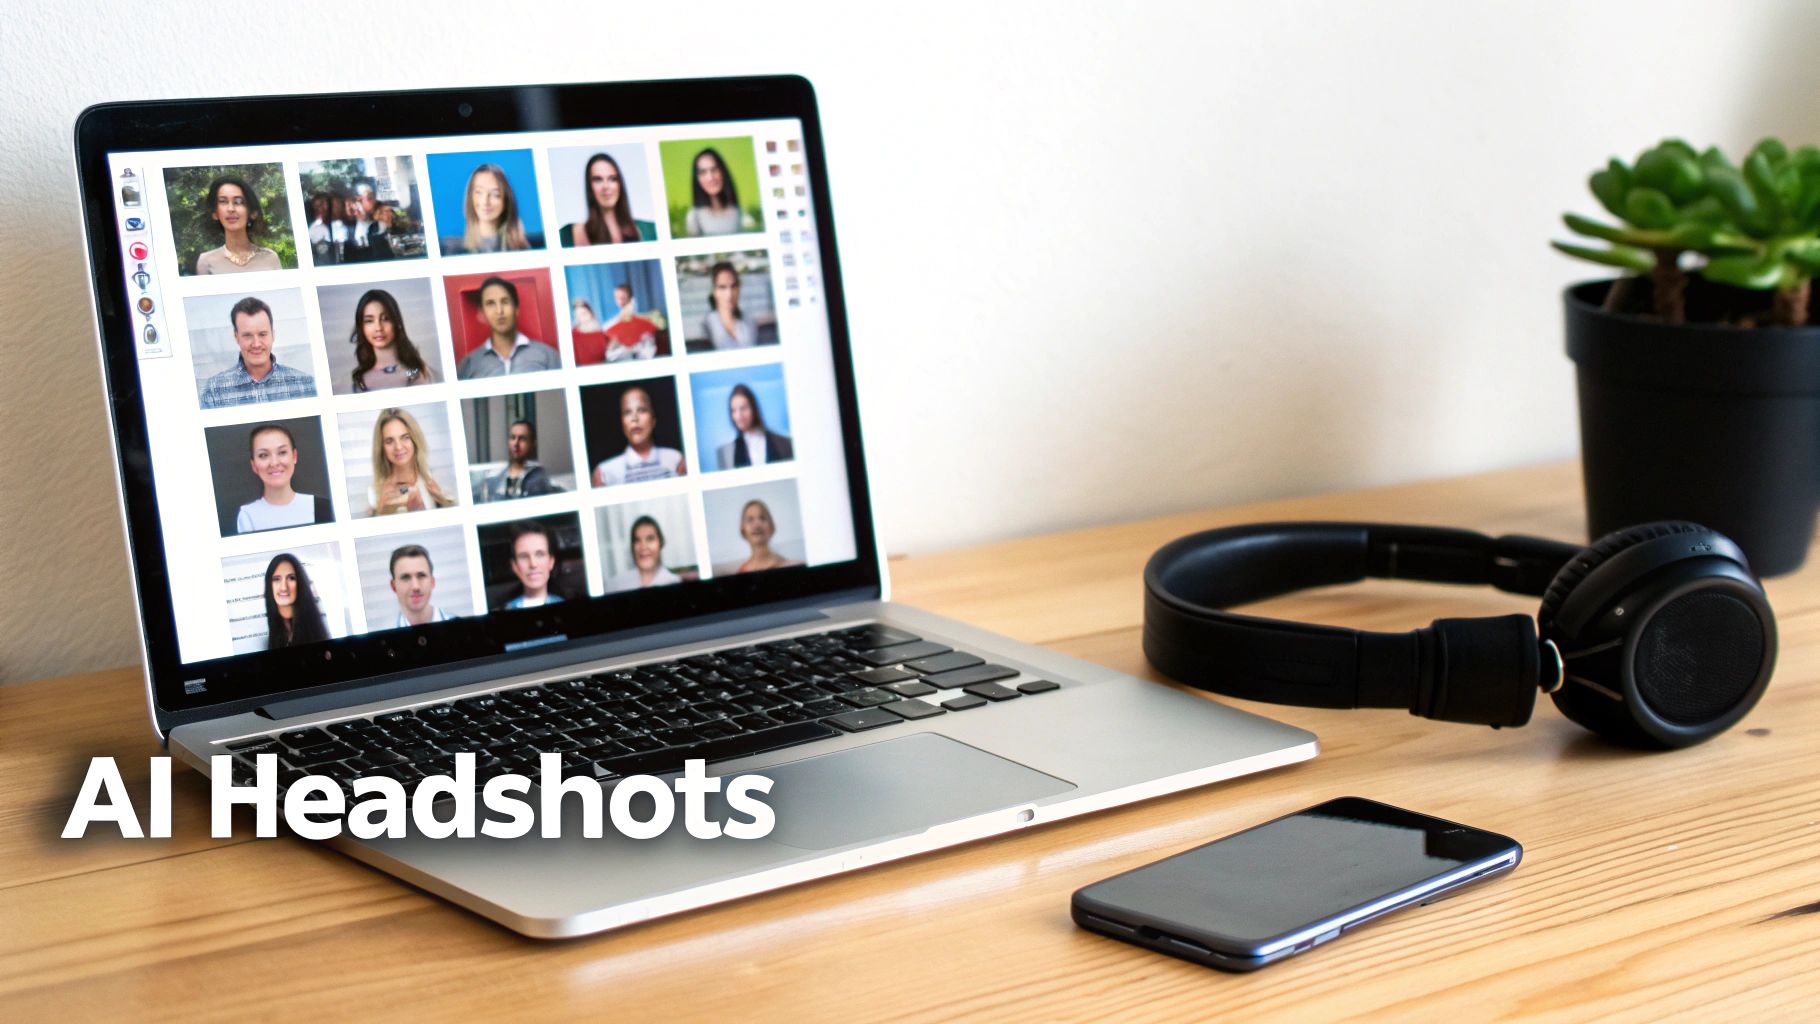
This gives you a good idea of what to expect from a service like PhotoAI Studio. From just one set of your own photos, you can get a huge range of professional looks—different poses, clothes, and lighting—all generated for you. The real magic is getting that much variety almost instantly.
The Core Advantages of AI Headshots
The big wins here are speed, cost, and variety. A traditional shoot means scheduling, travel, and a real time commitment, not to mention waiting a week or more to get the final images back. AI platforms can turn around your photos in under an hour for a tiny fraction of the cost.
This approach is also a game-changer for businesses trying to get consistent headshots for a team scattered across the country or the globe. Forget coordinating a dozen different photographers. Now, every team member can generate their own high-quality, on-brand headshot right from their laptop.
This isn't just a niche trend anymore. A recent survey found that over two in five Americans (44%) are open to using AI for professional headshots. The main draws? Convenience (38%), getting high-quality results (34%), and of course, the huge cost savings (32%). And the quality is getting so convincing that a 2026 study found 73% of recruiters couldn't tell the difference between AI headshots and professional photos.
How to Get the Best Results from an AI Generator
Here’s the single most important thing to remember: the quality of the headshots you get out is directly tied to the quality of the photos you put in. The AI learns your face from the images you provide, so giving it a clear, diverse set to work with is crucial.
Think of it like you're briefing a portrait artist. If you only give them reference photos from one angle with the exact same smile, your final portraits are going to look flat and might even get distorted. The goal is to upload a collection that really shows your face from all sides.
Follow these tips when you're picking your input photos:
- Vary Your Angles: Make sure you have photos looking straight at the camera, profile shots from the side, and some three-quarter turns.
- Mix Up Expressions: Don't just upload smiling pics! Include a range of expressions—serious, thoughtful, neutral—to give the AI more to work with.
- Show Different Lighting: Use a mix of photos taken in different lighting conditions, like some indoors and some outdoors. Just steer clear of anything with harsh, distracting shadows or super low light.
- Use Clear, High-Quality Images: The AI needs to see your features clearly. Avoid blurry photos, group shots where you're far away, or any pictures where you're wearing sunglasses or a hat.
Key Takeaway: The more varied and high-quality your input photos are, the more accurate and diverse your AI-generated headshots will be. Aim for 10-15 strong photos that give the AI a complete picture of what you look like.
This technology makes professional imaging accessible to everyone. If you're looking to generate your own AI headshots, you can explore tools like the lunabloomai app. By understanding how these tools work, you can get a killer new headshot that looks like it came from a high-end studio. Want to see for yourself? You can start by trying a free professional headshot generator and check out the results firsthand.
Maximizing the Impact of Your New Headshot
A brilliant headshot is a powerful tool, but it only works if people actually see it. Once you've got your new image in hand, the final and most important step is getting it out there across all your professional platforms. Think of it as rolling out a major upgrade to your personal brand.
Your first stop should always be LinkedIn. Seriously. A high-quality, professional photo can lead to 21 times more profile views and a 9 times jump in connection requests. It’s the digital handshake that establishes credibility before anyone even reads a word of your bio. This is where your new headshot will do the most heavy lifting.
Deploying Your Image Across Platforms
Beyond LinkedIn, the name of the game is consistency. Your headshot should show up wherever your professional identity lives. This consistency builds instant recognition and reinforces the brand you're building.
Make sure your new image is updated on:
- Company Website: On the "About Us" or team page, a sharp headshot adds a human touch and builds trust with potential clients.
- Professional Portfolio or Personal Website: This is your corner of the internet, and your headshot should be the welcoming face of your work.
- Email Signature: Popping your photo into your email signature makes every message more personal and memorable. It helps people put a face to the name.
- Speaker Bios and Conference Materials: If you do any public speaking or show up at industry events, a professional headshot is absolutely non-negotiable.
Key Takeaway: The goal here is to create a unified, professional presence. When a potential employer or client Googles you, they should see the same polished, confident image everywhere. That's how you nail the first impression.
Understanding Technical Specifications
Not all platforms are created equal, and uploading the wrong file type or size can make your perfect photo look blurry or pixelated. To keep things looking sharp, you need to get familiar with two key formats.
A JPEG (.jpg) is your go-to for almost all web use. It strikes the perfect balance between quality and a small file size, which means pages load quickly. For LinkedIn, your company site, and social media, a high-quality JPEG is the industry standard.
A PNG (.png) file is your best friend when you need a transparent background. For instance, if you want to place your headshot on a colored banner in a presentation without that clunky white box around it, a PNG is what you'll use.
Always start with the highest resolution file your photographer or AI service gives you. It's easy to scale a large image down for different uses, but you can never scale a small image up without it looking like a mess. This one simple rule ensures your professional image always looks crisp, no matter where it appears.
For a deeper dive into crafting the perfect image for these platforms, you might find our guide on creating an effective profile picture helpful.
Your Headshot Questions, Answered
Even with the best game plan, a few practical questions always seem to pop up. Getting clear, no-nonsense answers can make the whole process feel less daunting and help you avoid some common pitfalls. Let's tackle the questions I hear most often.
How Often Should I Update My Headshot, Really?
A good rule of thumb is to refresh your professional headshot every 2-3 years. The whole point is for people to recognize you when they meet you in person, so your photo needs to be a current, accurate reflection of who you are today.
Of course, life happens. You should definitely get a new one sooner if you make a big change to your appearance—think a new hairstyle or color, getting glasses (or ditching them), or anything else that alters your look. It's also a smart move if you're switching careers. A new industry often calls for a new vibe, and your headshot is the perfect way to signal that shift.
Can I Just Crop Myself Out of a Vacation Photo?
I get it, it’s tempting. You look happy, relaxed, and it’s right there on your phone. But please, don't do it. A professional headshot is intentional. Every element—the lighting, the clean background, your expression—is designed to make you look competent and approachable.
A cropped photo from a wedding or a beach trip always brings along unwanted baggage. You've got distracting backgrounds, casual clothes that don't fit the professional context, and almost always terrible lighting. Investing in a proper headshot tells people you're serious about your professional brand.
If you remember only two things, make them these: lighting and your expression. Great lighting makes you look polished and ensures you're seen clearly. A genuine, confident expression is what makes people feel like they can connect with you.
Are Recruiters Okay With AI Headshots?
The short answer is yes, and they're becoming more accepted by the day. What recruiters and hiring managers truly care about is a crisp, professional image that looks like you.
In fact, recent studies have shown that most recruiters can't even tell the difference between a high-quality AI headshot and one from a traditional photographer. As long as the final image is realistic and fits the professional tone of a platform like LinkedIn, it’s good to go. The trick is to use an AI service that creates natural-looking results, not something that looks obviously fake or heavily filtered.
Ready to create a professional image that opens doors, all in a matter of minutes? With PhotoAI Studio, you can generate dozens of high-quality, AI-powered headshots that will make your profile shine. See the difference a great headshot can make and get started today.