If you think professional photo editing is just about slapping on a filter, think again. The real magic isn't in a single click; it’s a deliberate workflow that starts way before you even open up your editing software. It’s about planning your shots with the final edit in mind, then moving through a methodical process of organizing, correcting, and enhancing to bring your vision to life.
Adopting a Professional Photo Editing Mindset
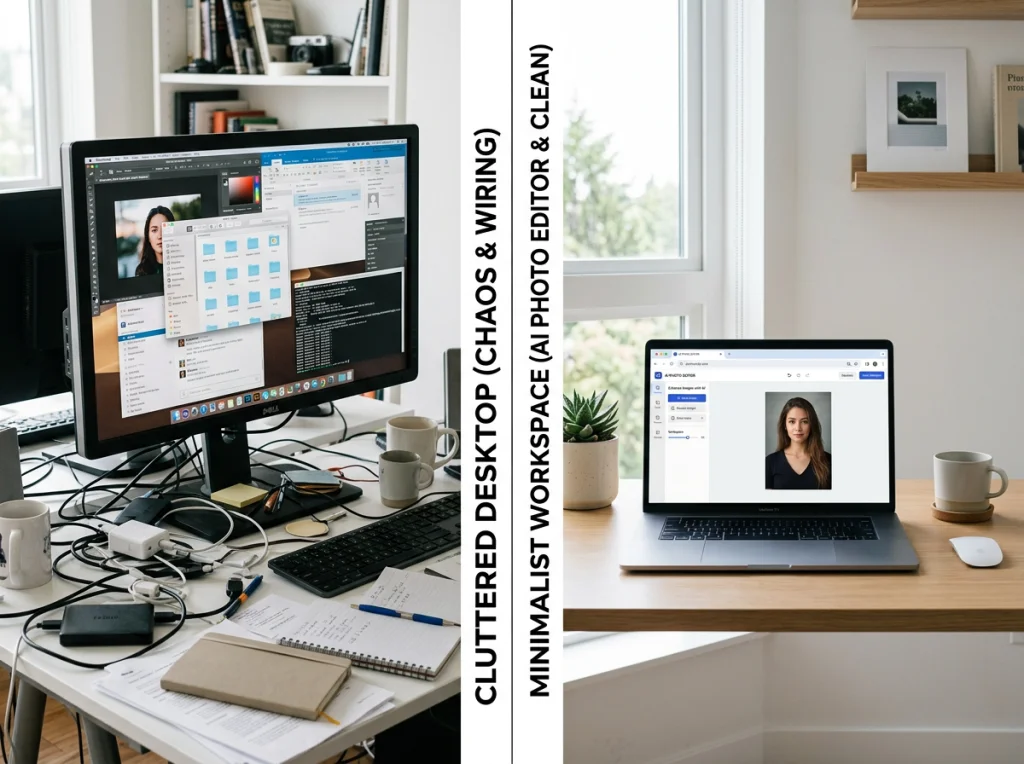
Before you even think about touching a slider or an adjustment tool, you have to get into the right headspace. The best editors I know start "editing" while they're still behind the camera. Thinking about the final image during the shoot makes the entire post-production process worlds easier and far more effective.
This means you're actively paying attention to the fundamentals—light, composition, exposure. Nailing a technically sound image in-camera, one that’s sharp and properly exposed, gives you the best possible starting point. I always think of it like cooking: you can't make a Michelin-star meal with subpar ingredients. The better the raw file, the better the final photo.
The Unseen Work: Culling and Organizing
Here’s a secret most people don't talk about: one of the biggest time-savers in any pro workflow happens before a single creative edit is made. It's called culling and organizing. A photographer might fire off hundreds, even thousands of shots in a session, but only a tiny fraction of those will ever see the light of day.
Culling is the art of being ruthless. You have to comb through every image and pick only the absolute best, ditching the blurry shots, the near-duplicates, and the ones with awkward expressions. It feels tedious, but this step alone will save you from wasting hours editing photos that were never going to make the cut.
"For every hour of shooting, expect to spend at least two hours in post-production. A huge chunk of that time is simply organizing and selecting the strongest images. Don't skip this step—it’s the foundation of an efficient and professional workflow."
Once you've got your "keepers," it’s all about organization. A simple folder system—maybe one for RAWs, one for edited JPEGs, and one for final exports—is a lifesaver. This kind of discipline means you can find exactly what you need in seconds, even years down the road. It’s a foundational habit, especially for specialized work like preparing for professional headshots, where every file counts.
Embracing a Non-Destructive Workflow
Finally, a truly professional mindset is built on non-destructive editing. This just means you're making changes to your photos without permanently messing up the original file. Modern tools like Photo AI Studio’s Photo Editor are designed for this. You can play around, experiment, and push your edits as far as you want, always knowing you can hit "reset" and go back to the original. This freedom is where creativity really comes alive—you can focus on the art, not the fear of making a mistake you can't undo.
Building a Strong Foundation with Essential Corrections
Every truly great image—the kind that makes you stop scrolling—starts with a rock-solid technical base. Before you can even think about the cool, creative stuff like color grading and stylistic effects, you have to nail the fundamentals. This is where you take your raw file and turn it into a clean, perfectly balanced canvas.
Think of it like building a house. You wouldn’t start hanging pictures on the wall before the foundation is poured and the frame is up. In photo editing, that foundation rests on three pillars: exposure, white balance, and composition. Getting these right isn't just a suggestion; it’s the non-negotiable first phase of any professional edit.
Dialing in the Perfect Exposure
The very first thing I do with almost any image is fix the exposure. If a photo is too dark (underexposed) or too bright (overexposed), you're losing precious detail in the shadows or highlights. Your eyes can be deceiving here, so your most trusted tool isn't your screen—it's the histogram.
A histogram is just a simple graph showing the tonal range of your photo. A well-exposed shot usually has a nice, even mountain range of data stretching from the darks on the left to the lights on the right. If everything is crammed to one side, you've got work to do.
Inside Photo AI Studio's Photo Editor, grab the main Exposure slider and watch how the histogram reacts as you move it. You're looking for a good spread without "clipping"—that's when the graph slams into the far left or right wall, meaning you've lost all detail in those areas.
- Highlights & Whites: Pull these sliders down to bring back the texture in bright spots, like the lace on a wedding dress or the clouds in a blue sky.
- Shadows & Blacks: Lift these to reveal details hiding in the dark parts of the image or pull them down to create deep, rich contrast.
Getting this balance just right gives your photo a sense of depth and dimension that makes it feel real.
Achieving True-to-Life Color with White Balance
Ever look at a photo and notice it feels a little too blue? Or maybe it has an unnatural orange or yellow cast? That's a white balance problem. Your camera does its best to guess the color "temperature" of the light, but it often gets it wrong. Fixing this is absolutely critical for professional-looking colors.
In most editors, including Photo AI Studio, you have a couple of easy options. The quickest fix is often the eyedropper tool. Just click on something in the photo that's supposed to be neutral gray or white, and the software will instantly correct the colors for the entire image. If you prefer more control, you can manually adjust the Temperature (blue-to-yellow) and Tint (green-to-magenta) sliders until things look natural.
A rookie mistake is to jump right into creative color grading. Always correct the white balance first, then grade for style. This ensures your artistic choices are built on an accurate color foundation, not just masking a problem.
AI is making a huge impact here. The professional photography services market is set to explode from USD 40.27 billion to nearly USD 66.8 billion by 2035, and a lot of that growth is driven by efficiency. For photographers dealing with thousands of images from a wedding or event, AI tools that automate these foundational fixes can cut post-production time by 30-50%, ensuring every photo has a consistent, professional starting point. You can read more about these market trends and how they're changing the game.
Refining Composition with Cropping and Straightening
The last piece of the foundation is honing your composition. A photo can be perfectly lit and color-corrected, but if the composition is off, it will still feel flat. This is where your Crop and Straighten tools become your best friends.
Nothing screams "amateur" faster than a crooked horizon. Use the straighten tool to level out the horizon in landscapes or fix tilted vertical lines in architecture. It’s a tiny adjustment that makes a world of difference.
Next, use the crop tool to make your composition stronger. Ask yourself a few questions:
- Can I get tighter on my subject to create more impact?
- Are there distracting elements at the edges I can just snip out?
- Does this crop help align my subject with a compositional guide, like the rule of thirds?
Here's a quick reference guide to these foundational edits and why they're so important.
Core Editing Adjustments and Their Purpose
| Adjustment | What It Does | Why It's Critical |
|---|---|---|
| Exposure | Adjusts the overall brightness and darkness of the image. | Corrects over/underexposed photos to recover lost detail and create a balanced tonal range. |
| White Balance | Removes unrealistic color casts to make colors appear natural. | Ensures skin tones are accurate and whites are truly white, providing a neutral base for color grading. |
| Highlights/Shadows | Recovers detail in the brightest and darkest parts of the photo. | Prevents "blown-out" skies or "crushed" blacks, adding depth and dynamic range to the image. |
| Cropping | Removes unwanted parts of the image to improve composition. | Eliminates distractions, strengthens the focal point, and guides the viewer's eye. |
| Straightening | Rotates the image to align horizontal or vertical lines. | Fixes crooked horizons and tilted perspectives, making the photo look polished and professional. |
Mastering these simple adjustments is what separates a quick snapshot from a polished, professional photograph.
This simple workflow diagram shows how these editing steps fit into the bigger picture. It all starts with planning and organizing, but the real magic happens when you sit down to edit.
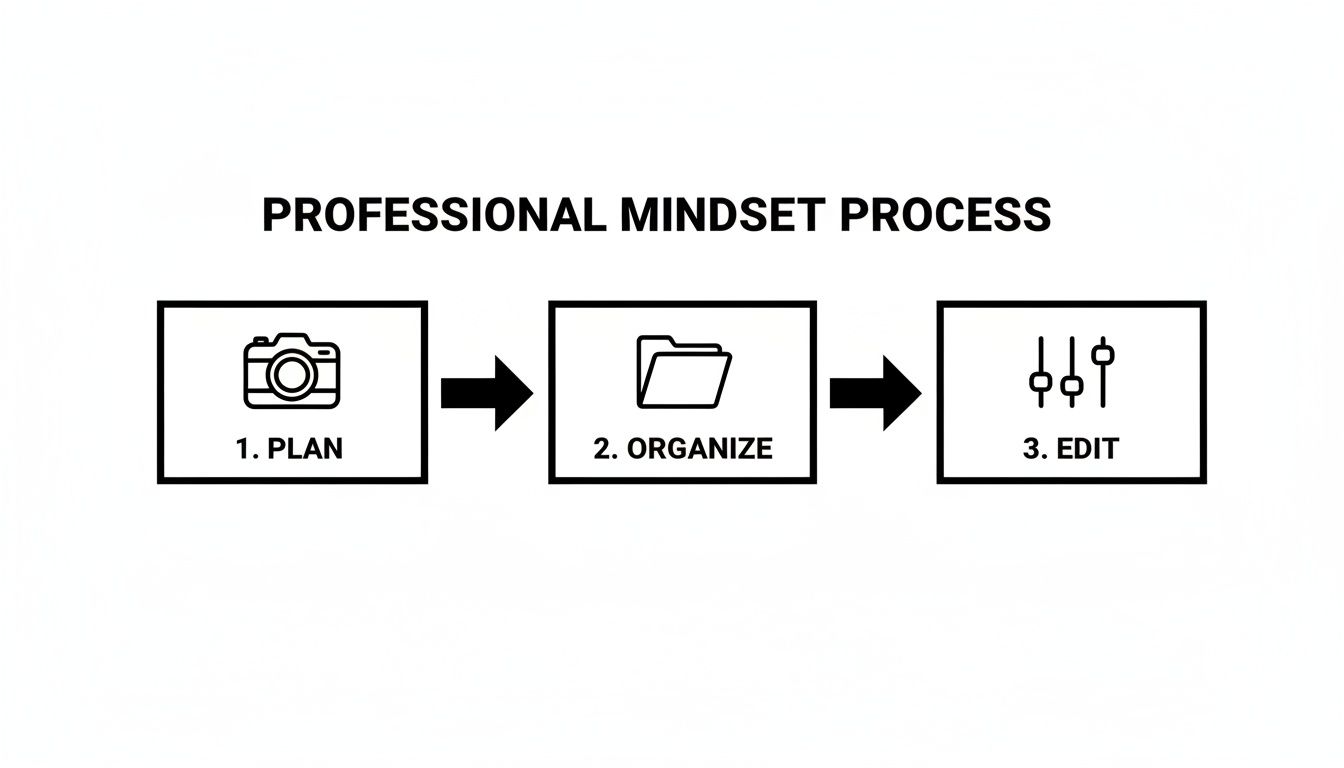
As you can see, editing is the final, crucial stage that brings all your careful preparation to life. Once you've mastered these foundational corrections, you've built a technically flawless base that lets you take your images in any creative direction you can imagine.
Diving Deeper: Advanced Retouching with AI
Okay, your photo is now technically correct. The exposure is right, the colors are true, and the crop is tight. This is where the real artistry begins. We're moving beyond the role of a technician and stepping into the shoes of an artist, focusing on those tiny details that separate a good photo from a genuinely professional one.
Advanced retouching is all about refinement. It’s about cleaning up distractions, making your subject pop, and delivering a final image that looks absolutely pristine.
This used to be the most grueling part of the job, sometimes demanding hours of painstaking, pixel-by-pixel work. Thankfully, AI tools have completely changed the game. They automate complex tasks that once took years to master, letting you achieve incredible results faster than ever and focus on your creative vision.
Natural-Looking Portrait Retouching
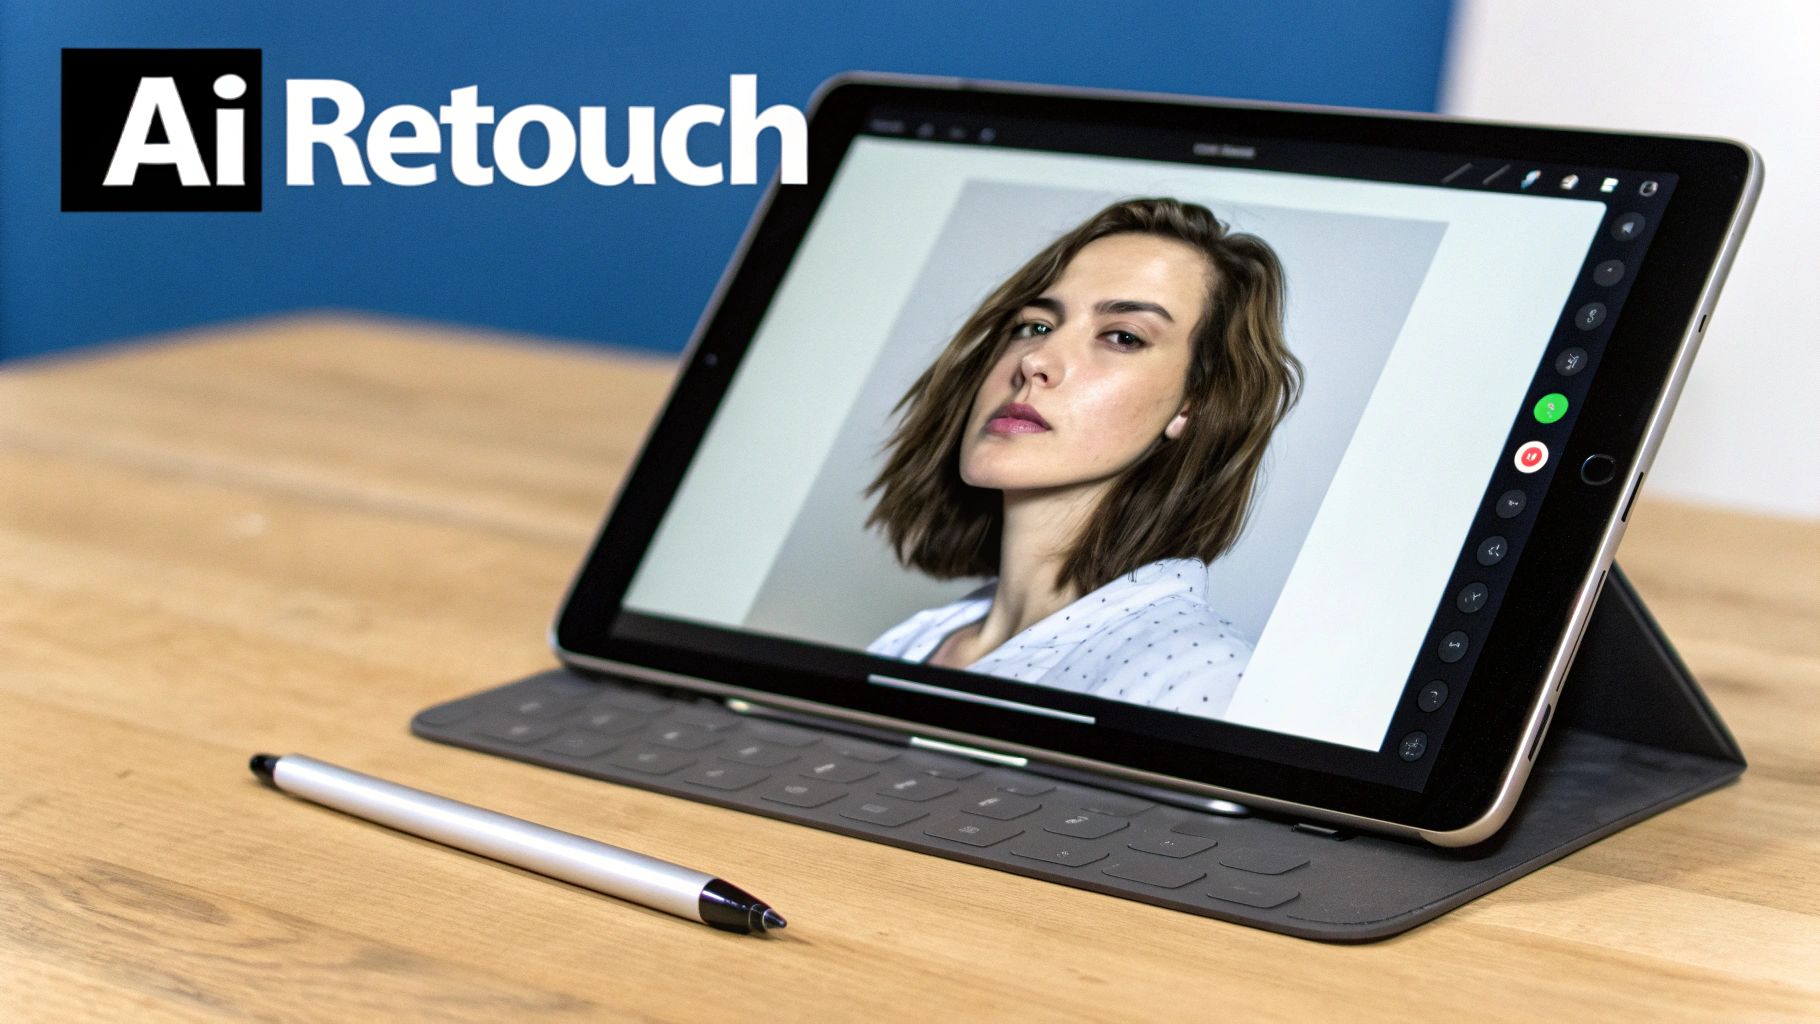
Portrait retouching, especially for headshots and lifestyle photos, is a delicate dance. The goal is always to enhance your subject’s best features without making them look like a plastic doll. It’s a constant balance between correction and authenticity.
The biggest mistake I see beginners make? Over-smoothing the skin. This completely destroys natural texture and pores, screaming "fake" from a mile away. A pro edit always keeps that crucial skin texture. Forget the blunt "blur" tool and focus on targeted, subtle corrections.
- Blemish Removal: Grab a spot healing brush or an AI object remover to zap temporary imperfections like pimples or stray hairs. The key word here is temporary. You only want to address things that aren't a permanent feature.
- Subtle Skin Smoothing: Instead of a heavy-handed global adjustment, use tools that target color and tone variations without nuking the texture. This evens out any blotchiness while keeping pores and fine lines visible for a realistic result.
- Brighten Eyes and Teeth: Making the eyes pop is a classic pro move. Select the whites of the eyes and teeth, then gently dial back any yellow cast and bump up the brightness just a touch. Be careful not to go overboard; a little goes a long way. This is also a critical step if you're looking to create a new profile photo and are exploring an AI headshot generator.
Removing Distractions with Precision
Nothing ruins a great photo faster than a distracting element in the frame—a tourist photobombing your landscape, a fire alarm on the wall, or a messy power cord in a product shot. The ability to seamlessly remove these things is a true hallmark of a professional editor.
Using a tool like Photo AI Studio’s Background Remover, this process becomes incredibly simple. The AI intelligently detects the edges of your subject and slices it away from the background with pixel-perfect accuracy. This is a game-changer for:
- E-commerce: Creating clean, consistent product shots on a pure white background for online stores.
- Creative Composites: Isolating a person or object so you can drop them into a completely new scene.
- Minimizing Distractions: Erasing a busy background to put all the focus squarely on your subject.
For smaller objects you want to remove from within the frame, AI-powered "content-aware fill" tools are your best friend. They analyze the surrounding pixels and intelligently fill in the gap after you've erased the unwanted object.
The best retouching is invisible. A truly professional edit often involves changes the viewer never even notices. The goal is to simply remove distractions so your subject can shine.
Rescuing Images with AI Upscaling
Sometimes, a shot just isn't as sharp as you’d like. Maybe you had to crop in super tight, or your focus was just a hair off. In the past, that photo was likely destined for the digital trash bin, unusable for anything high-resolution like a print.
Not anymore. The Photo Upscaler feature in Photo AI Studio offers a powerful fix. Traditional resizing just stretches pixels, which leads to that ugly, blurry mess. AI upscaling is different. It actually analyzes the image content and intelligently reconstructs details, sharpening edges and adding texture where it was lost. This can be an absolute lifesaver for:
- Breathing new life into old family photos that were scanned at a low resolution.
- Enlarging a heavily cropped image so you can make a large print.
- Improving the quality of smartphone photos to meet professional standards.
The ability to increase resolution without a massive hit to quality opens up creative doors that were previously locked shut. And as you get comfortable with these tools, you can explore even more. Transforming your expertly retouched stills into engaging videos with a Photo to Video AI tool is the next logical step. By mastering these advanced retouching tools, you're not just fixing photos—you're perfecting them.
Mastering Color Grading and Tonal Control
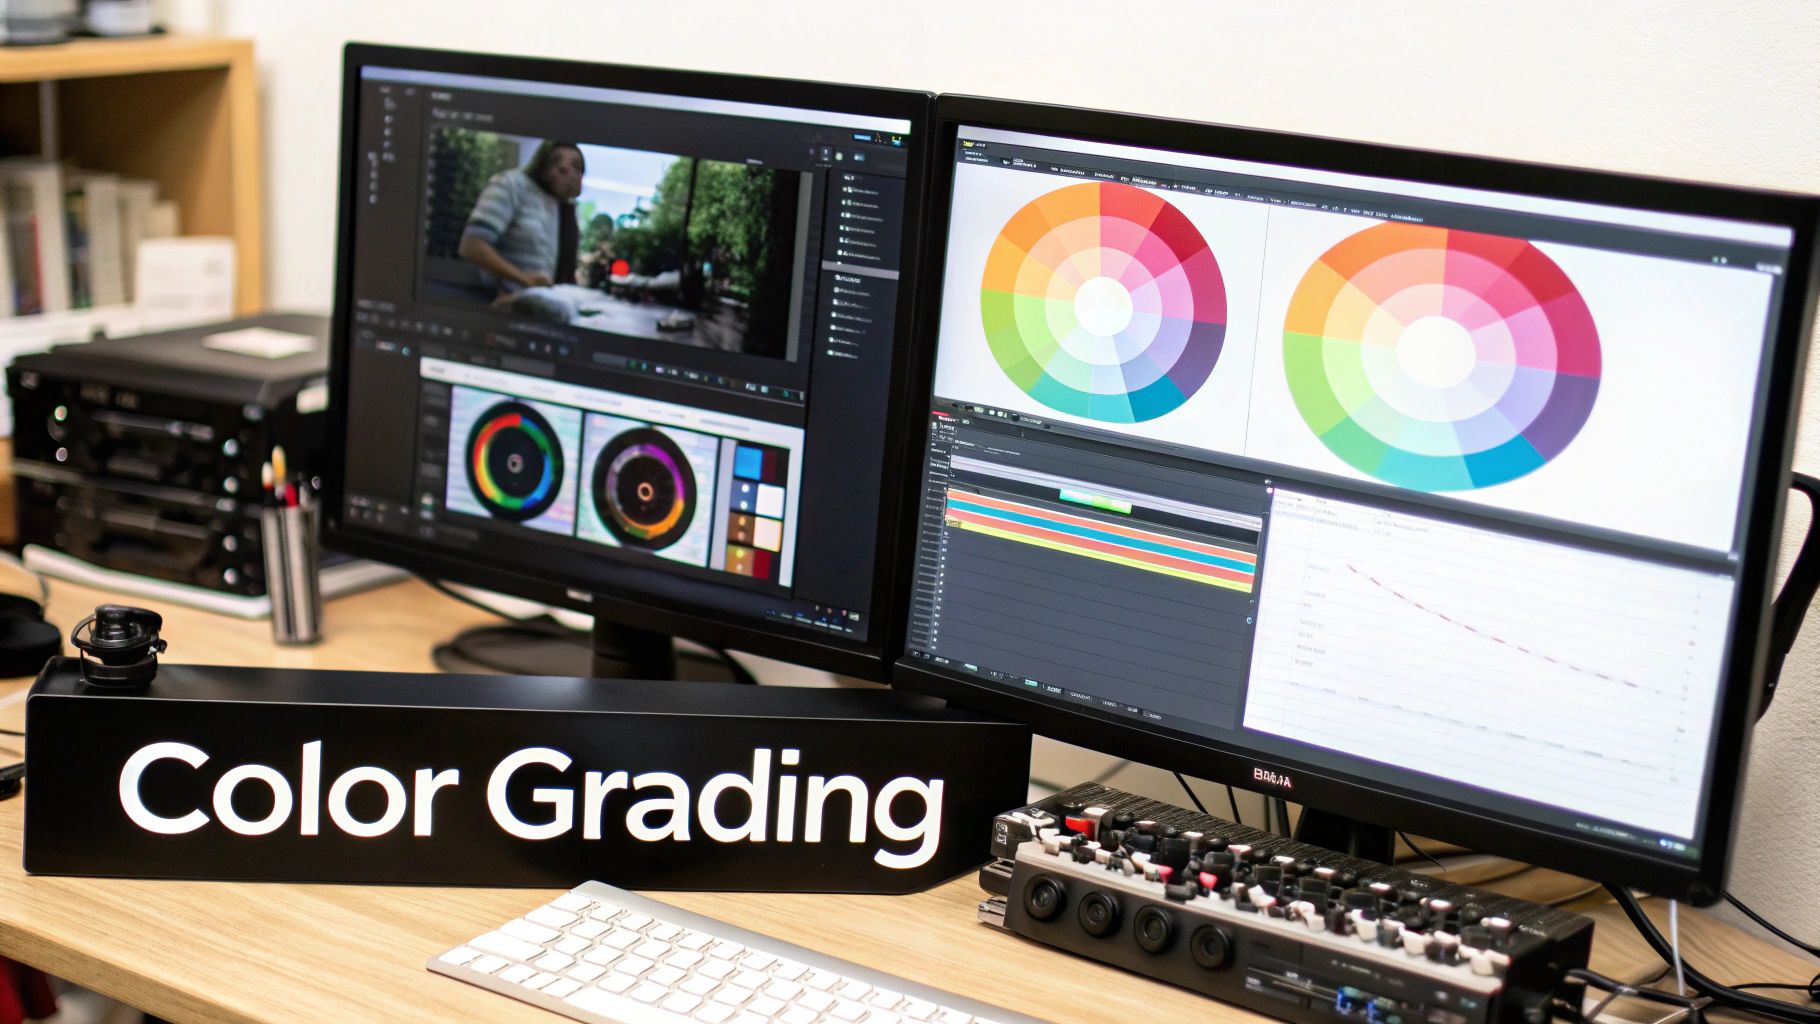
Once your image is technically sound—with perfect exposure and flawless retouching—you get to the fun part. This is where you move beyond simple correction and start to inject emotion, mood, and your own signature style. Color grading is the art of telling a story with hues and tones.
It’s really important to get the difference between color correction and color grading. Correction is about accuracy; it's what we did with white balance to make colors look true-to-life. Grading, on the other hand, is all about intention. It’s a creative process where you purposefully shift colors to evoke a feeling, like the warm, golden glow of a summer evening or the cool, moody blues of a cinematic night scene.
Unlocking Precision with Tone Curves
If you want absolute, granular control over the light and shadows in your photo, the Tone Curve is your most powerful tool. It might look intimidating at first—it’s just a graph with a diagonal line—but it offers incredible precision that simple sliders can't touch.
Think of the curve as a map of your image's brightness. The bottom-left represents the darkest shadows, the top-right represents the brightest highlights, and everything in between is the midtones. By clicking and dragging the line, you can selectively brighten or darken very specific tonal ranges.
- Creating an S-Curve: The most common starting point is a gentle "S" shape. By pulling the shadows down slightly and lifting the highlights up, you create a beautiful, punchy contrast that makes your image pop. It's a classic for a reason.
- Targeted Adjustments: Need to brighten just the midtones without blowing out the highlights? Place a point in the center of the curve and lift it gently. This nuanced control is the secret to a professional-looking edit.
You can even dive into the individual red, green, and blue color channels using the tone curve. This lets you introduce subtle color shifts into your shadows or highlights with surgical precision.
Crafting a Cinematic Mood with Split Toning
Split toning is a classic color grading technique that lets you add different colors to the shadows and highlights of your photo. This is exactly how you achieve those popular cinematic looks, like the iconic orange-and-teal palette you see in so many Hollywood blockbusters.
The concept is simple but incredibly effective. For instance, adding a cool blue or cyan to the shadows while warming up the highlights with a soft orange or yellow creates a dynamic color contrast that is instantly pleasing to the eye. It adds a layer of depth and professional polish that a simple filter just can't replicate.
A great way to start is by complementing the existing light. If you have a golden-hour photo with warm highlights, try adding a subtle cool tone to the shadows. This creates balance and makes that warmth feel even more vibrant.
Finding Your Style with Professional Themes
Developing a signature color style takes a lot of time and practice. A fantastic way to accelerate your learning and keep your work consistent is by using pre-made looks as a starting point. Inside Photo AI Studio, the Themes feature gives you access to a massive library of professional-grade color treatments.
These aren't just one-click filters; they are fully adjustable recipes that you can apply and then tweak to perfectly match your vision. Find a theme that gets you 80% of the way there, then use the tone curve and other tools to fine-tune the final 20%. This approach is a lifesaver for maintaining a cohesive look across a set of images, like for a wedding album or an Instagram feed. Exploring how to elevate your Instagram photos with AI can give you even more ideas for building a consistent, eye-catching aesthetic.
This blend of AI efficiency and artistic control is what's defining the industry right now. Clients love the speed that AI offers, but they're increasingly drawn to work that shows technical skill through natural, authentic color grading rather than over-the-top edits. The best work often comes from using AI to handle the heavy lifting, freeing you up to focus on that essential human touch. By mastering these color grading techniques, you're not just editing photos; you're becoming a visual storyteller.
You've done the heavy lifting—the culling, the color corrections, the retouching. But the last 5% of your edit is where a good photo truly becomes a great one. This is the final polish.
After all that work, this is not the time to rush. The final steps—sharpening, cleaning up noise, and exporting—are what guarantee your image looks just as incredible out in the world as it does on your screen. A small mistake here can make an image look soft, introduce weird digital grain, or mess up your colors online. Let's make sure that doesn't happen.
The Art of Selective Sharpening
First things first: sharpening is not for fixing a blurry photo. It's about creating the illusion of more detail by adding a tiny bit of contrast to the edges within your image. The goal is to make your subject look crisp, not crunchy.
The biggest mistake I see beginners make is applying sharpening to the entire photo. This is a fast track to an over-edited look, as it sharpens things that are supposed to be soft, like skin or a blurry background, and introduces a gritty texture.
The real secret is to be selective. Use a brush or a mask to paint sharpening only onto the parts of the image that need it.
- For a portrait: You'll want to hit the eyes, eyelashes, eyebrows, and maybe some strands of hair.
- For a landscape: Focus on the edges of mountains, the texture in rocks, or the fine details in leaves.
- For a product shot: Emphasize the unique textures and key features of the item you're selling.
This targeted approach makes your subject pop without ruining the smooth, clean areas of your image.
Cleaning Up with Noise Reduction
If you've ever had to crank up your camera's ISO in low light, you're all too familiar with digital noise. It's that grainy, speckled pattern that can make a photo feel cheap and unprofessional.
Noise reduction tools are fantastic, but they come with a major trade-off. If you push them too far, they start smudging away the fine details you just worked so hard to sharpen, leaving your photo looking soft and plasticky.
The trick is to find that perfect balance. Always zoom in to 100% to see what you're really doing. Apply just enough noise reduction to soften the distracting grain in the shadows, but stop before you lose the important textures.
A professional edit is all about preserving detail. When you're reducing noise, your goal isn't a perfectly smooth, sterile image. A little bit of fine grain often looks more natural and pleasing than an over-processed, waxy photo.
Nailing Your Export Settings
Your export settings are the final handshake between your editing software and the rest of the world. Getting them right is non-negotiable. The wrong settings can crush your colors, add ugly digital artifacts, or create files way too big to load properly on a website.
For web and social media, there are really only two things you need to master: file format and color space.
File Format (JPEG vs. PNG): For pretty much any photograph going online, JPEG is your best friend. It gives you an amazing balance of image quality and small file size. The only time you'd really use a PNG is if you need a transparent background, as they are "lossless" but create much bigger files.
Color Space (sRGB vs. Adobe RGB): This is a big one. Your camera might shoot in a wider color space like Adobe RGB, but almost every web browser and phone on the planet is built to display sRGB. If you export for the web in anything else, your colors will look dull and washed out. Always, always, always export in sRGB for web use.
To make it even easier, here's a quick guide for the most common scenarios you'll run into.
Export Settings for Different Platforms
Choosing the right export settings ensures your photos look their absolute best, whether they're being viewed on a tiny phone screen, a blog, or a large print. This table breaks down the best practices for the most common platforms.
| Platform/Use Case | Recommended File Type | Color Space | Key Considerations |
|---|---|---|---|
| Instagram/Facebook | JPEG | sRGB | Keep the longest edge around 2048 pixels for optimal quality and to prevent over-compression by the platform. |
| Website/Blog | JPEG | sRGB | Compress the file to balance image quality with fast page load times. Aim for under 500KB if possible. |
| High-Quality Print | TIFF or High-Quality JPEG | Adobe RGB or ProPhoto RGB | Use the native resolution of your camera and consult with your print lab for their specific color profile recommendations. |
| Client Web Gallery | JPEG | sRGB | Provide a high-resolution version for them to download but ensure the file size is manageable for web viewing. |
By taking the time to master these final steps, you're making sure every single photo you share is polished, professional, and presented exactly the way you intended.
Got Questions? Let's Talk Photo Editing
Once you start getting serious about editing, the questions start flying. That's a good thing—it means you're pushing past the basics. Learning how to edit like a pro is a journey, not a destination. Even after years in the industry, I'm still finding new tricks.
Here are a few of the big questions I get asked all the time by photographers and creators looking to sharpen their skills.
What's the Best Software for Pro Photo Editing?
There’s no single magic bullet here. The "best" software really comes down to your workflow, what you’re shooting, and your budget.
For a long time, the default answer was the Adobe combo: Lightroom for organization and basic edits, then bouncing over to Photoshop for the heavy lifting. They're undeniably powerful, but they also come with a monthly subscription and can feel pretty intimidating for newcomers.
Lately, though, the game has changed. All-in-one platforms like Photo AI Studio are gaining huge traction because they build powerful AI right into a workflow that just makes sense. You get all the robust manual controls for exposure and color, but you also get one-click tools for things that used to take ages—like background removal, upscaling, and tricky retouching. It just simplifies everything.
How Can I Develop My Own Editing Style?
Finding your style is that incredible moment when people can see an image and just know it's yours. It's the most satisfying part of the craft, but it doesn't happen overnight. It comes from a ton of experimentation and deliberate practice.
A great way to start is by looking at photographers whose work you absolutely love. Don't just scroll past—really analyze it. What is it about their images that grabs you? Is it the deep, moody color palette? The light, ethereal feel? That high-contrast, cinematic vibe? Try to reverse-engineer their look.
Here’s how you can get started:
- Build a Mood Board: Jump on Pinterest or just save images to a folder. Once you have a collection, look for the common threads in color, light, and mood.
- Use Presets as a Launchpad: Start with professional presets or Photo AI Studio's Themes, but never just stop there. Tweak the exposure, play with the shadows, adjust the color mix—make it yours.
- Give Yourself Constraints: Try editing an entire shoot using a limited color palette. Forcing yourself to work within boundaries is one of the fastest ways to build a cohesive look.
Keep at it, and you'll eventually find a rhythm and a look that feels completely authentic. That's your style breaking through.
Will AI Just Replace Photo Editors?
I hear this one constantly, and my answer is always the same: No, but it will absolutely change the job. AI isn't coming for your creativity; it's coming for the boring, repetitive parts of your workflow.
Think of AI as the world's best assistant. It can sift through a thousand photos from a wedding shoot in minutes, nail a perfect background cutout on the first try, or handle time-consuming skin retouching. This frees you up to pour your energy into what really matters: the composition, the storytelling, and the creative color grade. You can also check out our AI wedding photos.
The numbers don't lie. The global AI image editing market was valued at USD 88.7 billion in 2025 and is on a rocket ship to USD 1.81 trillion by 2030. Big companies make up around 42% of that spending, which tells you that pros are adopting these tools at a massive scale. If you want to stay competitive, learning to use AI isn't optional. You can see more of these AI image statistics to get a sense of how fast this is moving.
The photographers who get left behind won't be replaced by AI. They'll be replaced by photographers who use AI to work faster, smarter, and more creatively.
The smart move is to embrace these tools and figure out how they fit into your process. You can also check out our virtual wedding dress try-on.
Ready to see what AI can do for your photos? Photo AI Studio packs a full-featured Photo Editor, an AI Upscaler, professional Themes, and a Background Remover into one seamless workflow. Start creating incredible, professional-quality images today.