A Practical Guide to ai video generator from image: Techniques and Tips
Learn how ai video generator from image can turn simple photos into dynamic videos with AI, plus practical workflows, tips, and tools to get started.
An AI video generator from image is a clever bit of tech that takes a single, static picture and breathes life into it, turning it into a short, dynamic video clip. The artificial intelligence inside the tool animates different parts of the photo, adding motion like subtle zooms, pans, or even slick parallax effects to create something far more engaging.
It’s a fantastic way to get more mileage out of the visual assets you already have.
Why Bother Animating Images With AI?
Let's be honest, in a world where everyone is scrolling endlessly, static images just don't grab attention like they used to. Video consistently crushes still photos in engagement on every major platform, but who has the time or budget for traditional video production? This is exactly where AI-powered animation gives you a massive strategic edge.
When you turn a simple photo into a moving video, you instantly elevate its power to tell a story and pull the viewer in. It’s the difference between showing someone a product and showcasing it.
The Strategic Edge in Content Creation
Imagine an e-commerce brand turning a standard product shot into a mesmerizing 30-second ad for social media, complete with a slow zoom that highlights every key feature. Or a consultant animating their professional headshot for a LinkedIn profile that actually stands out from the sea of stiff, static portraits. These aren't just cool ideas; they're practical, real-world applications you can use right now. You can also check out our AI professional headshots.
Tools like PhotoAI Studio make this happen without needing a film degree or a huge budget. This shift puts sophisticated video capabilities into the hands of creators and small businesses, letting anyone create eye-catching content that was once only possible for big agencies with deep pockets.
Key Takeaway: Animating an image isn't just a gimmick. It’s a strategic move to boost engagement, slash production costs, and make your brand stick in people's minds.
To really see why this is such a game-changer, let's look at the hard numbers.
| Metric | Static Image | AI-Generated Video |
|---|---|---|
| Viewer Engagement | Lower (passive glance) | Higher (holds attention longer) |
| Click-Through Rate | Baseline | Up to 2-3x higher on average |
| Social Media Reach | Standard algorithmic reach | Prioritized by most platform algorithms |
| Storytelling Ability | Limited to a single moment | Conveys emotion, focus, and narrative |
| Production Cost | Low (photo cost) | Very Low (pennies per video) |
The table makes it pretty clear: for a tiny investment of time and credits, you get a disproportionately huge boost in performance. It's one of the highest-leverage moves you can make in your content strategy today.
Unlocking Efficiency and Slashing Costs
This isn't just a niche trend; it's a market exploding for a reason. The AI video generator market is projected to grow by 30% annually through 2026, all driven by the insatiable demand for scalable content. Businesses are already seeing the benefits, with some reporting a staggering 40% reduction in content creation costs compared to traditional video shoots.
To truly appreciate what's happening, it helps to understand the broader world of AI powered content creation and how it’s fundamentally changing digital media.
This efficiency means you can produce way more content, A/B test different creative ideas, and jump on market trends faster than ever before. For a deeper dive into more AI-driven strategies and creative ideas, check out the other articles on the https://www.photoaistudio.com/blog.
How to Create Your First AI Video
Turning a static image into a dynamic video might sound like a job for a visual effects artist, but with the right AI tools, it’s something you can knock out in a few minutes. I'll walk you through the entire process using PhotoAI Studio, showing you exactly how to get started, even if you’ve never touched video editing software in your life.
First things first, head over to your PhotoAI Studio dashboard. You'll see a bunch of creative options, but the one we're looking for is Image to Video. That's your launchpad.
The entire concept is really simple: you give the AI an image and some instructions, and it gives you back a video.
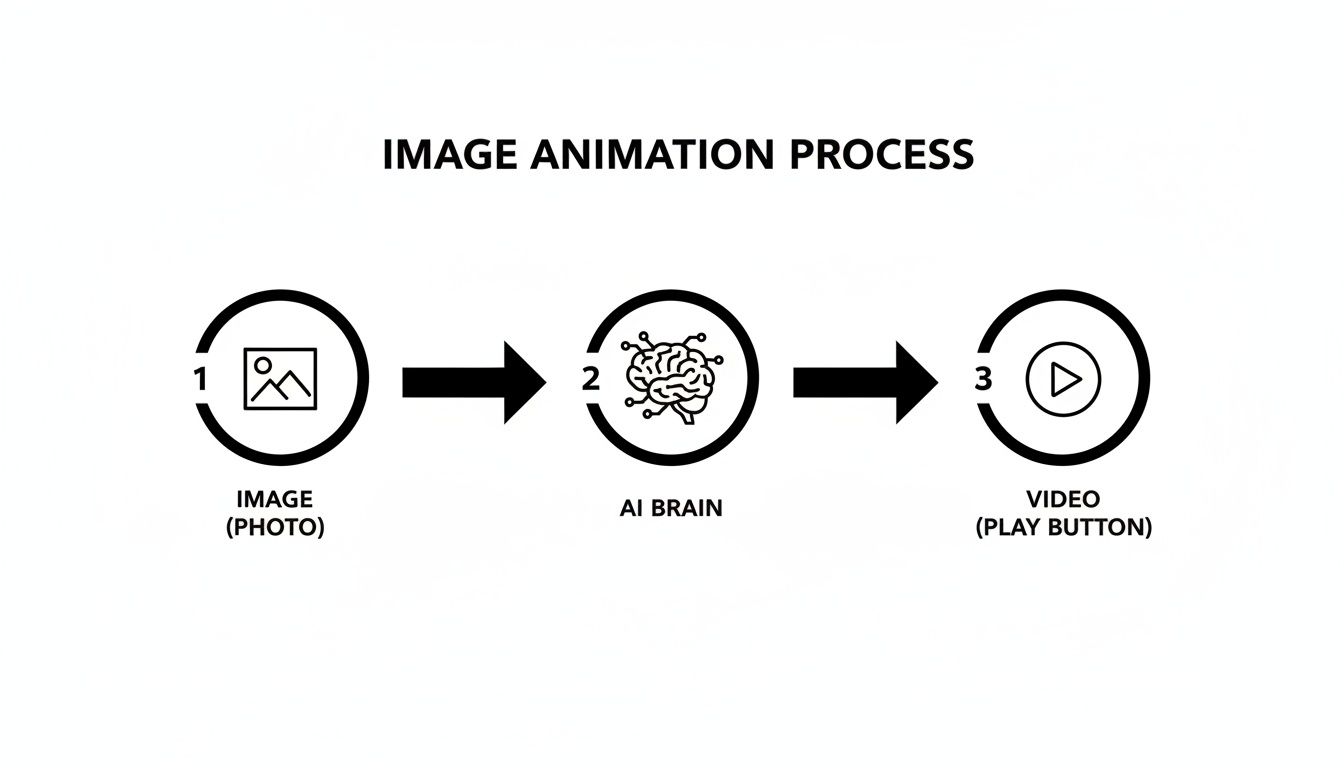
This graphic breaks it down perfectly. Your image goes in, the AI does its magic, and a moving video comes out. No complex timelines or keyframes required.
Getting Started with the Interface
Once you click into the Image to Video tool, you’ll land on a clean, simple workspace. This is where you'll do all the work. You'll immediately notice the key areas: the image upload box, the motion controls, and a text prompt field. It’s all laid out to guide you from one step to the next.
Your first job is to give it a picture. Click the upload button and pick a high-quality photo. I've found that images with a clear subject and some separation between the foreground and background work best—it gives the AI more information to create believable movement.
Choosing Your Motion Style
With your image loaded, it's time for the fun part: telling it how to move. PhotoAI Studio gives you a handful of preset motion styles that are fantastic starting points. These are your shortcuts to getting a professional-looking animation without any guesswork.
Here are the main options you'll see:
- Zoom In/Out: This is my go-to for drawing attention to a product or creating a bit of drama. A slow zoom-in can feel really cinematic.
- Pan Left/Right: Perfect for landscape shots or any wide photo. It mimics a smooth camera pan, instantly making a static scene feel alive.
- Tilt Up/Down: This works great for tall subjects, like skyscrapers or even full-body portraits, adding a sense of scale.
Think about the vibe you're going for. A gentle, slow motion feels calm and reflective. A quick pan adds a burst of energy. The best way to learn is just to try a few and see what clicks.
Pro Tip: Don't just stick to the presets. You can get much more precise control by combining a preset with a text prompt. For example, select "Zoom In" and then type a prompt like, "slow, subtle zoom towards the mountain peak." This gives the AI much clearer instructions.
Setting the Duration and Generating
Before you hit the generate button, you need to decide how long you want your video to be. Most clips you'll make this way will be short, usually between 3 to 7 seconds. This is the sweet spot for social media, where you have just a moment to grab someone's attention.
Once you’ve picked your motion and duration, give everything one last look. Happy with the prompt? Ready to go? Click "Generate." The AI will take a few moments to work its magic, and then you'll have your first animated video ready to preview.
It’s an incredibly fast process compared to traditional animation. If you want to build on this and create something more complex, you can even explore how to create user-generated style videos, which is a great next step. Just keep in mind that each video generation uses credits from your account, so it’s always a good idea to check the cost before you commit.
Crafting Prompts for Cinematic Motion
This is where the real magic happens. Moving beyond the simple presets is how you unlock the true creative power of an ai video generator from image. Stop thinking like you're just clicking buttons and start thinking like a film director. Your text prompt is the script, the command you give the AI's virtual camera to turn a static shot into something cinematic.
The secret is to use descriptive, action-oriented language. Don't just say "zoom." Instead, try "gentle zoom in on the main subject." That tiny change adds crucial context, telling the AI not just what to do, but how to do it. It's the difference between a robot moving a camera and an artist creating a shot.
The Language of Motion
To get the results you're picturing in your head, you need to speak the AI's language. This really boils down to combining different camera movements with modifiers that control the speed, intensity, and focus. Nailing these combinations is what separates a basic, floaty animation from a polished, professional video clip.
Think of these as the building blocks for any prompt you write:
Primary Movements: These are your bread-and-butter camera actions.
- Pan: Moving the camera left or right across the scene.
- Tilt: Pointing the camera up or down.
- Zoom: Pushing the camera closer (in) or pulling it away (out).
- Roll: Rotating the camera on its axis, kind of like a barrel roll.
Speed & Intensity Modifiers: This is all about the feel of the movement.
- Slow, gentle, subtle: Use these for dramatic, calm, or elegant effects.
- Quick, swift, energetic: Perfect for creating excitement or fast-paced action.
- Shaky, handheld: This mimics a more raw, on-the-ground documentary feel.
Focus & Depth Modifiers: These are the details that add a layer of photographic realism.
- Parallax motion: This is a big one. It creates a 3D effect by moving things in the foreground and background at different speeds.
- Soft focus on the background: Instantly draws the viewer’s eye right to your main subject.
- Rack focus: This is a classic film technique where you shift focus from one subject to another.
The tech that makes these precise controls possible is getting better by the day. We're seeing open-source video generation models trained on incredibly complex data to create realistic motion, sometimes generating clips up to 5.4 seconds at 30 fps. It’s this kind of sophisticated motion control that you’ll find baked into tools like PhotoAI Studio.
Practical Prompt Formulas
Okay, let's make this real. Here are a few formulas you can steal and adapt for your own projects. They show how mixing and matching these elements can create a very specific mood and tell a story.
For a Product Shot:
Your goal is to create a dramatic reveal that makes a single product look like a hero.
Prompt Example:
"Slow, subtle zoom in towards the watch face with a soft focus on the background."
This prompt is fantastic because it tells the viewer exactly where to look. It feels premium, intentional, and makes the product the undeniable star of the show.
For a Landscape Photo:
Here, the mission is to convey the sheer scale and energy of a natural scene.
Prompt Example:
"Swift pan right across the horizon, capturing the mountain range."
See how the motion adds life? A quick pan makes the landscape feel dynamic and expansive, not just like a flat, boring picture. It’s a simple but incredibly effective way to pull your viewer right into the environment.
Finalizing Your Video With Sound and Polish
You've brought your image to life, which is a huge step. But a silent video feels incomplete. The final touch—the audio—is what turns a cool animation into a piece of content that genuinely connects with people. The right sound can completely change the mood, transforming a slow zoom into a dramatic reveal or a fast pan into an energetic, attention-grabbing intro.
Most tools that generate video from an image, including PhotoAI Studio, are laser-focused on the visuals. This means you'll need to pop your video into a separate editor to add the audio track. Don't sweat it—this is a standard part of the workflow, and great free tools like CapCut or DaVinci Resolve make it incredibly simple to layer in music or sound effects.
Sourcing and Adding Audio
First things first, you need to find royalty-free audio. The last thing you want is a copyright strike, especially if you're using this video for your business or brand.
Here are a few of my go-to places for quality, safe-to-use audio:
- YouTube Audio Library: A massive, free-to-use collection of music and sound effects. It's super easy to search by genre, mood, or even specific instruments.
- Pixabay Music: Another fantastic source for high-quality, royalty-free tracks that are cleared for commercial use.
- Artlist & Epidemic Sound: These are premium, subscription-based services, but the quality is absolutely top-tier. If you're creating video content regularly, an investment here is well worth it.
Once your AI-generated video is looking sharp, remember that audio quality matters just as much as visual quality. Taking a moment to explore professional noise reduction techniques for video can make a world of difference, ensuring your final product sounds as clean as it looks.
Expert Tip: Try to match the tempo of your music to the motion in your video. A slow, atmospheric track pairs perfectly with a gentle parallax effect, while an upbeat, driving song works wonders for quick, energetic pans and zooms. This small detail makes the whole thing feel more cohesive and professional. You can also check out our AI dating profile photos.
Upscaling and Export Settings
With your audio in place, the last step is to export the final file. The settings you choose here are critical because every social platform has its own preferences for what looks best.
For example, a 1:1 square video is ideal for an Instagram grid post, but for Reels, TikTok, or Stories, you absolutely need a vertical 9:16 aspect ratio. Getting this wrong can result in ugly black bars or your video getting awkwardly cropped.
If you notice your generated video looks a little soft or pixelated, here's a pro move: use the Photo Upscaler in PhotoAI Studio on your source image before you generate the video. A higher-resolution starting image will always yield a crisper, sharper final video. It's a simple prep step that pays off big time, giving you a share-ready asset that looks amazing on any screen.
To make things easy, here’s a quick reference table I use for exporting videos for the most common platforms.
Recommended Export Settings for Popular Platforms
Getting your export settings right ensures your video looks its best without any weird compression or formatting issues. This little cheat sheet covers the basics for the main social and web platforms.
| Platform | Recommended Resolution | Aspect Ratio | File Format |
|---|---|---|---|
| Instagram Feed | 1080 x 1080 px | 1:1 | MP4 |
| Instagram Reels/Stories | 1080 x 1920 px | 9:16 | MP4 |
| LinkedIn Feed | 1920 x 1080 px | 16:9 | MP4 |
| Website/Blog | 1920 x 1080 px | 16:9 | MP4 |
Stick to these general guidelines, and your videos will load quickly and display correctly, no matter where you post them. Using the MP4 format is almost always the safest and most compatible choice.
Real-World Uses for Marketers and Creators
Alright, you’ve seen how the sausage is made. Now for the fun part: where can you actually use an ai video generator from image to get real-world results? The magic of this tech isn't just about cool animations; it’s about turning your existing library of static visuals into scroll-stopping video content that performs better on crowded timelines.
These tools have been a game-changer, slashing production workflows from weeks down to a matter of hours. For Shopify merchants, this means turning basic product photos into snappy demo clips that can boost viewer engagement by a staggering 49%. It’s not just about getting more clicks; research shows AI-driven videos can lift viewer retention by 34% over a static image. That’s a massive advantage when you’re fighting for every second of attention.
Energize E-commerce Product Listings
Let’s be honest, those standard product shots on a plain white background are necessary, but they’re also a bit of a snoozefest. Now, imagine taking that same high-res photo of a handbag and adding a slow, elegant zoom to highlight the custom hardware or the texture of the leather.
You can even fake a 360-degree view by generating a few short clips with different camera motions—pan left, pan right, tilt up—and then stringing them together. Suddenly, shoppers get a much richer feel for the product, all without you having to book an expensive and time-consuming video shoot.
- Goal: Make product pages more engaging to increase conversions.
- Image to Use: A sharp, high-resolution product shot with clean lighting.
- Prompt Idea: "Subtle zoom in on the product's main feature with a soft parallax motion."
Elevate Social Media Graphics
If you’re a social media manager, the content treadmill never stops. Instead of just posting another static graphic for your weekend sale or a text-based quote, why not give it a little life? A simple panning motion across the image can make your announcement feel instantly more polished and dynamic.
This is gold for formats like Instagram Stories, Reels, and TikTok, where movement is everything. It’s how you catch someone’s eye in the first two seconds. You don't need a full-blown video; you just need enough motion to stand out from the endless stream of static posts. For your next big campaign, you could even create a unique brand ambassador from scratch using an AI influencer generator.
Key Insight: You're not trying to make a feature film here. The goal is to add just enough motion to stop the scroll. A three-second animated graphic will almost always outperform its static cousin.
Create a Standout Professional Profile
This isn’t just for brands. Professionals can use this to break out of the sea of stiff, static headshots on platforms like LinkedIn. Think about animating your profile picture with an incredibly slow, subtle zoom. It creates a "living portrait" effect that’s both memorable and surprisingly sophisticated.
This small tweak makes your profile feel more modern and alive, helping you make a much stronger first impression on recruiters, potential clients, or collaborators. It’s a low-effort move that signals you’re tech-savvy and creative—a powerful way to personalize your professional brand with minimal fuss.
Got Questions About AI Video Generation? Let's Clear Things Up.
Once you start playing with AI video tools, a few common questions always seem to surface. It's one thing to make a picture wiggle; it's another to create something that looks polished and professional. Let's get into the practical, real-world answers to the questions I hear most often.
What Kind of Images Work Best?
High-resolution photos with a clear, single subject almost always give you the cleanest results. Think about it: the AI needs good data to work with. A crisp image with good lighting and a distinct separation between the foreground and background gives the algorithm a much clearer map for applying motion.
I've learned this the hard way—if you feed it a blurry, low-quality, or super cluttered image, the AI gets confused. It struggles to figure out what should move and what should stay still, resulting in weird, muddy-looking animations. A clean starting point is probably 80% of the battle.
How Much Control Do I Really Have Over the Motion?
You have more control than you might think, but you have to think like a director, not a keyframe animator. You aren't going in and manually adjusting motion paths. Instead, you guide the AI by picking a base motion style—like a pan, zoom, or tilt—and then you refine it with a text prompt.
This is where the real magic happens. A generic prompt gets you a generic result. But a specific one, like "slowly pan right across the distant horizon," tells the AI exactly what you want it to do.
My Pro Tip: The real creative power comes from layering these commands. Try combining a "zoom in" motion style with a text prompt for "subtle parallax motion." This can create a slick 3D effect that makes the image pop, something you'd never get from just a simple preset alone.
How Long Are the Videos and What's the Cost?
Most of these tools are designed to create short, punchy clips that are perfect for social media. We're typically talking about videos between 3 to 10 seconds long—just enough to grab someone's attention as they're scrolling through Instagram or TikTok.
Platforms like PhotoAI Studio operate on a credit system, which is pretty straightforward. Generating a video uses a certain number of credits, and that number can change based on the final length and resolution you choose. The good news is, you always see the credit cost before you hit the "generate" button, so there are no nasty surprises.
Can I Use These Videos for My Business?
Absolutely. This is one of the biggest benefits. When you create a video from your own uploaded images, that final video is yours to use for commercial purposes.
This makes AI video generators an incredibly potent tool for marketers, small business owners, and creators. You can whip up unique ad creative, engaging product shots, or dynamic social media content without getting tangled up in complex licensing agreements.
Ready to stop reading and start creating? See for yourself how easy it is to turn your static images into videos that move. Get started for free with PhotoAI Studio and bring your visuals to life today.
🤖Get a summary of this article with AI
Related Articles

Image to Video AI: Animating Product Photos for Social Media
Learn how to use image to video AI tools to transform static product photos into engaging animated content for TikTok and Instagram Reels.
2026-03-26

Top 12 AI Video Creation Tools to Transform Your Content in 2026
Discover the best AI video creation tools for marketers, creators, and teams. Create stunning videos from text, images, and more with our ultimate guide.
2026-03-18

How to Remove Blemish From Face Instantly With AI
Learn how to remove blemish from face in photos using powerful AI tools. Get professional, flawless results in minutes with our expert guide.
2026-03-01