Taking your own headshots really boils down to four main phases. First, you'll need a solid plan. Then comes the setup—getting your light and background just right. After that, it's all about nailing the shot itself, from camera settings to your expression. And finally, the magic happens in the edit.
The best part? You can get a killer, high-quality image that seriously boosts your professional presence with just your smartphone and some good window light.
Why a Great Headshot Is Your Digital Handshake
Think about it: your online profile is often the first place people "meet" you. A professional headshot isn't just a nice-to-have anymore; it's a fundamental career tool. It's your first impression on LinkedIn, your author photo, your website's "About" page.
A polished, authentic image instantly builds trust and credibility. And here's the secret—you don't need to spend a fortune at a photography studio to get one.
This guide is your roadmap. We’ll walk through every single step, showing you how a little prep and the right techniques can lead to a fantastic result. We'll focus on getting the most out of the gear you already own, whether that’s the latest iPhone or a trusty DSLR.
Your headshot is a huge piece of your personal brand. It telegraphs professionalism, confidence, and personality in a single glance, making it one of the most powerful assets you have.
What You Will Learn
We’re covering the whole process here, from the initial spark of an idea to the final, polished picture. Everything is broken down into practical, actionable advice. By the time you're done, you'll feel completely in control of your professional image.
Here's a look at what's ahead:
- Strategic Planning: We'll figure out the exact message you want to send and find some visual inspiration to guide you.
- Simple Setups: Learn how to use natural light and a few household items to create a surprisingly flattering studio right at home.
- Technical Skills: I'll give you easy-to-understand camera settings, simple posing tips, and tricks for getting a genuine expression.
- Modern Editing: We'll dive into powerful but simple tools that can take a good photo and make it great.
I’ll also show you how AI can be a total game-changer in this process. If you want to elevate your DIY shots even further, our guide on creating professional headshots with AI demonstrates how new tech can give you studio-quality results from a photo you snapped at home.
Laying the Groundwork for a Flawless Shoot
The secret to a great DIY headshot isn't some high-end camera. It’s the prep work you put in long before you ever press the shutter button. This initial planning is what separates a polished, professional photo from a simple snapshot. It’s where you truly set yourself up for success.
First things first, you have to define your goal. A headshot is never a one-size-fits-all deal. The picture you put on a buttoned-up LinkedIn profile needs to send a totally different message than one for an actor's portfolio or a creative's website.
So, ask yourself the big question: What is this headshot for?
- Corporate or LinkedIn: Here, the goal is to look professional, trustworthy, and approachable. We're talking clean backgrounds, classic clothing, and a confident but friendly expression.
- Acting or Modeling: This is all about versatility and personality. You’ll likely need a whole range of shots, from intense and dramatic to warm and commercial.
- A Creative Brand (Author, Coach, Designer): Your headshot should scream you. The style can be more artistic, the wardrobe more expressive, and the environment can even give a nod to what you do.
Nailing this down from the start will guide every single decision that follows, from what you wear to the type of background you choose.
Gather Your Visual Inspiration
Once you know your "why," it’s time to figure out the "how." The best way to do this is by creating a simple mood board. But don't just mindlessly save pictures you think are cool; you need to analyze them.
Hop over to LinkedIn, portfolio sites, or even Pinterest and find 5-10 headshots that really nail the vibe you're after. As you collect them, start paying close attention to the little things.
Your mood board is your visual blueprint. You’re not trying to copy someone else’s photo. You’re deconstructing the elements that make it work so you can apply those same principles to your own shoot.
Look for the patterns in the images you save. Are you drawn to soft, natural light, or do you prefer something more dramatic and stylized? Are the backgrounds plain and neutral, or do they have a bit of texture? Breaking down these components is how you build a crystal-clear vision for your own photo.
Choosing Your Wardrobe and Grooming
Your clothes need to support the goal of your headshot, not become the main event. Remember, the focus has to stay on your face and your expression.
Wardrobe Dos and Don'ts
| Do This | Don't Do This |
|---|---|
| Wear Solid Colors: Jewel tones, deep blues, and earthy colors look fantastic on almost everyone. | Wear Busy Patterns: Loud stripes, intricate florals, or big logos are distracting and pull focus away from you. |
| Choose Flattering Necklines: V-necks and scoop necks are great for elongating the neck, while a crisp collared shirt always looks sharp. | Wear Colors That Match the Background: You don't want to be a floating head. If the wall is white, don't wear a white shirt. |
| Prioritize Fit: Make sure your clothes are comfortable, well-fitted, and neatly pressed. Trust me, wrinkles show up on camera. | Wear Anything Too Trendy: A classic, timeless look will serve you for a much longer time. |
Simple grooming is just as crucial. The idea is to look like a polished, well-rested version of your everyday self. This just means making sure your hair is neat, your nails are clean, and your skin is moisturized. If you wear makeup, aim for a natural look that defines your features without being over the top.
This small bit of prep makes a world of difference. It helps you look and feel confident—and that’s the single most important ingredient in any great headshot. Later on, when you're editing, you can even see how an AI professional headshot generator can add that final layer of polish.
Setting Up Your At-Home Photo Studio
You really don’t need a fancy studio to get a professional headshot. Honestly, some of the best portraits I've seen were taken in a simple corner of a living room. The real magic isn't in expensive gear; it's in how you manage two things: your light and your background.
By making a few smart moves, you can turn a small space into a setup that delivers incredible results. The goal is to keep it simple and focus on what makes you look good. This approach not only saves you a ton of money but puts all the creative power right in your hands.
Harnessing Light for Flattering Photos
Light isn't just part of your photo; it’s everything. Great light can make a quick iPhone snap look like it was shot by a pro, while bad light will sabotage a photo from even the most high-end camera. Your top priority is to find or create soft, even light that flatters your face.
The best and cheapest light source you have is a large window on a day with some light cloud cover. This natural light acts like a giant softbox, wrapping gently around your face to smooth out skin and minimize harsh shadows.
- Position yourself correctly: You want to be facing the window head-on. Let that beautiful, soft light illuminate your face directly.
- Get your timing right: Steer clear of direct, hard sunlight streaming in. The golden hours are usually mid-morning or late afternoon, when the light is softer.
- Kill the overheads: Always, always turn off the lamps and ceiling lights in the room. Mixing indoor artificial light with natural daylight creates funky color casts that are a nightmare to correct later.
This quick flowchart breaks down the planning you should do before you even think about setting up.
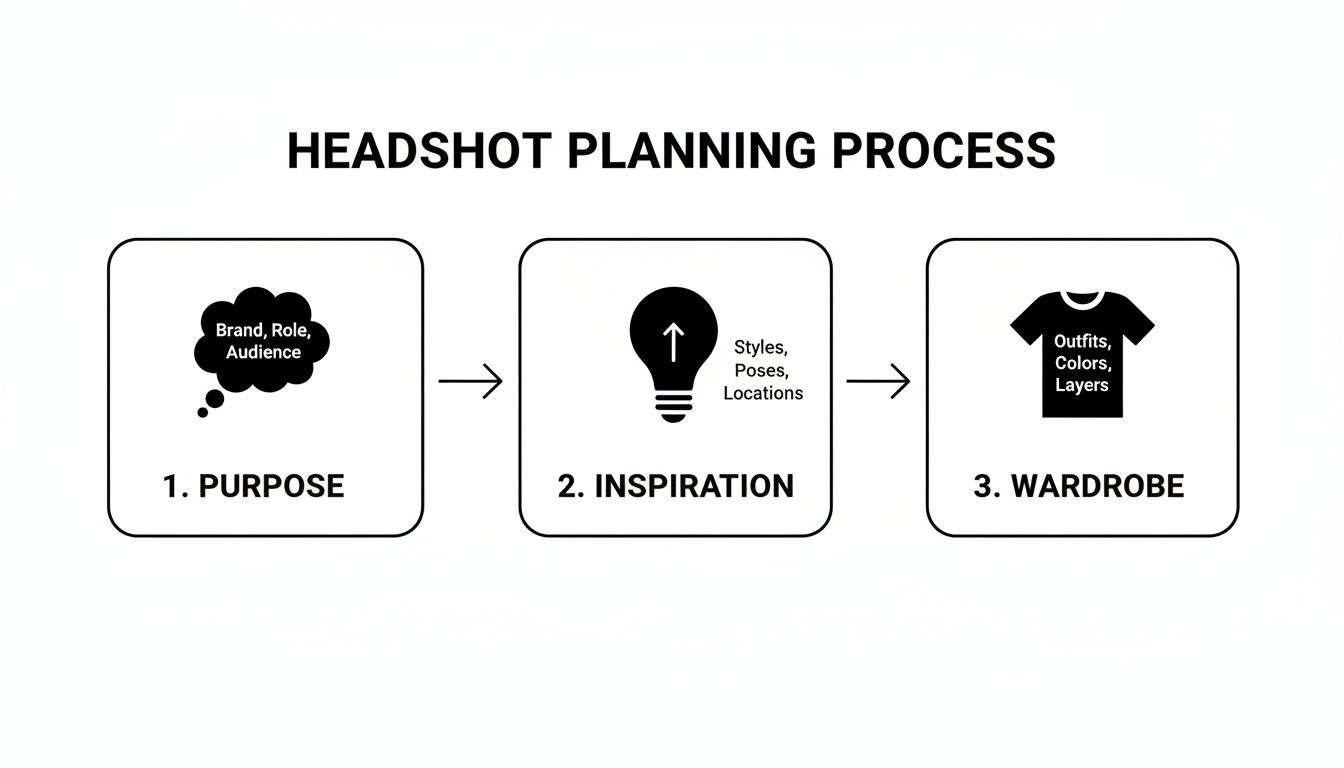
As you can see, figuring out your purpose, grabbing some inspiration, and picking your wardrobe are the essential first steps to a successful shoot.
Inexpensive Artificial Lighting Solutions
No good windows? No problem. You can still create amazing light using things you probably already own or can buy for cheap.
A ring light is a go-to for a reason. They’re designed specifically to produce that even, shadowless light that’s perfect for headshots. You can snag an affordable one online that clips right onto your phone or mounts on a simple tripod.
If a ring light isn't in the cards, a standard desk lamp can be your best friend—with one simple tweak: diffusion.
Never point a bare bulb directly at your face. It's too harsh. Instead, clip a thin white bedsheet or a piece of parchment paper a safe distance in front of the lamp. This instantly softens the light, giving you that same flattering effect as a cloudy day.
Creating a Clean and Professional Background
Your background has one job: to make you stand out. That means it needs to be completely non-distracting. The simplest way to do this is with a neutral, solid backdrop.
Take a look around your home for a plain wall. Light gray, off-white, or even a muted beige can work perfectly. If you don't have a wall that fits the bill, it's easy to make one.
- The Bedsheet Trick: Grab a plain white or gray bedsheet and iron it until it's perfectly smooth. Wrinkles will show up and look unprofessional. Then, just tape or tack it flat against a wall.
- Poster Board Power: For a classic head-and-shoulders crop, you can tape two large pieces of white or black foam core from a craft store together. It creates a flawless, clean slate to shoot against.
The main idea is to eliminate any clutter that might pull attention away from your face. A clean background is an instant upgrade that makes your photo look polished and professional.
Smartphone vs Dedicated Camera
The old debate of using a smartphone versus a "real" camera for headshots is pretty much over. Modern smartphones are absolute powerhouses, and for most people, they are the best and most convenient tool for this job.
Let's be real—we're all pretty used to taking photos of ourselves. In fact, research shows that 18.89% of all selfies in the U.S. are taken right at home. That comfort level is a massive advantage when you’re trying to capture your own professional headshot. You can dig into more selfie stats in this research summary from EBSCO.
Here’s a quick breakdown to help you decide what's right for you:
| Feature | Smartphone Advantage | DSLR/Mirrorless Advantage |
|---|---|---|
| Ease of Use | Super intuitive. Features like Portrait Mode do the heavy lifting by automatically blurring the background for you. | Gives you full manual control over everything from aperture (for that blurry background) to ISO (for low light). |
| Convenience | It's already in your pocket, and you know how to use it. Plus, you can edit and share instantly. | Unbeatable image quality, especially in tricky lighting, and higher resolution for massive prints. |
| Cost | It's free! You already own it. | A significant investment. You'll need a camera body and at least one good lens. |
For almost any online use case—think LinkedIn, your company website, or a speaker bio—a well-lit photo from a modern smartphone is more than capable of producing a sharp, impressive, and professional-looking headshot.
5. Dialing in Your Settings, Pose, and Expression
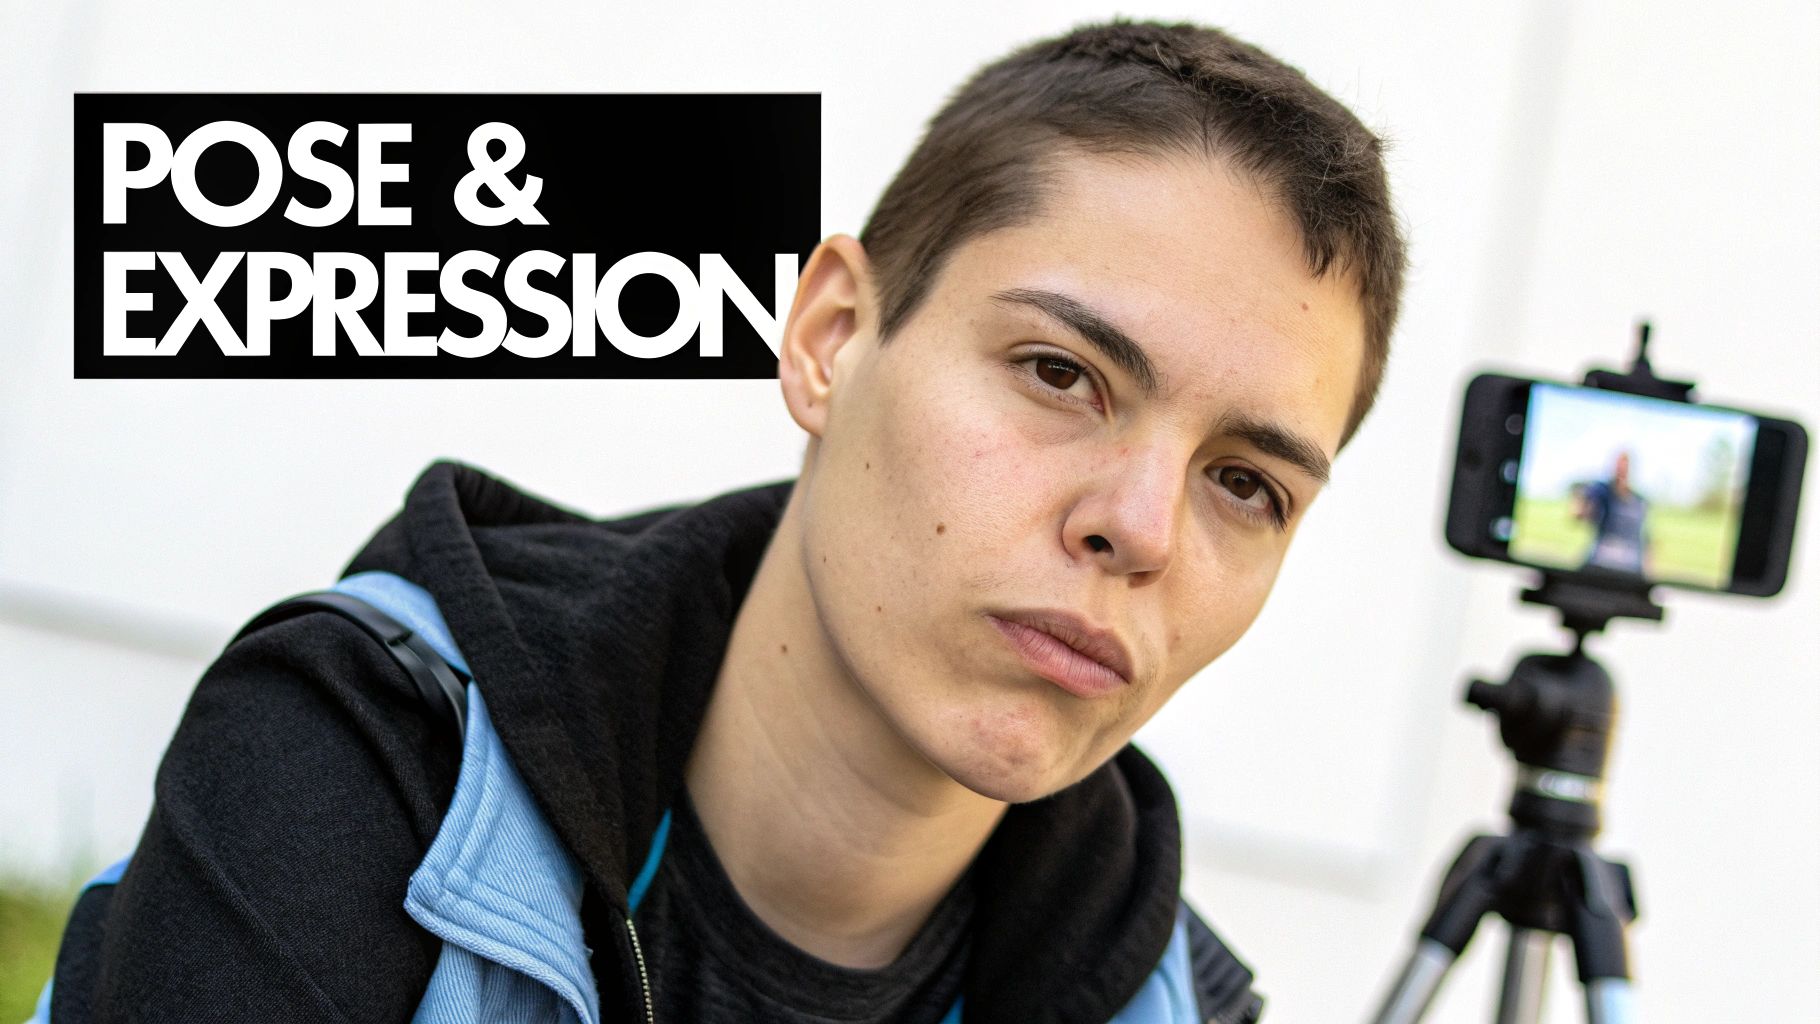
Alright, your lighting is set and the background looks great. Now for the fun part: stepping in front of the camera. This is where the technical side of photography meets the art of human expression, and getting it right is what separates a decent snapshot from a headshot that actually works for you.
We'll start with the camera settings to make sure your image is sharp and professional. Then, we'll get into the specifics of how to pose and what to do with your face so you connect with whoever sees your photo, whether that's a recruiter on LinkedIn or a casting director.
Nailing Your Camera and Smartphone Settings
You don't need to be a photography guru to get this right. We're just going to focus on a couple of key settings that make all the difference.
If you’re using a smartphone, your secret weapon is Portrait Mode. It’s engineered to mimic what professional cameras do—artfully blurring the background so you stand out. It’s a one-tap-wonder for that polished look.
Before you snap away, tap your face on the screen. A little box will pop up, confirming the camera is focused on you. This is crucial. You want that focus to be tack-sharp right on your eyes. If the eyes are even a little soft, the whole photo just feels off.
The number one rule in any kind of portrait work is to get the eyes in focus. They’re what people connect with, and they absolutely have to be sharp.
The other non-negotiable tool is the self-timer or a cheap Bluetooth remote. This is how you avoid the dreaded "selfie arm" and the blurry shots that come from jabbing at the screen. Set your phone on its tripod (or a stack of books), use the timer, and give yourself a few seconds to get into a natural pose.
How to Pose for Different Goals
Your posture and angle say a lot before anyone even reads your name. It sounds a bit dramatic, but it's true. The goal is to make your pose match the purpose of the headshot.
A classic mistake is facing the camera head-on, like a deer in headlights or a passport photo. It often comes across as stiff or even confrontational. An easy fix? Angle your body about 45 degrees away from the camera, then turn your head back to look at the lens. This one little move creates depth and is instantly more flattering and dynamic.
Let's break down a few common scenarios:
- For LinkedIn & Corporate Use: You're aiming for confident, competent, and approachable. Stand tall with your shoulders back and lean ever so slightly toward the camera. This small forward lean conveys engagement and confidence.
- For Actors & Performers: Here, you need to show personality and range. Feel free to experiment more. Lean forward, try a more dramatic turn, or even sit down. Your body language should hint at a character or emotion.
- For Entrepreneurs & Creatives: Let your personal brand shine through. If your brand is high-energy, go for a bigger smile and more open posture. If you're more of a thoughtful, serious type, a quieter, more contemplative pose will feel more authentic.
And what about your hands? Don't just let them hang there. Try crossing your arms (in a relaxed way, not a defensive one), putting one hand in a pocket, or resting a hand on your chin. Just give them something to do so they look intentional.
Capturing an Authentic Expression
This is the soul of your headshot. A fake, plastered-on smile is easy to spot a mile away and can kill your credibility. The real challenge is summoning a genuine expression when it’s just you and a camera on a tripod.
Here’s a trick that always works: think of something that actually makes you happy or proud. Seriously. A funny memory, a recent win at work, your dog doing something goofy—whatever it is, let that feeling bubble up. Your facial muscles will follow, creating a smile that actually reaches your eyes (the famous "smize").
And please, don't just take one picture. Shoot in bursts. Try a sequence of expressions: a small, closed-mouth smile, then a bigger laugh, then a more serious, confident look. The magic is often in the "in-between" moments you didn't plan for.
To pull all the technical pieces together, here’s a quick cheat sheet for your camera settings.
Camera Settings Quick Guide for Headshots
This simple table breaks down the most important settings for getting that professional look, whether you're using a dedicated camera or your smartphone.
| Setting | DSLR/Mirrorless Camera | Smartphone | Why It Matters |
|---|---|---|---|
| Mode | Aperture Priority (A/Av) | Portrait Mode | These modes give you control over the background blur, which is a key ingredient for a pro headshot. |
| Aperture | f/2.8 - f/5.6 | Automatic in Portrait Mode | A wider aperture (lower f-number) creates that beautiful, soft, out-of-focus background. |
| Focus | Single Point AF (on the eye) | Tap-to-Focus (on the eye) | This ensures the most important part of your photo—your eyes—is perfectly sharp and clear. |
| Timer | 2 or 10-second timer | Self-Timer or Remote Shutter | Prevents camera shake and gives you time to get into a natural pose without feeling rushed. |
Getting these settings locked in, combined with intentional posing and a genuine expression, gives you all the ingredients you need for a headshot that looks fantastic and, more importantly, feels like you.
Editing Your Headshot From Good to Great with AI
Snapping the photo is a huge win, but you're not quite at the finish line. Post-processing is where the magic really happens, turning a decent DIY shot into a headshot that looks genuinely professional. This is the final polish that corrects small issues and makes sure your photo screams confidence and competence.
First, we'll walk through a few fundamental edits anyone can do with free tools. After that, we’ll dive into how AI can elevate your image to a whole new level, closing the gap between your home setup and a high-end studio result.
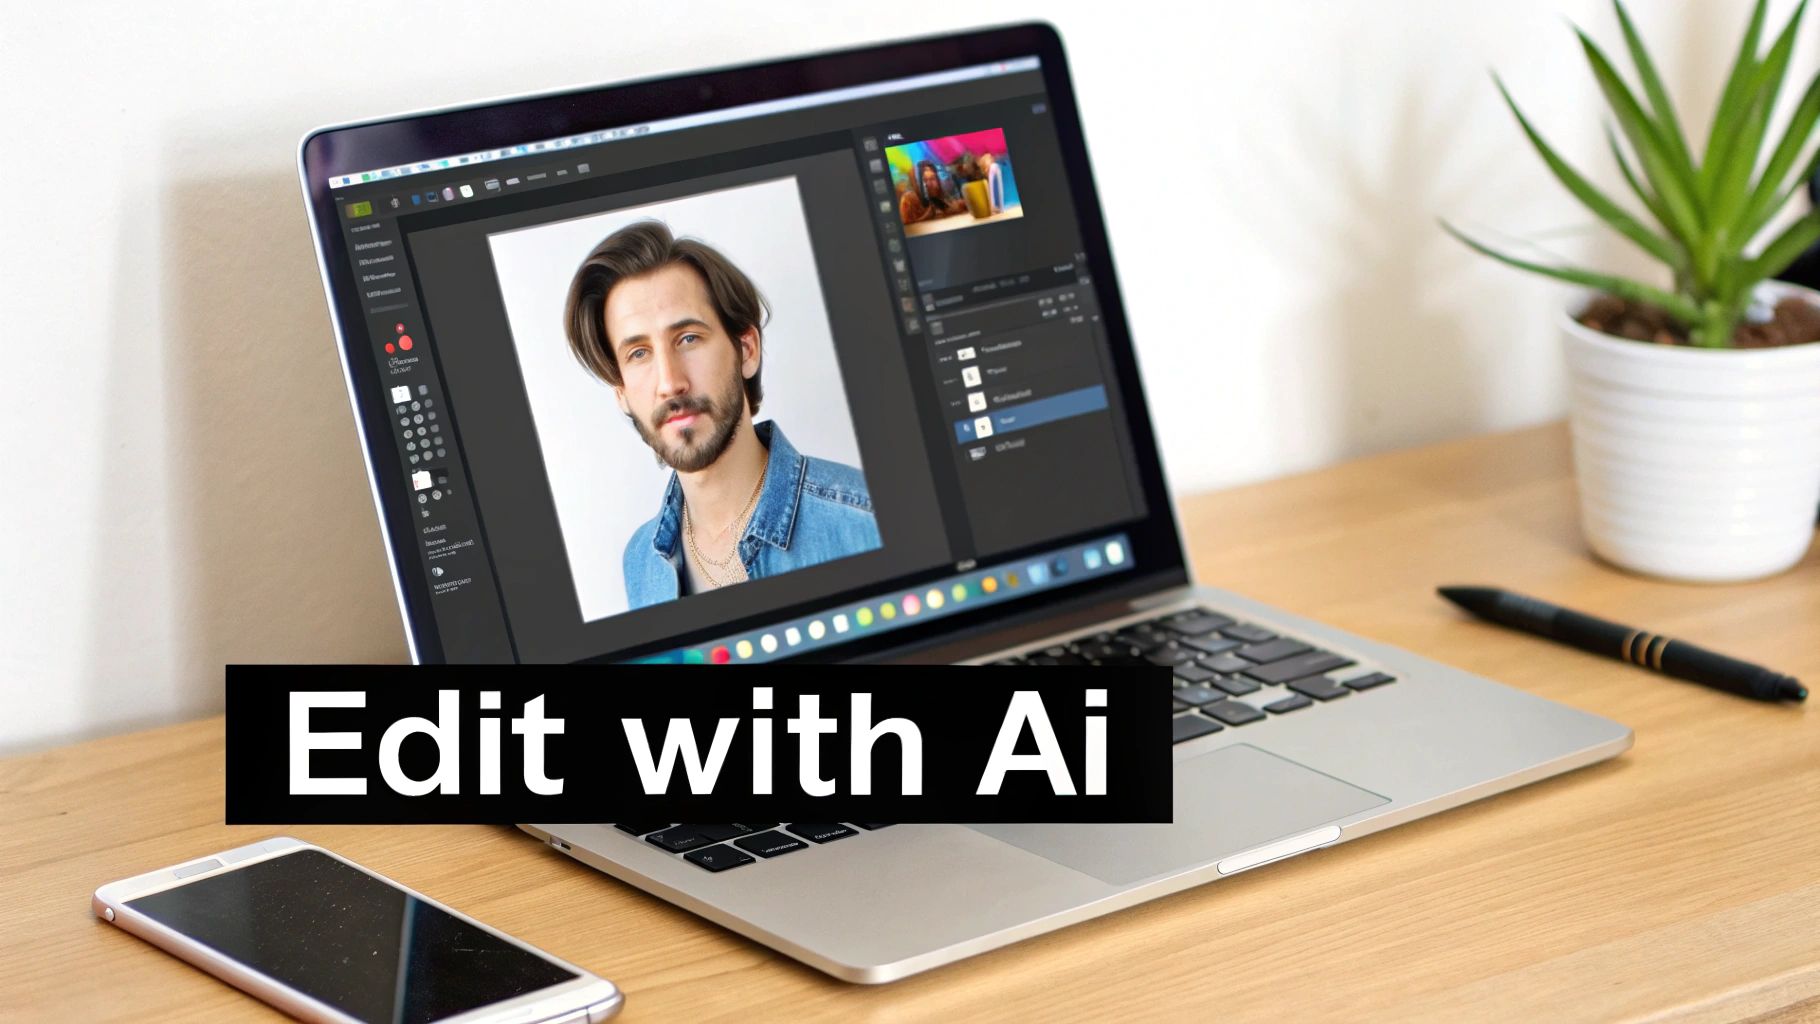
This is what it looks like inside an AI editing tool—you can take one good photo and let the software generate a whole gallery of polished options. It's a powerful way to get a portfolio's worth of professional images from a single source file.
Starting with the Editing Basics
Before you even think about advanced tools, every photo needs a little basic TLC. You can handle these adjustments right in your phone’s built-in editor or a free app like Snapseed. The idea is just to create a clean, balanced canvas to work from.
Here’s what to focus on first:
- Cropping: Your face should be the star. A great starting point is the "rule of thirds"—try to position your eyes along the top horizontal line of a 3x3 grid. This is also your chance to trim out any distracting bits in the background you couldn't avoid during the shoot.
- Brightness & Contrast: Let's be real, your lighting probably wasn't perfect. That's okay. Give the brightness a slight nudge to make the photo feel more open and inviting. A tiny bit of contrast will make the details pop, but don't overdo it and create harsh, unflattering shadows.
- Color Correction: Indoor lighting often casts a subtle yellow or blue tint on everything. Find the "white balance" or "temperature" slider and adjust it until your skin tone looks natural and the whites in the image actually look white.
A light touch is everything. The goal is for your headshot to look like an amazing photo of you, not a heavily filtered picture. The best edits are the ones no one can spot.
Unleashing the Power of AI Editing
Basic tweaks are essential, but AI is how you get that truly professional sheen without needing a graphic design degree. Modern AI tools are built to handle complex editing tasks automatically, giving you a studio-quality finish in minutes.
And the timing couldn't be better. The demand for high-quality, self-directed portraits is exploding. The self-portrait photo studio market hit a valuation of around $1.2 billion in 2024 and is on track to more than double. This surge shows just how critical strong personal visuals have become in our careers, which is why powerful AI tools are becoming so popular—they make top-tier results accessible to everyone.
A Workflow Using PhotoAI Studio
A tool like PhotoAI Studio gives you a clear path to systematically upgrade your headshot. This isn't about altering your face; it's about enhancing the technical quality of the photograph itself.
A great first step is the Photo Upscaler. If your phone photo feels a little soft or low-res, this feature uses AI to intelligently increase its size and sharpness without that dreaded pixelated look. This is a must-do if you plan on using the image for anything high-resolution, like a website banner or a press kit.
Next, let's fix that background. Even with a clean wall, you might have caught some faint shadows or wrinkles in your sheet. The Background Remover is your best friend here. It can instantly swap your real-world background for a perfectly clean, neutral one—think a solid light gray or a subtle, out-of-focus office setting. It's one of the quickest ways to make a DIY shot look like it was taken by a pro.
Generating Polished Variations
Now for the part that feels like a superpower. Instead of being stuck with just one final image, you can use your single best shot to create a whole collection of high-quality options.
When you use the Professional Headshots feature, you simply upload your edited DIY photo. The AI gets to work, generating a gallery of brand-new headshots. It keeps you looking like you but presents your image with different lighting styles, micro-adjustments to your expression, and even alternative professional outfits.
Suddenly, you have options for every platform without having to retake a single picture. You could grab a warm, approachable shot for your personal website and a more classic, formal one for your LinkedIn profile. You can see how this works by trying out the free professional headshot generator here: https://www.photoaistudio.com/tools/free-professional-headshot-generator
Finally, let the AI handle the subtle retouching. It can automatically soften harsh lighting, minimize temporary blemishes, and even out skin tone. The final result is a polished, clean image that still looks completely and authentically like you. And if you want to get even more creative, exploring some of the top AI image models can give you even more ways to personalize your final look.
Your Top DIY Headshot Questions Answered
Even with the best guide in hand, a few questions always pop up right before you start shooting. It's completely normal. Getting those last-minute details sorted out is often the key to moving forward with confidence. Let's tackle some of the most common things people ask when taking their own headshots.
Think of this as the final check-in, the part where we clear up any lingering doubts so you can focus on getting a fantastic photo.
What’s the Best Color to Wear for a Headshot?
When in doubt, stick with solid, deep colors. Shades like navy blue, charcoal gray, maroon, and forest green are fantastic because they create a natural contrast that draws attention to your face, right where it should be. The idea is to wear the outfit, not let the outfit wear you.
There are a few things I always tell people to avoid:
- Busy patterns or big logos. They’re just distracting and pull the eye away from your expression.
- Colors too close to your skin tone. This can easily wash you out, making you look pale or faded.
- Anything that matches your background. You need to stand out from the background, not blend into it.
At the end of the day, the best outfit is one you feel powerful in. If you pick something that fits you well and makes you feel confident, that energy will absolutely translate into the final shot.
Can I Really Get a Good Headshot with Just My Phone?
Yes, you absolutely can. The cameras in modern smartphones are incredible, and features like Portrait Mode are specifically designed to mimic the shallow depth-of-field you see in professional photos, giving you that nice blurry background.
The secret to a great smartphone headshot isn't the phone itself—it's the light. Good, soft light from a window paired with a simple background can give you a result that rivals what you’d get from a much more expensive camera.
The one non-negotiable accessory? A small tripod. Using a tripod with a remote shutter or your phone's self-timer is the only way to completely eliminate camera shake. This tiny step frees you up to concentrate on your expression instead of fumbling with the phone.
How Do I Make Sure My Headshot Doesn't Look Like a Selfie?
That classic "selfie look" comes from holding the camera at arm's length, which creates a bit of wide-angle distortion. The fix is surprisingly simple: get some distance between you and the camera.
Set your phone up on a tripod or lean it against a stack of books a few feet away. This is where a Bluetooth remote or the self-timer becomes essential. It lets you trigger the shot without your arm awkwardly reaching into the frame, which instantly makes the photo look more professional. Finally, change your posture. Instead of a casual, tilted selfie pose, square your shoulders and face the camera with intention.
Ready to take your best shot and turn it into a gallery of professional options? Photo AI Studio uses powerful AI to enhance your photos, remove backgrounds, and generate dozens of polished headshot variations, giving you the perfect image for any platform. Create your professional headshot today


