
Taking your own headshot is simpler than you might think. All you really need is a window with soft natural light, a plain background, and your phone on a tripod to get a clean shot from the chest up.
By mastering just a few basics, you can create a genuinely professional image that builds credibility without the high cost of a studio session.
Why a Great Headshot Is Your Digital Handshake
In a world where so much of our work and networking happens online, your headshot is often the first impression you make. Before anyone reads your resume, your proposal, or even your LinkedIn profile, they see your photo. It’s your digital handshake—instantly communicating professionalism, approachability, and confidence.
The big challenge, of course, is that traditional studio sessions can be expensive. At the same time, a blurry selfie taken in your car or a poorly lit room can seriously undermine your credibility before you’ve even had a chance to say hello.
Bridging the Gap Between Cost and Quality
This is where learning to take your own headshot becomes such a powerful skill. It’s not about becoming a professional photographer overnight; it’s about taking control of your personal brand. A well-executed DIY photo closes the gap between a pricey studio package and a low-effort snapshot, giving you a polished image that opens doors.
The good news is, you almost certainly own the right equipment already. With smartphones now accounting for about 94% of all photos captured globally, the camera in your pocket is more than capable. Yet, with the portrait photography market valued at a staggering $20.6 billion and sessions costing anywhere from $175 to $1,500, the demand for high-quality results isn't going anywhere.
Your headshot is a key part of your professional identity. It’s a visual anchor that helps people connect a name to a face, making you more memorable and trustworthy in a crowded online space.
Taking Control of Your Professional Image
Ultimately, a great headshot is an investment in yourself. It gives you the power to present yourself exactly how you want to be seen—whether you're a freelancer pitching new clients, a job seeker chasing your dream role, or an entrepreneur building a brand from the ground up.
You have complete control over the final image, ensuring it aligns perfectly with your industry and personal style. For those looking to elevate their DIY shots even further, exploring options for AI-generated professional headshots can provide studio-quality results using your best self-portraits as a starting point.
Setting Up Your At-Home Photo Studio
You really don't need a Hollywood-level budget or a dedicated studio to get a professional headshot. I’ve seen amazing results come out of spare bedrooms and living rooms. It all comes down to controlling just three things: your equipment, the lighting, and your background.
And yes, your smartphone is more than capable of capturing a fantastic, high-quality image. The cameras on modern phones, especially the main rear lenses, are incredibly sharp. The key is to avoid that awkward "selfie arm" look and any potential for blur. That's where a small, inexpensive tripod and a Bluetooth remote shutter become your best friends. They're a tiny investment for a massive leap in quality.
Getting this right is the first domino to fall in making a great professional impression.
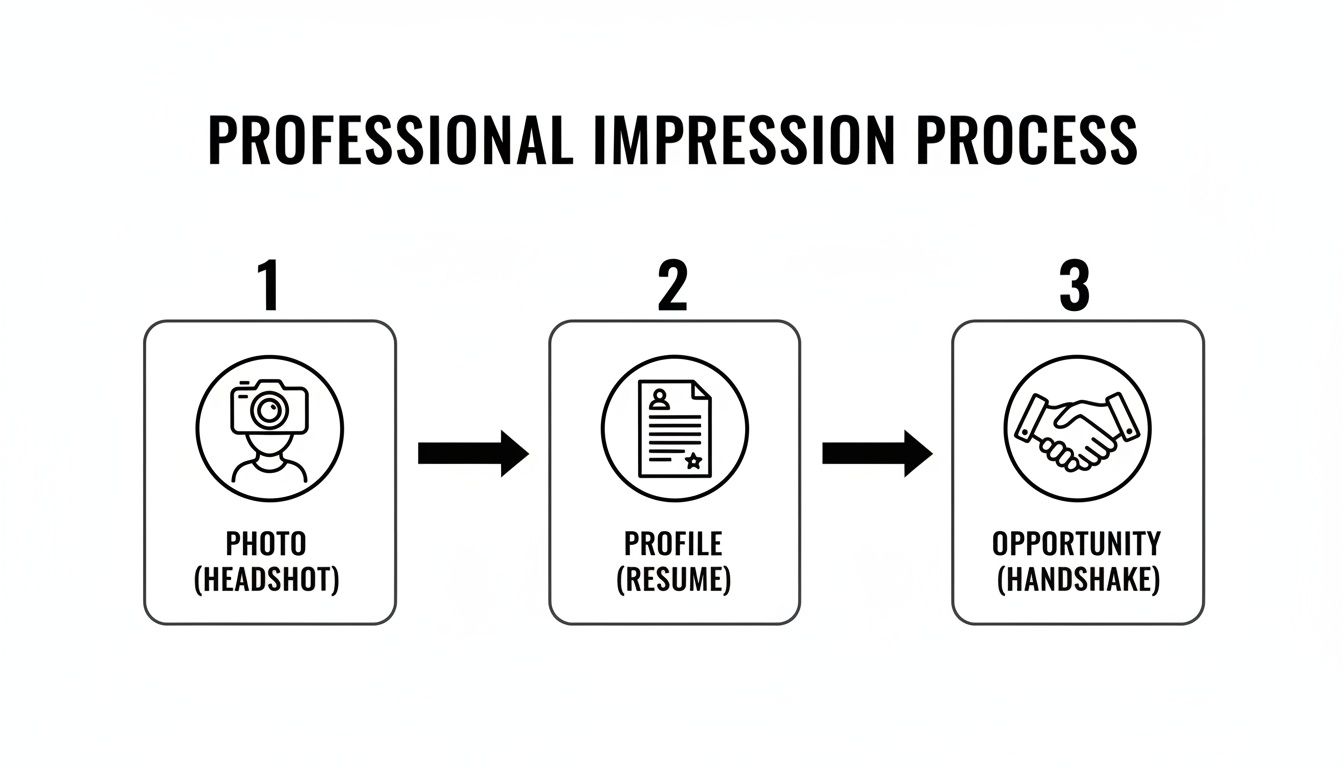
As you can see, a strong headshot kickstarts a process that leads to real-world opportunities.
DIY Headshot Equipment Checklist
Getting your gear together doesn't have to be complicated or expensive. Here’s a quick checklist of what you'll need, from the absolute basics to some nice-to-have extras that can elevate your shot.
| Equipment | What You Need | Pro Tip |
|---|---|---|
| Camera | Your smartphone's rear camera or any DSLR/Mirrorless camera. | Clean your lens with a microfiber cloth before you start! Smudges are the enemy of sharp photos. |
| Tripod | A simple, stable tripod for your phone or camera. | Even a stack of books on a table can work in a pinch, but a tripod gives you much more control over height and angle. |
| Remote Shutter | A small Bluetooth remote or your camera’s self-timer function. | Using a remote eliminates the tiny shake caused by tapping the screen, ensuring your photo is perfectly crisp. |
| Light Source (Optional) | A window with natural light is best. A ring light is a good alternative. | If you use a ring light, dial the brightness down. Overly bright, flat light can wash out your features. |
| Background (Optional) | A plain, neutral-colored wall. | A clean, ironed bedsheet (white or gray) taped to the wall makes a perfect, non-distracting backdrop. |
| Reflector (Optional) | A piece of white foam board or poster board. | Hold this just out of frame below your chin to bounce soft light back into your face, filling in any shadows. |
With these simple tools, you have everything required to create a professional-grade setup right in your own space.
Find the Perfect Natural Light
Light is everything in photography. It’s the one thing that will make or break your headshot, and thankfully, the best light is usually free.
Your goal is to find a large window and position yourself facing it. The best time of day is typically mid-morning or late afternoon when the sun isn't blasting directly through the glass. This indirect sunlight creates a soft, diffused glow that is incredibly flattering and erases harsh shadows from your face.
Whatever you do, don't stand with the window behind you—you'll end up as a dark silhouette. Also, be sure to turn off any overhead lights in the room. Ceiling lamps often cast a weird, yellowish tone and create unflattering shadows under your eyes. Stick with the natural light. It’s your secret weapon.
Choose a Simple Background
The background of your photo should do one job: make you stand out. It needs to be completely non-distracting. A plain, solid-colored wall is almost always the best choice.
Look for a spot that is:
- Neutral in color: Think light gray, off-white, or even a muted beige.
- Completely clear: Take down any picture frames, posters, or clutter in the shot.
- Evenly lit: Make sure there aren't any weird shadows or bright spots falling on the wall itself.
A busy or messy background instantly screams "amateur," no matter how sharp you look. A simple backdrop communicates professionalism and focus.
If you don’t have a perfect wall, no problem. You can easily create one. Just hang a plain bedsheet (make sure to iron out the wrinkles first!) or a large piece of poster board. The goal is just to create a clean, uniform canvas that isn’t competing for attention.
Select Your Wardrobe Wisely
What you wear sends an immediate message. Your outfit should feel right for your industry and your personal brand, but a few universal rules always apply.
Solid colors are your friend. Deep tones like navy, dark green, burgundy, or even classic black and white almost always look great and photograph well. They help you pop against a neutral background.
It's best to steer clear of anything that could pull the viewer's eye away from your face. That means avoiding busy patterns, large logos, or anything neon. You're aiming for a timeless look, so pick something you’d feel confident wearing to a big client meeting or an important interview. And of course, make sure your clothes are clean, well-fitting, and wrinkle-free before you start shooting. That little bit of prep makes a huge difference.
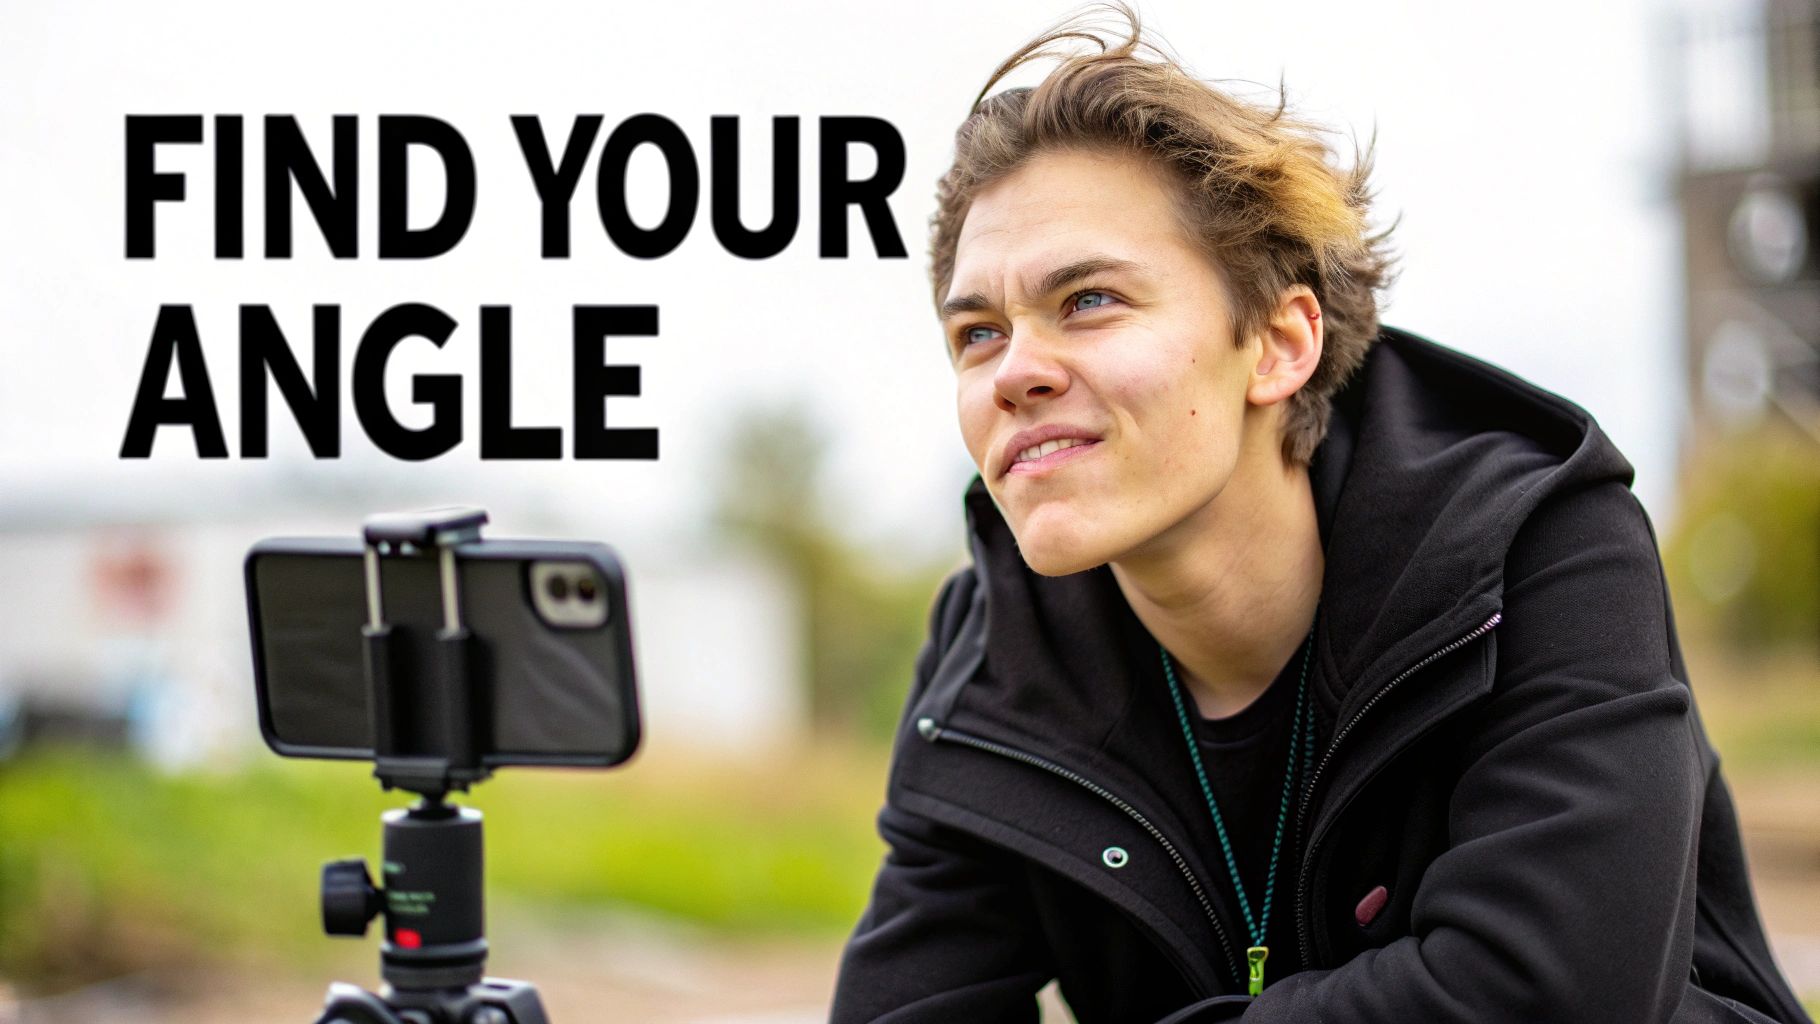
Finding Your Angle and Nailing the Shot
Okay, your home studio is set. Now it’s time to step in front of the camera. This is where you switch from being a technician to a performer, but don't sweat it—this part is easier than it sounds. The whole point is to capture an image that feels confident and, most importantly, genuinely you.
First things first, let's dial in your camera settings. If you’re using a smartphone, your best friend is Portrait Mode. This feature is engineered to create that professional-looking shallow depth of field, which just means it blurs the background and keeps all the focus right where it belongs: on you.
For those of you with a DSLR or mirrorless camera, flip that dial over to Aperture Priority mode (usually marked 'A' or 'Av'). You'll want to set your aperture to a low number—anything between f/1.8 and f/4 is the sweet spot. This will give you that beautiful, soft background that makes your portrait pop.
Master Your Pose and Posture
The way you hold yourself says a lot before you even crack a smile. A great headshot pose should look relaxed and self-assured, not stiff and awkward. Standing flat-footed and staring straight into the camera is a classic mistake. It often looks more like a passport photo than a professional portrait.
Instead, try these simple tweaks for a much more dynamic and engaging look:
- Angle Your Body: Turn your body about 45 degrees away from the camera, then just turn your head back to face the lens. This little twist instantly creates a more flattering and three-dimensional shape.
- Fix Your Posture: Stand or sit up straight. Roll your shoulders back and down. Think about elongating your neck. It’s a small change that immediately projects more confidence.
- Lean In (Just a Bit): A subtle lean toward the camera from your hips creates a feeling of connection and makes you seem more approachable.
Here's a classic photographer's trick: push your chin slightly forward and then down. It feels weird—they call it "turtling"—but it does wonders for defining your jawline and getting rid of any hint of a double chin.
Find an Authentic Expression
Your expression is the heart and soul of your headshot. We can all spot a forced, cheesy grin from a mile away, and it just feels insincere. The goal is to capture a look that’s warm, approachable, and true to your personality.
Don't just say "cheese." Seriously. Think of something that actually makes you happy or proud—a recent win at work, a funny memory, or someone you love. This will bring a genuine light to your eyes and a real warmth to your smile that you just can't fake.
It also helps to practice in a mirror first. See what a subtle, closed-mouth smile feels like compared to a bigger, toothy one. Find the one that feels the most like you on a good day.
A Quick Word on Safety
The pressure to get that perfect shot is real. Back in 2015, research showed that 95% of millennials had taken a selfie. But that trend has a dark side; by that same year, more people had died from selfie-related accidents than from shark attacks. The lesson here is simple: your best headshot will come from a safe, controlled environment, not a risky one. You can learn more from EBSCO's research on the culture surrounding selfies.
Editing Your Headshot for a Polished Finish
Taking the picture is just step one. The real transformation often happens in post-production, where a few thoughtful tweaks can take your DIY headshot from "pretty good" to genuinely professional. A raw, unedited image is your canvas; editing is where you add the polish.
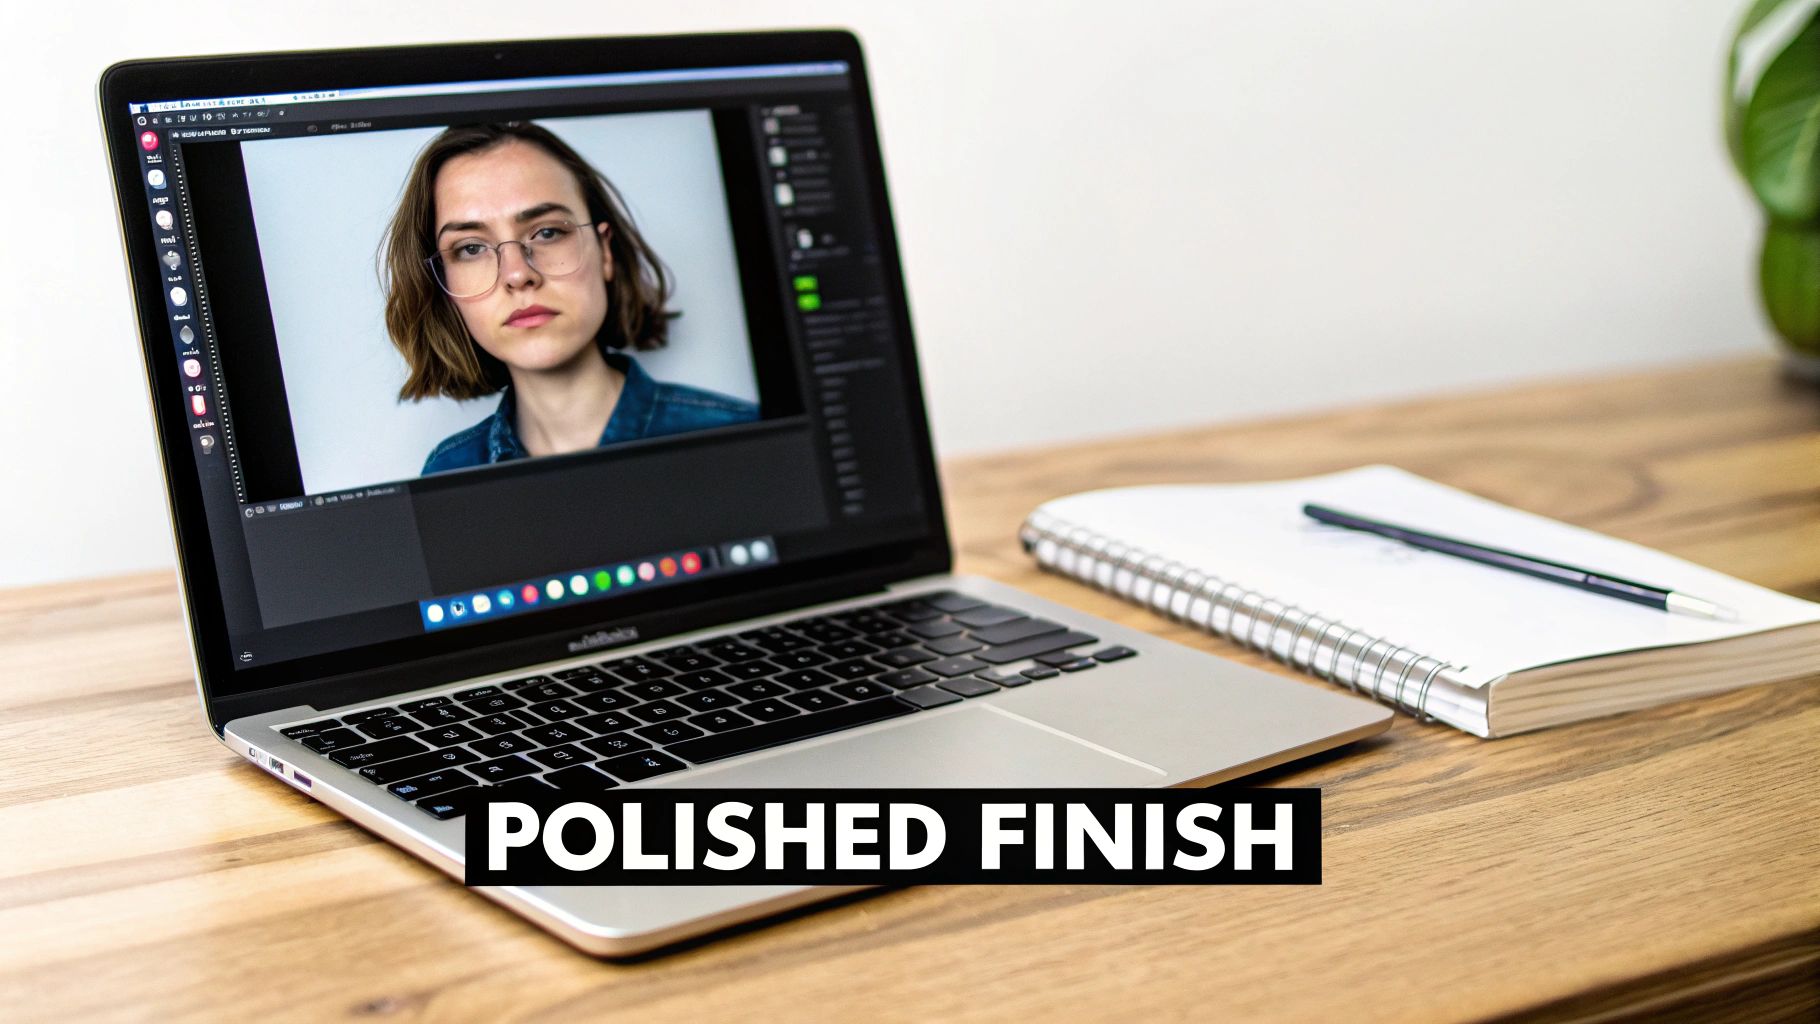
You absolutely don't need to be a photo editing wizard to make a huge impact. Free mobile apps like Snapseed and Lightroom Mobile, or even your phone's built-in photo editor, are packed with powerful tools. The trick is to aim for subtle enhancements, not a complete overhaul.
Start with the Essentials: Cropping and Straightening
Before you touch any colors or lighting, get the composition right. Nothing screams "amateur" like a crooked photo. Use the straightening tool to align the image—this tiny fix instantly makes your shot feel more intentional and professional.
Next, it’s time to crop. For a classic headshot, you want a tight head-and-shoulders frame. Try using the rule of thirds as a guide, placing your eyes along the top horizontal line of the grid. It’s a simple trick that creates a much more engaging composition than just sticking your face in the dead center.
- Cut the clutter: Crop out any distracting background elements that don’t add value to the shot.
- Think about format: Keep your crop proportional to where it will be used. A 1:1 square is perfect for LinkedIn, while a 4:5 vertical works great for Instagram.
This first step is all about making you the undeniable focus of the image, which is the whole point of learning how to take your own headshot.
The best edit is one that nobody notices. Your goal isn't to create a new version of yourself, but to present the best, most authentic version. Keep your adjustments subtle and realistic.
Adjusting Light and Color for a Natural Look
With your composition locked in, it's time to fine-tune the lighting and color. The mission here is to look bright, clear, and natural—not like you just discovered the saturation slider for the first time.
Start with brightness (sometimes called exposure). Nudge it up until your face is well-lit, but be careful not to blow out the highlights or make it look washed out. Then, add a touch of contrast to give the image a little more depth and pop. A little goes a long way here; too much can create harsh, unflattering shadows.
Color is just as important. If your lighting cast a weird yellow or blue hue on the photo, the white balance or temperature slider is your best friend. Tweak it until your skin tone looks accurate and natural. For really granular control over color and tone, you’ll eventually want to work with powerful editing software like Adobe Photoshop.
Finally, a tiny bit of sharpening can make the details in your eyes and hair look wonderfully crisp. But be warned: over-sharpening is a common mistake that can make an image look grainy and fake. Less is definitely more.
Using AI to Create Studio-Quality Headshots
So, you’ve captured and edited your best DIY shots. Now what? This is where things get really interesting. Artificial intelligence isn't some far-off sci-fi concept anymore; it's a practical tool that can take your simple, well-lit photos and transform them into a full gallery of studio-quality headshots.
This isn't about creating a fake avatar. It’s about using your own authentic self-portraits as a high-quality starting point. An AI platform can then generate dozens of variations, putting you in different professional outfits, against various backdrops, and under perfect studio lighting—all while keeping you looking like you.
This approach completely sidesteps some of the biggest hassles of DIY photography. Forget about buying multiple expensive outfits or scouting for different locations. You can generate a polished headshot for your LinkedIn profile and, a minute later, create a more creative one for your personal brand, all from the same initial set of photos.
How Does AI Headshot Generation Actually Work?
The process is surprisingly simple. You start by uploading a handful of your best self-portraits—the clearer and more varied they are, the better the final result will be. The AI gets to work analyzing your unique facial features from these images to build a personalized model.
From there, you get to pick from a huge range of styles. Need a serious corporate look with a sharp blazer? Or maybe a more approachable, casual vibe in a simple sweater? The platform generates brand new, photorealistic images that match exactly what you're looking for. The best tools can produce an incredible variety, giving you options for every professional scenario you can think of.
If you want to see how it works firsthand, you can test out a free professional headshot generator and get a feel for the process.
Most platforms have a clean, user-friendly interface that guides you right through it.
It’s as simple as uploading your images and then choosing the styles you want to generate.
Beyond Generation: AI Photo Enhancers
The explosion of AI in photography is part of a much bigger trend. Self-directed portrait creation has become a massive global market, with annual revenues around $3 billion and projected to hit $6.45 billion by 2025. People are more comfortable than ever being their own photographer, a shift that has paved the way for these powerful AI tools.
Beyond just generating entirely new headshots, other AI-powered enhancers can make a huge difference to the photos you’ve already taken:
- AI Upscalers: If your original photo isn't quite as high-res as you'd like, an AI upscaler can intelligently increase its size and sharpness without that blurry, pixelated look.
- Background Changers: Not thrilled with your living room background? AI tools can seamlessly cut you out and place you against a clean studio backdrop, an office setting, or any other scene you can imagine.
Think of AI as your virtual photography assistant. It takes care of the technical stuff—lighting, background, wardrobe—so you can focus on capturing a great expression and let the technology handle the rest.
These tools offer a flexible and seriously cost-effective alternative to a traditional photoshoot. For a deep dive into using AI to get professional results in minutes, there are some great guides on how to take your own headshots instantly with AI. By combining solid DIY photography skills with smart AI tools, you can build a versatile portfolio of headshots that are ready for any opportunity that comes your way.
Answering Your Top Headshot Questions
Even with the perfect setup, a few nagging questions always seem to pop up right when you’re trying to get the shot. Let's clear up some of the most common hurdles people hit when taking their own headshots so you can get back to it with confidence.
What Should I Wear?
This is always the first question, and the advice is simpler than you'd think. While solid, neutral colors are always a safe bet, don't feel boxed in. A pop of color, like a rich jewel tone (think sapphire blue or emerald green), can look fantastic as long as it isn't so bright that it distracts from your face.
The golden rule? Wear something that fits you well and, most importantly, feels like you. If you feel awkward or uncomfortable in an outfit, it will show on camera every single time.
How Should I Smile in My Headshot?
To smile with teeth or not to smile with teeth—that is the question. And honestly, there’s no single right answer. It comes down to your industry, your personality, and the message you want to send.
For more buttoned-up, corporate roles (think finance or law), a confident, closed-mouth smile often projects the right mix of seriousness and authority. But for more creative, collaborative, or client-facing fields, a genuine, warm smile showing some teeth can make you seem far more approachable and trustworthy.
My advice? Take a bunch of both! Fire off a series with a subtle, confident smile, then think of something that genuinely makes you laugh and capture that open, happy expression. You can decide later which one fits best for LinkedIn versus your personal website.
Your expression is the most powerful tool you have for making a connection. Aim for a look that feels authentic, not forced. Just before you snap the picture, think of a recent win at work or a funny memory. That little trick will bring a natural light to your eyes that you just can't fake.
Can I Wear My Glasses?
Yes, absolutely! If you wear glasses every day, they are part of your look and professional identity. You should definitely wear them in your headshot.
The only real challenge is managing glare. To avoid it, pay close attention to where your main light source is. If you see a bright reflection on your lenses, you'll need to adjust. Try turning your body slightly away from the light or tilting your head down just a fraction of an inch until the reflection disappears.
How Many Headshots Should I Take?
Whatever number you have in your head, double it. Seriously. Don't just stop when you get one or two that look "good enough." It is always, always better to have too many options than not enough.
As a baseline, aim to take at least 20-30 photos in a single session. Make tiny adjustments between each shot—shift your weight, change the angle of your chin, try a slightly different smile. This creates a wide variety to choose from later.
It’s also great preparation if you plan on using an AI headshot service. These tools work best when they have multiple source images to learn from. The different options available in the PhotoAI Studio pricing plans can give you incredible flexibility with the shots you've taken.
Ready to turn your best DIY shots into a full gallery of professional options? PhotoAI Studio uses your photos to generate dozens of studio-quality headshots in different styles, outfits, and backgrounds. Create your perfect headshot today!


