You don't need to book an expensive photographer to get a headshot that makes you look great. Believe it or not, the powerful camera you carry around every day is more than capable of capturing a truly professional image.
Honestly, the most important part of learning how to take a headshot with your iPhone has nothing to do with the phone itself. It's all about simple preparation, like picking the right outfit and finding a good background.
Your iPhone Is the Only Studio You Need
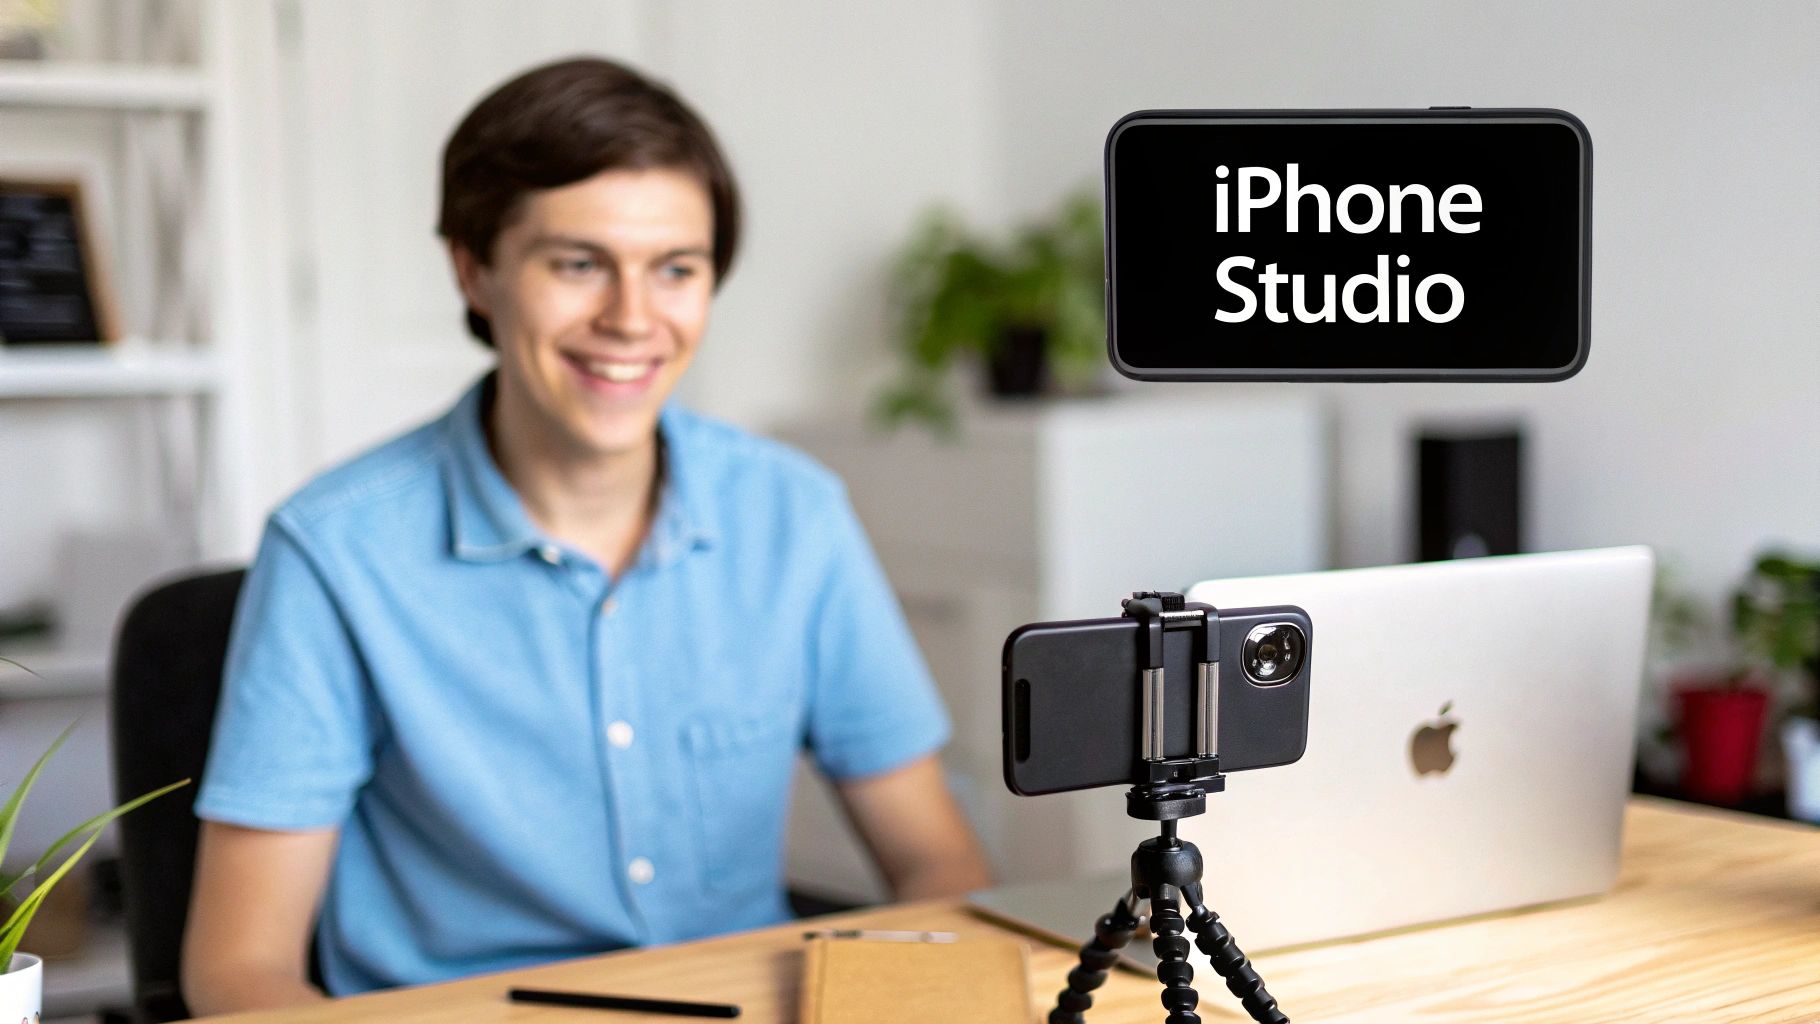
Forget the idea that you need a fancy studio. Smartphones have completely changed photography. To put it in perspective, a mind-boggling 92.5% of all photos taken worldwide in 2023 were captured on phones.
Even the pros are on board; a recent survey found that 86% of photographers actually prefer using their iPhones for everyday shooting. You can dive deeper into these kinds of photography trends over at The Studio Pod.
Getting a great shot starts long before you even think about pressing the shutter button. When you set the stage correctly from the beginning, the rest of the process becomes so much easier, and the final result is always better.
Plan Your Wardrobe and Background
What you wear really matters. My advice? Stick with simple, solid-colored tops. Pick a color that you know looks good with your skin tone.
It's best to steer clear of anything with busy patterns, big logos, or anything else that might pull attention away from your face. You really can't go wrong with timeless choices like a classic button-down shirt, a simple blouse, or a sweater that fits you well.
Now, for the background. You want it to add a little context without being distracting. For a corporate or more formal headshot, a clean wall in a neutral color is your best bet. If you're going for something more casual, a softly blurred outdoor setting or even a tidy home office can work perfectly. The key is to make sure there's no clutter or weird shadows behind you.
Key Takeaway: The goal is for you to be the focus of the photo, not your clothes or what's happening behind you. Simplicity is your best friend here.
Lastly, don't forget the little things. Make sure your hair is neat, and try to relax into a natural, friendly expression. It makes a world of difference.
Getting Your iPhone Camera Settings Just Right
To get a headshot that looks like it came from a pro's camera, you need to step out of the iPhone's automatic "point-and-shoot" world. A few simple tweaks to the settings will make a night-and-day difference, elevating a basic photo into a polished, professional portrait.
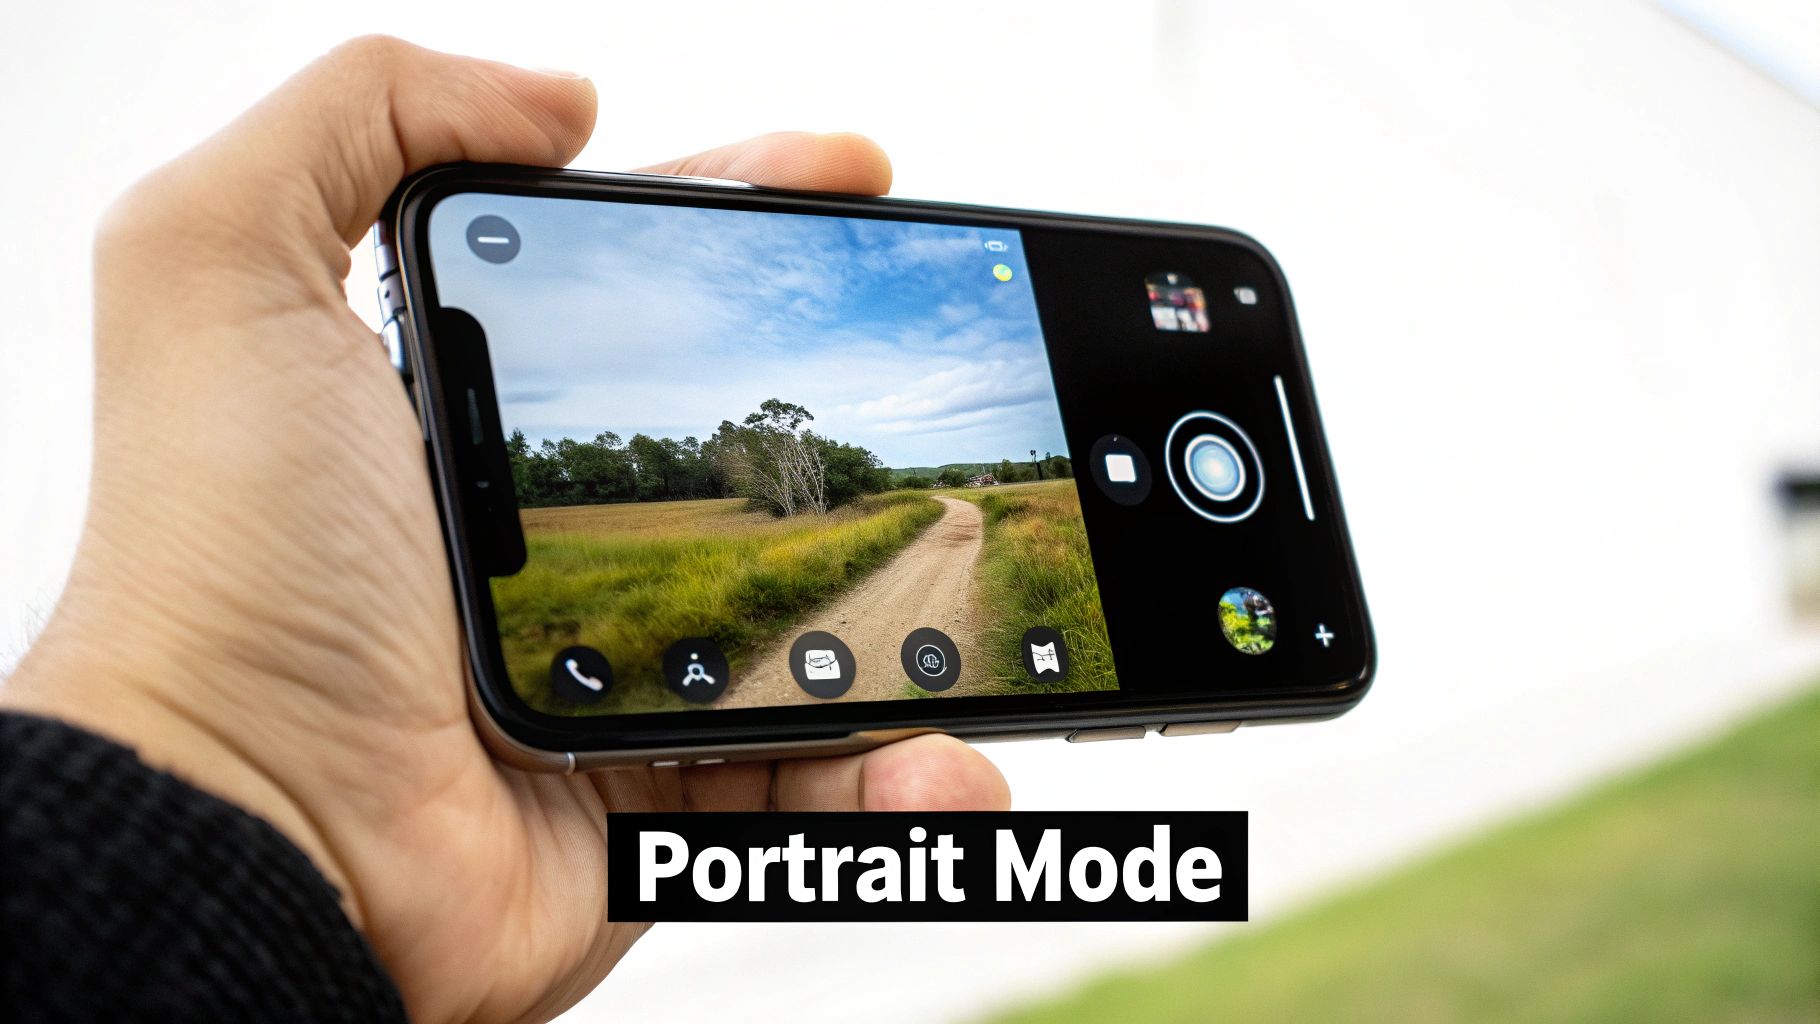
The secret weapon here is Portrait Mode. This feature is an absolute game-changer, using some clever software to replicate the shallow depth of field you'd get from a high-end DSLR camera. It keeps your face perfectly sharp while artfully blurring the background, creating that beautiful bokeh effect that makes your portrait pop.
Taking Control of Focus and Exposure
Don't just open Portrait Mode and start snapping away. You need to tell the camera exactly what's important. Tap your face on the screen, and you'll see a yellow box appear—that’s your focus point.
Next to that box, a small sun icon will show up. This is your exposure control. Slide it up to brighten the shot or down to darken it. It's a tiny adjustment that makes a massive difference, preventing your face from being blown out by bright light or lost in shadows.
Once you have the focus and brightness dialed in, lock it down. Just tap and hold the screen for a couple of seconds until you see “AE/AF LOCK” flash at the top. This is a crucial step! It freezes your settings, so even if you shift a little or a cloud passes by, your shot stays perfectly focused and exposed.
Choosing Your Lens and Staying Steady
It might be tempting, but resist the urge to use the front-facing selfie camera. Its wider lens can slightly distort your features, which is the last thing you want in a professional headshot.
Always flip to the rear camera system. For the most flattering and true-to-life perspective, stick with the 1x or 2x telephoto lens options. They provide a much more natural compression, similar to what a professional portrait photographer would use.
And here’s a tip for getting a crisp, non-blurry shot: use the timer. Fumbling to press the shutter button can cause camera shake. By setting a timer on your iPhone camera, you can get into position, perfect your expression, and let the phone do the work.
For a quick summary of what to adjust, here’s a handy table.
Essential iPhone Camera Settings for Headshots
| Setting | Recommended Action | Why It Matters |
|---|---|---|
| Camera Mode | Use Portrait Mode. | Creates a professional-looking blurred background (bokeh) that makes you stand out. |
| Lens | Use the rear camera's 1x or 2x telephoto lens. | Avoids the facial distortion common with the wide-angle front-facing camera. |
| Focus | Tap your face on the screen to set the focus point. | Ensures your eyes and facial features are perfectly sharp. |
| Exposure | Tap the screen, then slide the sun icon up or down. | Gives you manual control over brightness to prevent images from being too dark or washed out. |
| AE/AF Lock | Tap and hold on the focus point until "AE/AF LOCK" appears. | Locks in your focus and exposure settings, ensuring consistency between shots. |
| Timer | Set a 3 or 10-second timer. | Eliminates camera shake from pressing the shutter, resulting in a sharper photo. |
Nailing these settings in-camera is the first and most important step. For more advice on taking your photos to the next level, you can find some great editing tips on the Photo AI Studio blog: https://www.photoaistudio.com/blog
Finding Flattering Light for Your Headshot
Let's be clear: great lighting is the one thing that will make or break your headshot. It’s more critical than your camera, the background, or even what you’re wearing. The best part? You don’t need a fancy studio. Incredible light is all around you, and it's usually free.
The gold standard for a headshot is soft, diffused light. Picture the kind of light that streams through a big window on a cloudy day. It wraps around your features, gets rid of harsh shadows, and gives your skin a smooth, clean look.
To capture this, just stand facing a large window. You want that light hitting you straight on, not from the side or behind. Play with your distance—take a step back or forward until the light looks balanced and even across your face.
Create Your Own Lighting Setup
Can't find good natural light? No problem. You can build a surprisingly effective setup with a few lamps you probably already have lying around the house. A classic three-point lighting arrangement is simpler than it sounds and will instantly elevate your shot.
Key Light: This is your star player, your main light. Position a lamp about 45 degrees to one side of your face. It should be the brightest of the bunch.
Fill Light: Grab a second lamp, maybe a slightly dimmer one, and place it on the opposite side. Its only job is to soften the shadows created by the key light so they aren't too dramatic.
Back Light (Optional): If you have a third lamp, place it behind you, just out of the shot. This creates a subtle glow around your hair and shoulders, which is a classic trick to make you pop from the background.
Pro Tip: If your lamps are creating a harsh, direct glare, soften them up! You can bounce the light off a white wall or even hang a thin white bedsheet over the lamp to diffuse it. Safety first, of course—make sure the bulb isn't touching the fabric.
Common Lighting Mistakes to Avoid
Knowing what not to do is just as important. A few common mistakes can ruin an otherwise perfect headshot.
First, stay away from standing directly under an overhead ceiling light. This is a recipe for unflattering "raccoon eyes," casting deep, dark shadows under your brows and chin.
Also, never, ever face the bright, direct sun. It forces you to squint and creates hard, unforgiving shadows that emphasize every tiny line and blemish. Always look for that soft, even light, and you'll be setting yourself up for a fantastic photo.
Posing and Framing for a Confident Look
How you carry yourself in the frame is just as important as the lighting or camera settings. It’s what conveys personality. A few simple tweaks to your pose and the way you frame the shot can make all the difference between a flat, awkward photo and a headshot that genuinely projects confidence.
First things first, avoid facing the camera head-on. That's the classic passport photo mistake, and it tends to make you look wider and less dynamic. Instead, try angling your body about 45 degrees away from the camera, then turn your head back to face the lens. This instantly creates more depth and a flattering line. Another pro tip is to be mindful of your chin—a slight downward tilt can really define your jawline, but be careful not to tuck it in too much.
Composition and Expression
The way you position yourself in the frame is your way of guiding the viewer’s attention. One of the most effective and time-tested principles here is the rule of thirds. Just imagine your phone screen has a tic-tac-toe grid laid over it. The goal is to place key features—specifically your eyes—along that top horizontal line. It creates a composition that’s naturally pleasing to the human eye.
Now, for the hardest part: a genuine expression. Here’s how to nail it:
- Drop your shoulders. Most of us hold tension there without even realizing it. Roll them back and let them relax; it makes you look more at ease.
- Think happy thoughts. It sounds cheesy, but it works. A real smile always crinkles the corners of your eyes. Recalling a funny memory or thinking about someone you love will bring that authenticity out.
- Give your hands a job. If your hands are going to be in the shot, don't let them just hang there awkwardly. You can cross your arms for a confident look, gently rest your hand on your chin, or just hook a thumb in your pocket.
Your expression is everything. It's the heart of the photo. Aim for whatever feels most like you, whether that’s a big, warm smile or a more serious, contemplative look.
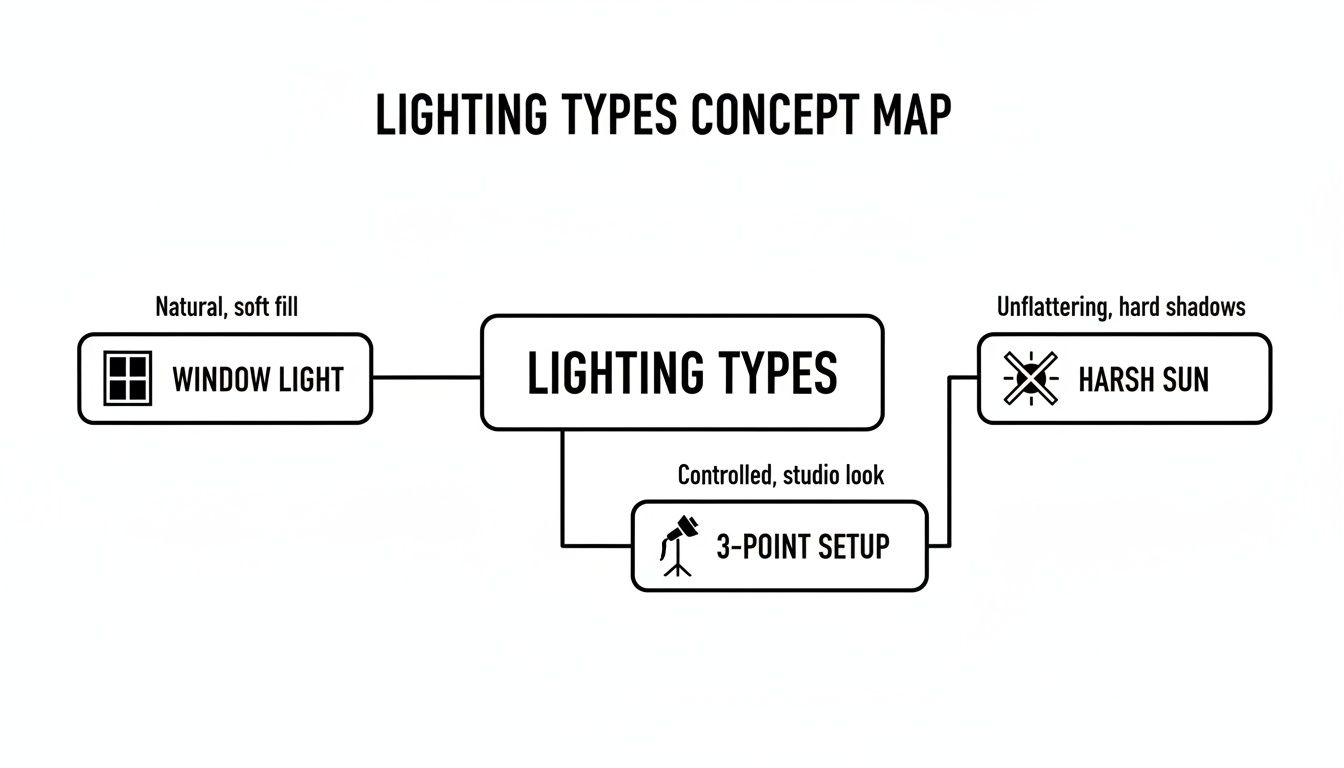
As this visualization shows, sometimes the simplest lighting (like from a window) is the most effective, while direct, harsh sun is your enemy.
Once you feel good about your posing, you can take your photos to the next level by exploring these game-changing dating profile photo tips, which have a ton of great insights. And if you're looking to create images for other platforms, our guide on generating the perfect AI https://www.photoaistudio.com/s/profile-picture is a great resource.
You’ve nailed the shot—the lighting is just right, and your expression is perfect. Now, what's next? While the basic editing tools on your iPhone are great for a quick touch-up, the real magic happens when you bring in some AI muscle. This is how you take a great DIY photo and make it look like you spent a day in a professional studio.
AI-powered photo tools are designed to do the heavy lifting, saving you from the steep learning curve of software like Photoshop. We're not just talking about bumping up the brightness here. These tools can completely remake your photo, giving you a level of polish that used to require a pro with a bag full of expensive gear. This is the final step in learning how to take a headshot with an iPhone that truly looks the part.
Instantly Generate a Portfolio of Looks
What if you could take that one favorite shot and, in minutes, have a dozen different versions of it? That's exactly what AI headshot generators are built for. You upload a single, clear selfie, and the technology gets to work, creating a full set of professional images, each with its own unique vibe.
This is a game-changer for building out your personal brand online. Just think of the possibilities:
- Wardrobe Swaps: See what you'd look like in a tailored business suit for your LinkedIn profile, then a more relaxed blazer for your company's "About Us" page—all from the same original photo.
- New Scenery: Instantly place yourself in front of a sleek corporate office, a blurred cityscape, or a classic, clean studio backdrop without ever leaving your home.
- Different Styles: You can experiment with lighting, too. Go for something bright and approachable or something more dramatic and cinematic to match the tone you're after.
The real benefit is getting maximum variety with minimal effort. A traditional photoshoot might cost you hundreds of dollars for just one or two final images. With an AI tool, you can get dozens of options for a fraction of that, giving you the perfect headshot for every single platform.
Fine-Tuning Your Best Shot
Beyond generating brand-new images, AI tools give you incredible power to refine the photos you already have. These aren't just your standard Instagram filters; they're smart features that understand what's in your picture and how to improve it.
A Photo Upscaler, for instance, uses AI to intelligently increase the resolution of your headshot. This is a must if you ever need to print your photo for a conference badge or a banner. It keeps your image looking crisp and clear, even when blown up to a larger size.
Another incredibly useful tool is the Background Remover. With a single click, it can perfectly cut you out from your original background, leaving you with a clean image on a transparent layer. This is perfect for dropping your headshot into a website design, a presentation slide, or a social media graphic.
The best way to get a feel for this is to see it for yourself. You can play around with a free professional headshot generator and get a firsthand look at what's possible.
DIY iPhone Headshot vs. Photo AI Studio Enhancement
So, what's the tangible difference between a good iPhone shot and one that's been enhanced with a tool like Photo AI Studio? Let's break it down.
| Feature | Standard iPhone Headshot | Photo AI Studio Enhanced Headshot |
|---|---|---|
| Lighting | Dependent on your setup; can be flat or have harsh shadows. | Studio-quality lighting is simulated for professional depth and feel. |
| Background | Limited to your physical location (e.g., a plain wall at home). | Dozens of professional options, from corporate offices to neutral backdrops. |
| Wardrobe | You're stuck with the one outfit you wore for the photo. | A wide variety of outfits can be generated, from business suits to casual wear. |
| Resolution | Good for web use, but may look pixelated when printed large. | AI upscaling ensures the image is high-resolution for both digital and print. |
| Overall Polish | Looks like a good DIY photo; may lack a professional touch. | Achieves a polished, high-end look that's ready for any professional use. |
As you can see, while starting with a great iPhone photo is crucial, the AI enhancement is what closes the gap between "good enough" and "truly professional."
Troubleshooting Your iPhone Headshots
Even with a solid plan, things don't always go perfectly on the first try. It happens to everyone. Let's walk through a few common snags you might hit and how to fix them on the fly.
How Do I Stop My Photos From Being Blurry?
Blurry photos are the absolute worst, and the culprit is almost always a tiny bit of camera shake. The best defense is a good offense: stabilize your phone.
Holding it with two hands is a good start, but an inexpensive tripod is the game-changer for guaranteeing a crisp, sharp image every single time. Seriously, it's worth the small investment.
Another pro tip? Instead of tapping the screen to take the shot—which can wiggle the phone just enough to cause blur—use the built-in timer. A 3 or 10-second delay gives the phone a moment to settle after you press the button, ensuring it's perfectly still for the final shot.
What If My Home Has Terrible Lighting?
Don't have a big, bright window to work with? Resist the urge to just flip on the overhead room light. That's a one-way ticket to harsh, unflattering shadows under your eyes and nose.
Instead, get creative with what you have. A simple desk lamp or a floor lamp can work wonders.
- Your goal: Position it about 45 degrees off to one side of your face.
- The effect: This creates a soft, dimensional light that looks far more professional than a ceiling fixture ever could.
Remember, the quality of the light is far more important than the quantity. One good, soft light source beats a room full of bad ones.
Is It Okay to Use the Selfie Camera?
For a truly professional headshot, you'll want to skip the front-facing "selfie" camera. It's convenient, but its wider-angle lens can subtly distort your features, making things like your nose appear a bit larger. It's just not built for flattering portraits.
For the best, most accurate results, always stick to the rear camera system. The standard 1x lens is your reliable go-to. If your iPhone has a 2x or 3x telephoto lens, even better—that will give you a perspective much closer to what a classic portrait lens would capture.
Ready to skip the guesswork and get a perfect headshot every time? Photo AI Studio can transform your best selfie into dozens of studio-quality options with different outfits and backgrounds. Start creating your professional headshots today!


