How to Make Pictures Look Professional: A Practical Guide
Learn how to make pictures look professional with actionable tips on lighting, composition, editing, and using AI tools to create stunning, high-quality photos.
Forget the expensive gear for a moment. The most powerful tools you have are completely free: light and the space within your frame. Honestly, if you can get a handle on these two things, you're 90% of the way to a professional-looking photo before you even touch an editing app.
This isn’t just some abstract theory; it's the foundation that separates a quick snap from a compelling image.
Mastering Light and Composition
Every stunning photo you've ever admired has two silent partners: the way it's lit and the way it's framed. They work together to create mood, guide the eye, and give the image a sense of purpose. Getting them right is the first, and most important, step.
Think of it as a simple, two-step dance. First, you get the lighting right. Then, you arrange your scene.
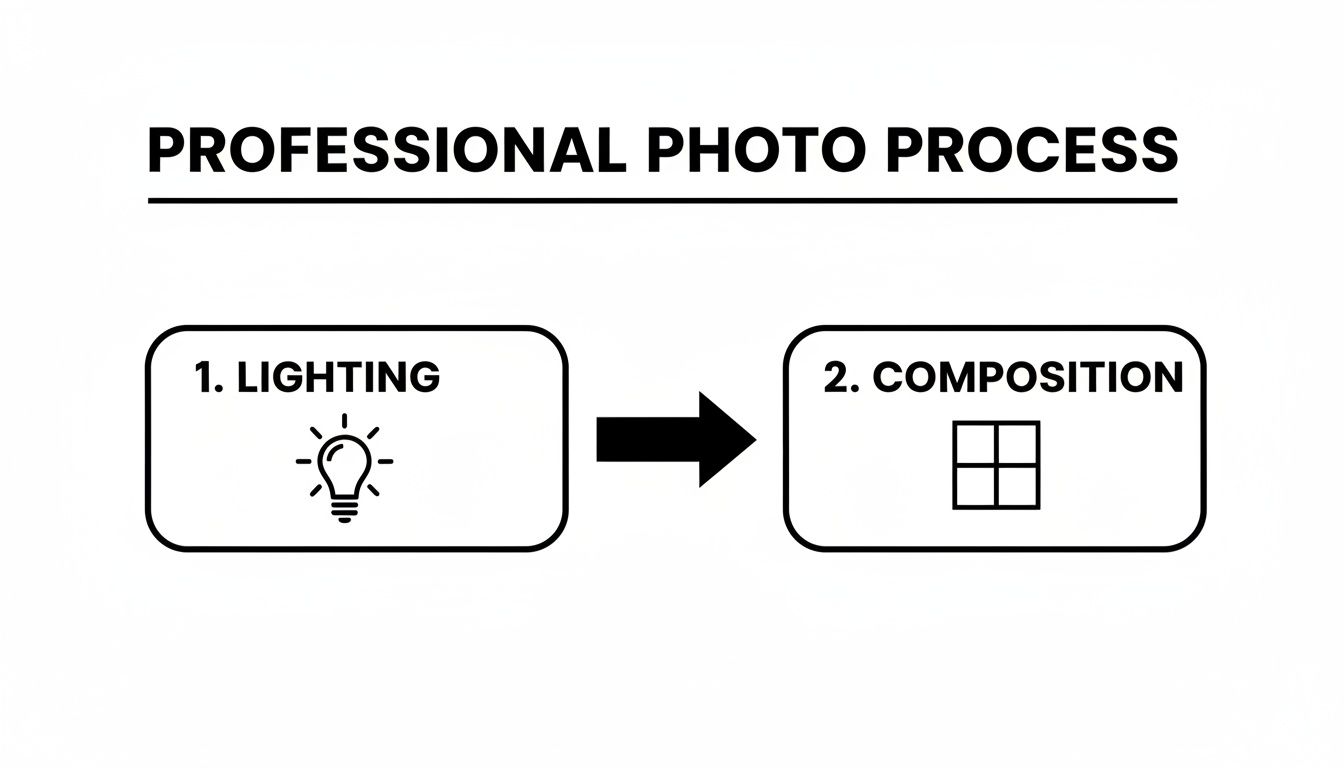
You can't have one without the other. Perfect light can't save a chaotic, messy composition, and a brilliantly composed shot will fall flat in bad lighting. They’re a team.
While they work together, it's helpful to understand what each one brings to the table.
Lighting vs Composition Key Differences
This quick table breaks down their distinct roles in creating a professional-quality image.
| Aspect | Lighting | Composition | Impact on Photo |
|---|---|---|---|
| Primary Role | Sets the mood, creates depth, reveals texture. | Guides the viewer's eye, creates balance and structure. | Defines the photo's emotional feel and visual flow. |
| Key Elements | Direction, quality (hard/soft), color, intensity. | Rule of thirds, leading lines, framing, symmetry. | Controls what the viewer sees and in what order. |
| Common Mistake | Harsh, direct light causing strong shadows. | Placing the subject dead-center without reason. | A flat, uninspired image that feels like a snapshot. |
| Quick Fix | Shoot during the "golden hour" or find open shade. | Move the subject off-center along a grid line. | Instantly adds dynamism and a professional touch. |
Understanding these differences helps you diagnose what's not working in a photo and fix it before you even press the shutter button.
Harnessing the Power of Light
Light is what gives a photograph its shape, texture, and soul. The difference between a flat, boring snapshot and a dynamic, professional image almost always comes down to the quality and direction of the light.
You’re generally working with two kinds of light:
- Natural Light: This is just a fancy term for sunlight. It's beautiful and versatile, but it’s always changing. The best time to shoot is the "golden hour"—that magical period right after sunrise or before sunset. The light is soft, warm, and incredibly flattering, and it wraps around your subject beautifully.
- Artificial Light: This is anything you plug in or turn on, from a simple desk lamp to a full studio strobe setup. The big advantage here is control. You can shape it, move it, and dial it in to get exactly the look you want.
When shooting indoors, the gold standard is a three-point lighting setup. It sounds technical, but the concept is simple: a main light (key light), a second light to soften shadows (fill light), and a third to separate the subject from the background (backlight).
Pro Tip: Don't have any fancy lights? No problem. Just position your subject facing a large window. The window acts as a giant, soft light source, giving you a beautiful, professional look with zero equipment. For more advanced situations, especially with tricky indoor/outdoor views, look into mastering HDR photography.
Arranging Your Scene with Composition
If light sets the mood, composition tells the story. It’s how you arrange all the stuff in your frame to create a balanced, engaging image that pulls the viewer in. Good composition can make a photo of a simple coffee cup feel like a work of art.
These aren't new ideas; artists have been using these principles for centuries. But in a world where the global photography market is worth over $105.2 billion, knowing these rules gives you a huge advantage. In fact, simply applying the rule of thirds can boost engagement on social media by 30-40%.
Let's start with two of the most effective techniques.
- The Rule of Thirds: Imagine a tic-tac-toe grid over your screen. Instead of sticking your subject right in the middle square, place them on one of the lines or at a point where the lines intersect. This simple trick instantly makes your photo feel more balanced and professional. It’s a game-changer for everything from landscapes to headshots.
- Leading Lines: Look for natural lines in the scene—a road, a fence, a shoreline, even the edge of a table. Use those lines to point the viewer’s eye directly toward your subject. It creates a sense of depth and makes the image feel deliberate and thoughtfully planned.
Whether you're taking professional headshots for your LinkedIn profile or snapping product photos for an online store, these simple rules will make a world of difference. When you nail both the light and the composition, you've built the unshakable foundation of a truly great photograph.
Dialing in Your Camera and Smartphone Settings
Professional-looking photos aren't about having the most expensive gear. Not even close. They’re about knowing how to take control of the camera you’ve already got, whether it's a high-end DSLR or just the phone in your pocket.
The secret is moving beyond "Auto" mode. It's about telling your camera exactly what you want it to do instead of letting it guess. Understanding a few core settings is what separates a deliberate, polished shot from a simple snapshot.
The Exposure Triangle: Your Creative Controls
Think of aperture, shutter speed, and ISO as the three core controls of photography. They're in a constant dance with each other—adjust one, and you’ll likely need to tweak another to get that perfect exposure. Mastering this balance is the key.
- Aperture (f-stop): This is all about focus and depth. A low f-stop number (like f/1.8) creates that beautiful, blurry background you see in portraits, making your subject pop. A high f-stop number (like f/11) keeps the entire scene sharp from front to back, which is perfect for sweeping landscapes.
- Shutter Speed: This setting controls time. A lightning-fast shutter speed (like 1/1000s) freezes motion, letting you capture a perfectly crisp action shot. On the other hand, a slow shutter speed (like 1/15s) intentionally creates motion blur, which is great for artistic effects like light trails from moving cars.
- ISO: Think of this as your camera's sensitivity to light. You always want to keep your ISO as low as possible (100 or 200) for the cleanest, most detailed image. You only crank it up when you're in a dark environment and can’t get enough light by adjusting the aperture or shutter speed.
Getting these technical details right is a huge part of what gives a photo its value. It’s a craft that anchors the entire $15.8 billion U.S. photography market, where technical skill directly translates into professional results. You can read more about the growth of the photography industry at IBISWorld.
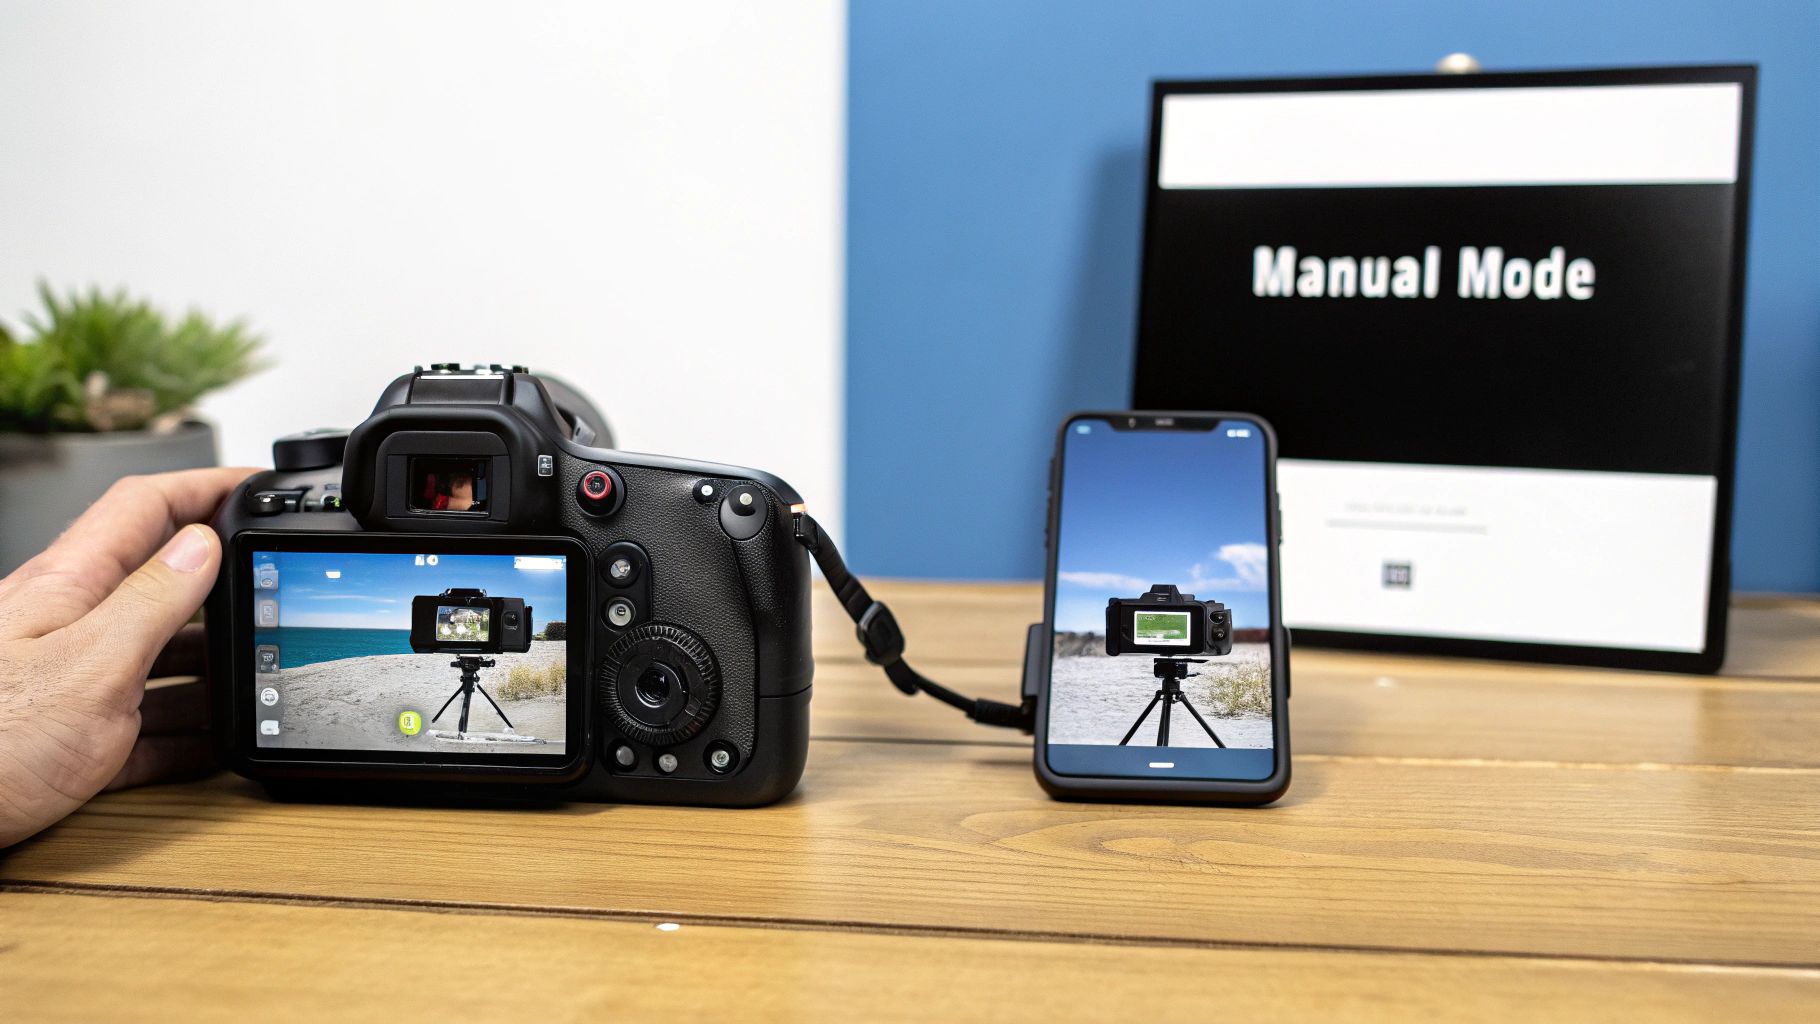
Take Manual Control on Your Smartphone
Your smartphone is way more powerful than you might think. Most native camera apps now have a hidden "Pro" or "Manual" mode that unlocks DSLR-like control over your photos. This is your chance to stop letting the phone's algorithm make every decision for you.
Switching to this mode lets you adjust a few crucial settings yourself.
- Focus: Tap-to-focus is fine, but manual focus gives you absolute precision. Use the focus slider to make sure the most critical part of your image—like a person’s eyes in a headshot or the logo on a product—is tack-sharp.
- White Balance (WB): Ever notice how indoor photos can look too yellow or shots in the shade look too blue? That’s your phone's auto white balance getting confused. Setting it manually ensures your colors are clean, accurate, and true to life.
- Exposure Compensation (EV): This is a simple slider that lets you brighten or darken the entire image before you press the shutter. It’s a fast and effective way to override the camera’s guess and get the exact brightness level you’re aiming for.
Learning to make these small, intentional adjustments is how you start creating photos that match your creative vision, not just what your phone's software thinks looks best.
Styling Your Scene with Purpose
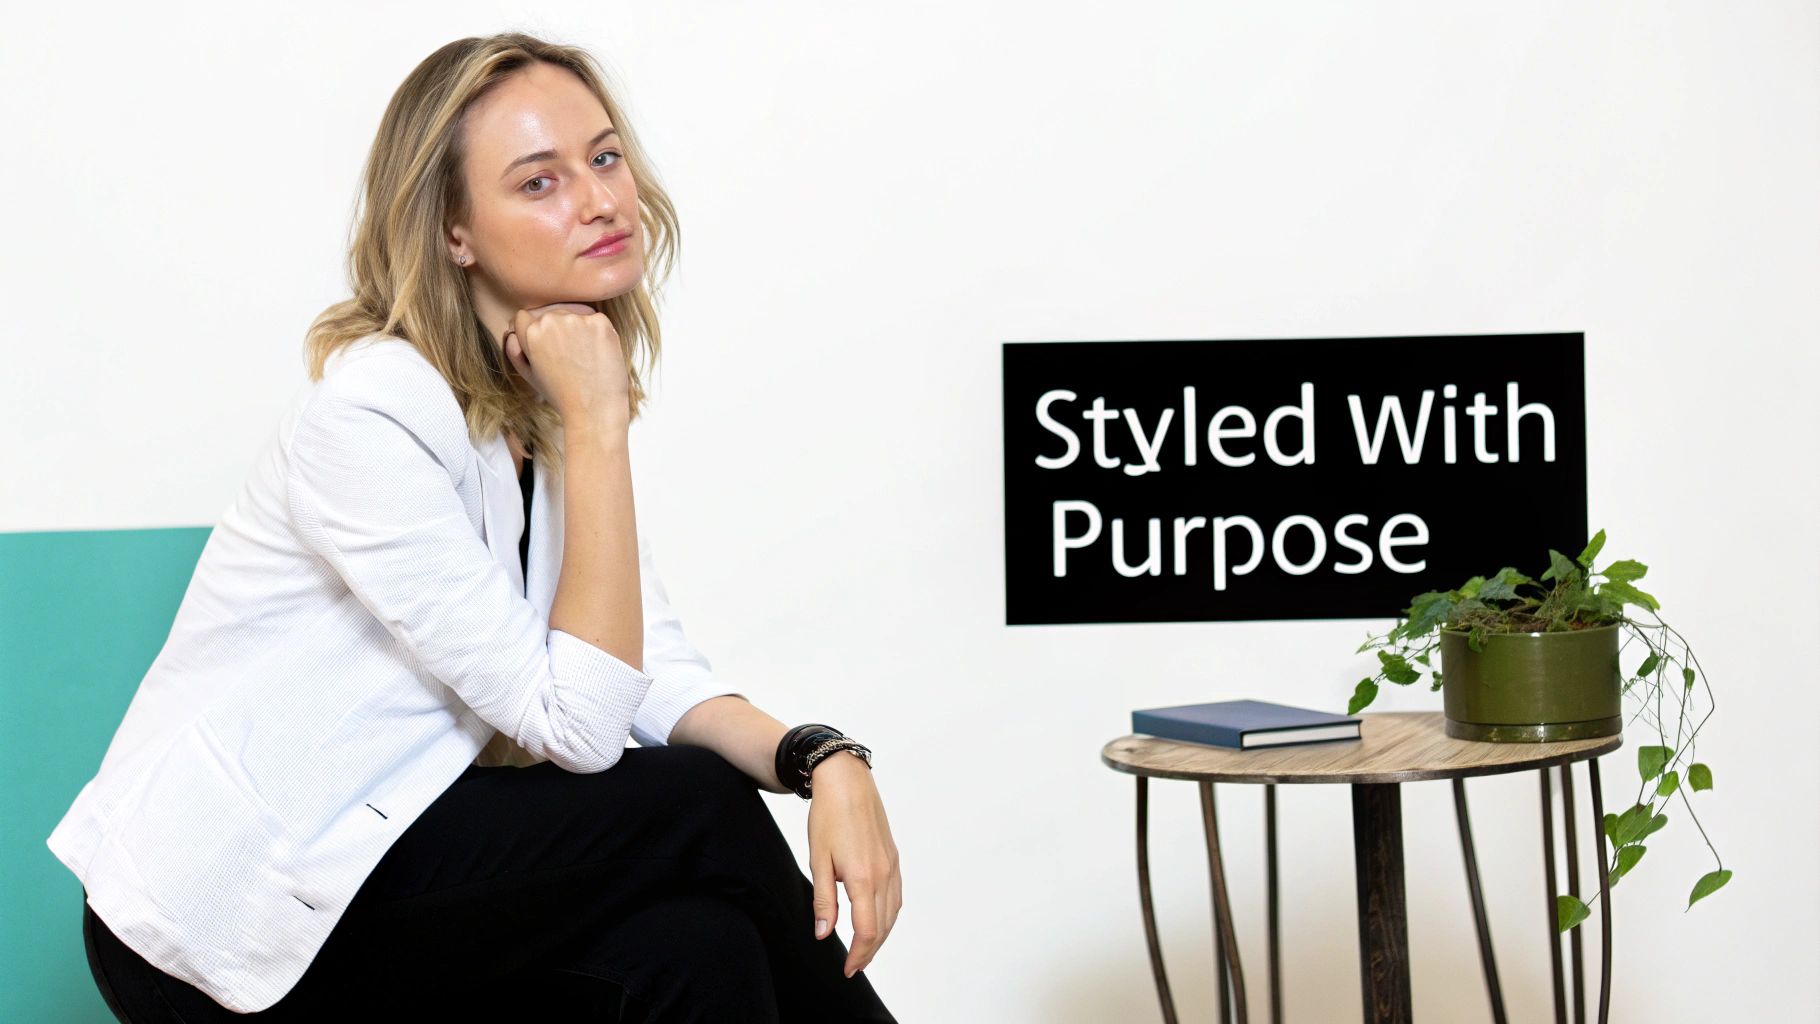
A truly professional photo isn’t just a well-lit picture of someone. It’s a story told in a single frame, and every single thing in that frame—from the background texture to the tiniest prop—plays a part. This is where intentional styling comes in. It’s about making deliberate choices that turn a simple snapshot into a polished, professional statement.
Think of it this way: your background is a supporting actor. It’s there to make your subject, the star, look even better. The fastest way to scream "amateur" is with a busy, cluttered, or distracting background that fights for attention.
Choosing Your Background Wisely
The backdrop you choose immediately sets the stage and the mood. Your goal is to find something that enhances the subject without pulling focus away from them. You’ve really got two great paths to take here.
The first is the simple, clean backdrop. I’m talking about a solid-colored wall, a roll of seamless paper, or even a nice piece of fabric stretched tight. This approach puts all the focus on your subject, making them the undeniable hero of the shot. It’s my go-to for corporate headshots and clean e-commerce photos where clarity is everything.
The other option is to use the environment itself as your canvas. A brick wall can give you a cool, urban texture. A park can create a natural, relaxed vibe. An office setting instantly provides professional context. The trick is to find a spot that’s visually interesting but not chaotic. A great technique here is to use a wide aperture (a low f-stop number) to create that beautiful, blurry background that really makes your subject pop.
Posing for Confidence and Authenticity
When you're photographing people, the right pose can be the difference between a photo that feels stiff and awkward and one that looks natural and confident. The goal isn't to force someone into a rigid position but to guide them into something that feels authentic to them. So, forget those stiff, straight-on shots.
Instead, let’s create some angles and a sense of movement. Tiny adjustments can have a massive impact:
- Turn the body slightly: Ask your subject to angle their body about 45 degrees away from the camera, then turn their head back toward you. This is almost universally more flattering and dynamic.
- Create some space: Have them put a little bit of a gap between their arms and their torso. This tiny change helps define their shape and keeps them from looking smushed.
- Give their hands a job: People get really self-conscious about their hands. Give them a task! Have them lean on a desk, hold a coffee mug, or fold their arms. It gives the pose a natural purpose.
The best direction I’ve ever given isn’t physical, it’s emotional. Instead of barking "smile!", I'll say something like, "Think about a project you're incredibly proud of." You get a genuine expression that a forced smile can never, ever match.
Using Props to Add Context and Personality
Props are the final layer of your visual story. But they can’t be random. They need to be carefully chosen elements that add personality, context, or a pop of interest to the image. For a writer's headshot, maybe it’s their favorite book or a classic pen. For a product shot of artisanal jam, including some fresh berries tells a story about its quality.
It all comes down to intention. For every item you consider adding, ask yourself: What does this add to the story? Does it explain their profession? Does it add a splash of color that ties everything together? If an object doesn't have a clear purpose, it’s probably just clutter. When you style every element in the frame this deliberately, you’re no longer just taking a picture—you’re crafting a compelling visual narrative.
Editing Your Photos for a Polished Finish
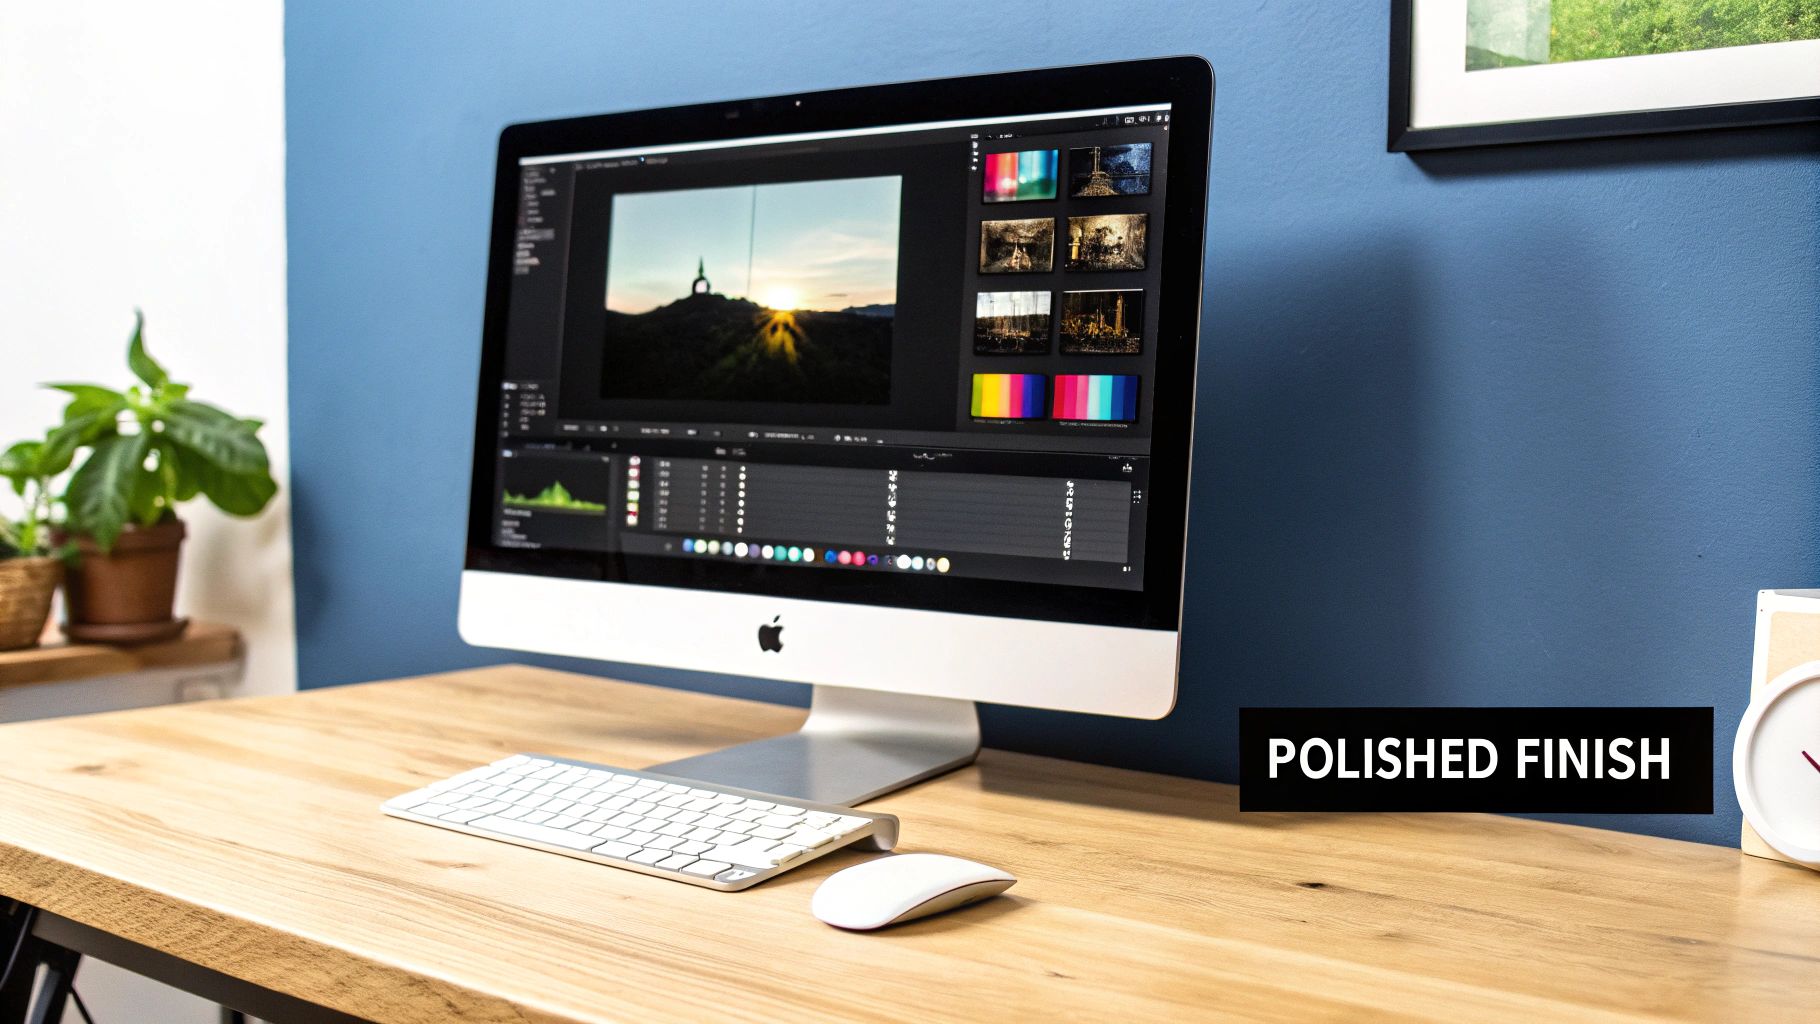
Taking a great photo is really only half the battle. That final, critical moment—where a good shot transforms into a professional one—happens in the edit. This is where you bring everything together, polishing the raw materials and refining the details until the image is clean, impactful, and perfectly matches your original vision.
The goal isn’t to create some over-processed, plasticky image that screams "edited." Instead, think of it as a series of small, intentional adjustments that work together to elevate the entire photo. You’re simply enhancing what’s already there to create something truly compelling.
Start with a Solid Foundation
Before you even think about creative filters or fancy effects, every professional photo needs a solid technical foundation. This is all about correcting the basics so the image is balanced, clean, and just plain easy to look at. Think of it like a painter prepping a canvas before they even pick up a brush.
There are three non-negotiable adjustments you should make to virtually every single photo:
- Exposure: This is simply how bright or dark the image is. You're aiming for a balanced exposure where you can see detail in the brightest areas (highlights) and the darkest parts (shadows) without losing anything to pure white or pure black.
- Contrast: This is the difference between your lights and darks. Bumping up the contrast adds "pop" and makes an image feel dynamic. Lowering it can create a softer, more muted, or even dreamy feel.
- White Balance: This one is crucial for accurate color. It corrects the color temperature of the light source to ensure things that are white in real life actually look white in your photo. Getting this right removes weird color casts—like that ugly yellow tint from indoor lighting—and makes every color in your shot look clean and true.
Getting these three things right is the bedrock of any professional edit. It creates a neutral, well-balanced starting point for all the creative work that comes next.
Understanding the Histogram
To make these adjustments accurately, you can't just trust your eyes. You need to learn to use a tool called a histogram. It might look a little technical, but it’s just a simple graph showing the tonal range of your photo. The far left side represents pure black, the far right is pure white, and everything in between is your mid-tones.
A well-exposed image usually has a histogram that looks like a gentle mountain range, with data spread across the graph. If that "mountain" is slammed up against the left wall, your photo is underexposed (too dark). If it's shoved all the way to the right, it's overexposed (too bright).
Learning to read a histogram is a fundamental skill that separates amateur editors from pros. It allows you to make precise adjustments based on data, not just what looks good on your specific screen.
Advanced Techniques for Mood and Impact
Once your photo has a solid technical base, you can get to the fun part: creative edits that shape the mood and guide the viewer's eye. This is where your unique style really starts to shine.
This stage of post-processing is where raw captures become polished gems. It’s a digital evolution of the darkroom alchemy photographers practiced in the 1970s, a process revolutionized by Photoshop’s debut in 1990. Today, powerful editing continues to fuel the photography services market, which is projected to grow by $11.57 billion through 2029. In fact, studies show that 65% of professionals spend a huge chunk of their workflow on editing, which leads directly to higher client satisfaction. You can learn more about the growth and demands of the photography services sector on Technavio.
Here are two powerful techniques you can start using right away.
Strategic Color Grading
Color grading goes way beyond simple color correction; it's the art of adjusting the colors in your image to create a specific feeling or aesthetic. For example, you can add subtle blue tones into the shadows and warm, orange tones into the highlights to create that popular cinematic look you see in movies.
This is an incredibly powerful tool for branding. When you use a consistent color grade across all your photos, you create a cohesive, recognizable style that people will immediately associate with you or your business.
Selective Sharpening and Detail Enhancement
Here’s a pro secret: not every part of your photo needs to be razor-sharp. Selective sharpening is the art of adding crispness only to the most important areas of your image. In a portrait, you’d sharpen the eyes and eyelashes while leaving the skin relatively soft. In a product shot, you’d sharpen the product and its label to make them pop right out of the background.
This targeted approach adds a layer of polish and professionalism that a simple "sharpen" filter can never replicate. It makes your subject the undeniable hero of the image.
Using AI for Instant Professional Enhancements
While mastering manual editing is a fantastic skill, today’s photographers have a powerful new tool in their corner: Artificial Intelligence. The days of spending a full afternoon meticulously tracing a product to cut it out from its background are numbered. AI-powered tools are here, and they automate these complex, often tedious tasks, giving you a shortcut to professional-grade results.
This isn't about replacing your creative eye; it's about amplifying it. Think of AI as your digital assistant—the one who handles the repetitive, technical work so you can stay focused on the bigger picture. Tools like Photo AI Studio are built to tackle these time-consuming jobs with just a few clicks.
Automate Complex Editing Tasks
Let's be honest, some editing jobs are just a grind. Even seasoned pros dread certain repetitive, detail-heavy tasks. This is where AI really shines, delivering consistent, high-quality results in a fraction of the time. The idea isn't to create generic, soulless images, but to get the grunt work done faster.
Here’s a look at how AI can completely change your workflow:
- Background Removal: Manually selecting a subject is slow and painstaking. An AI Background Remover analyzes your photo, isolates the subject, and gives you a clean PNG with a transparent background in seconds. It's a lifesaver for e-commerce listings or creating composites.
- Image Upscaling: Ever find the perfect photo, only to realize it's too small or low-res? An AI Photo Upscaler can intelligently enlarge it, sharpening details and adding clarity without the ugly pixelation you get from old-school resizing. It's fantastic for salvaging old family photos or preparing a web image for print.
- Photo Restoration: AI can also bring old, faded, or damaged photographs back to life. By analyzing the photo, it can intelligently fill in scratches, fix color fading, and sharpen blurry details, preserving precious memories with stunning clarity.
Using AI isn't about skipping the work; it's about working smarter. It condenses hours of manual labor into seconds, giving you more time to focus on creative direction, composition, and storytelling. This efficiency is a massive advantage for small businesses and solo creators.
Generate Flawless Headshots and Product Photos
Beyond just fixing photos, AI has become an incredible creation tool. This is especially true for corporate photography and e-commerce, where you need consistent, top-quality images on demand.
Imagine needing professional headshots for your entire team. The logistics of a traditional photoshoot are a nightmare. Now, an AI Headshot Generator can take a few casual selfies and spin them into a whole gallery of polished, studio-quality portraits in different outfits and styles. It’s a game-changer for anyone wanting to build a professional online presence fast. You can see for yourself how an AI Headshot Generator can create professional-grade photos.
Even for specialized fields, AI is making a huge impact. For example, for real estate agents looking to create dramatic property listings, using AI for instant results in real estate photography can turn a boring daylight shot into a captivating twilight image that grabs attention.
Unlock New Creative Possibilities
AI also opens doors to creative ideas that were once out of reach for most people. For online clothing stores or fashion designers, a feature like AI Clothes Try-On lets you showcase your apparel on different models without a single photoshoot. Customers can see how a dress or shirt looks on various body types, which is a huge boost for the online shopping experience.
This technology allows you to experiment and produce a high volume of visual content at a fraction of the traditional cost and time. The table below shows a direct comparison between the old way and the new, AI-assisted approach for common professional tasks.
Manual Editing vs AI-Powered Photo AI Studio
Here’s a quick breakdown of how much time and effort AI can save on common professional photo tasks. It really puts the efficiency gains into perspective.
| Task | Manual Editing Effort | Photo AI Studio Solution | Time Saved |
|---|---|---|---|
| Corporate Headshots | Hours of shooting, setup, and retouching per person. | Upload selfies, generate dozens of options in minutes. | 95%+ |
| Product Background Removal | 5-15 minutes per image using manual selection tools. | Instant, one-click background removal. | ~99% |
| Upscaling a Low-Res Image | Limited results, often requires specialized software and skill. | AI-driven upscaling that reconstructs detail. | Significant |
| Outfit Visualization | Requires a model, photoshoot, and location. | Virtual try-on with AI-generated models and clothing. | 90%+ |
Ultimately, using AI to make pictures look professional is about efficiency and empowerment. It levels the playing field, giving everyone access to tools that produce clean, polished, and high-impact visuals without the traditional barriers of time, cost, and technical skill.
Common Questions We Hear All the Time
Once you get a handle on the fundamentals of lighting, framing your shot, and editing, you’ll find that a few practical questions always seem to pop up. Let's tackle some of the most common hurdles photographers run into on their journey from amateur to pro.
What's the Single Biggest Mistake New Photographers Make?
Hands down, it's ignoring the background. It happens to everyone. You get so focused on making your subject look great that you completely miss the distracting trash can, the cluttered desk, or that weird branch that looks like it's growing out of their head.
A busy or irrelevant background is the fastest way to make an otherwise great photo look cheap. Before you ever press the shutter, get in the habit of scanning the entire frame, from corner to corner. If something in the frame doesn't add to the story you're trying to tell, either get it out of there or change your angle to hide it.
A simple, clean background is your best friend. Seriously. A plain wall, a soft-focus line of trees, or a solid piece of fabric will almost always look more professional than a chaotic, accidental setting.
Do I Really Need a Fancy Camera to Take Professional Photos?
Absolutely not. This is probably the biggest and most persistent myth in all of photography. Sure, a high-end camera gives you more buttons to press and more lenses to buy, but the person operating it is infinitely more important than the gear itself.
Don't underestimate the camera you already have in your pocket. Modern smartphones are incredibly capable. The trick is to stop using them like a simple point-and-shoot. Learn to use its "Pro" or "Manual" mode, which gives you direct control over critical settings like focus, exposure, and white balance. When you combine that control with a solid understanding of light and composition, you can create images that easily rival those from expensive DSLRs.
A skilled eye will always beat expensive equipment. Always.
How Do I Get That Blurry Background Look in My Pictures?
That gorgeous, creamy, out-of-focus background has a name: bokeh. It’s a signature of professional portrait photography because it makes your subject pop right off the screen by creating a shallow depth of field.
Here are a few ways to achieve it:
- With a DSLR or Mirrorless Camera: The key is to use a wide aperture. That means setting your lens to the lowest f-stop number it can handle, like f/1.8, f/2.8, or f/4. A lower f-stop number creates a shallower depth of field, which results in a more blurred background.
- On Your Smartphone: This is what "Portrait Mode" was made for. This feature uses clever software to map out your subject and then digitally blur the background, mimicking the effect you'd get from a wide-aperture lens on a big camera.
- The Universal Method: This works with any camera, anytime. Just increase the physical distance between your subject and whatever is behind them. The farther the background is from your subject, the more out-of-focus it will naturally appear.
If I Only Learn One Editing Skill, What Should It Be?
Before you even think about complex color grading or fancy retouching, master the basics: exposure and contrast. Learning to create a well-balanced image that isn't too dark (underexposed) or washed out (overexposed) is the absolute foundation of good editing.
Forget the creative filters for a moment. Just focus on making your whites look clean, your blacks look rich, and ensuring you can see details in both the brightest and darkest parts of the photo. Nail this one skill, and you'll have a clean, professional canvas to build every other edit upon.
Want to keep learning? We're always sharing new tips and techniques. Check out the other articles on the Photo AI Studio blog to keep leveling up your skills.
🤖Get a summary of this article with AI
Related Articles

12 Best Free Background Remover Tools in 2026 (Tested & Ranked)
I tested 15+ background remover tools so you don't have to. Here are the 12 that actually work in 2026, ranked by quality, speed, and real-world results.
2026-03-26

Remove Text From Picture: Flawless Techniques to remove text from picture
Need to remove text from picture? Our guide shares AI tools and pro techniques to erase text cleanly and restore your image.
2026-03-12

Prompt Engineering 101: Master Your AI Images Generator
Learn to write perfect prompts for your artificial intelligence images generator. Master structure, descriptors, and style parameters to get exactly what you want.
2026-03-10