At its heart, a great headshot lighting setup is all about a key light (your main source), a fill light (to manage shadows), and sometimes a little something extra like a reflector or hair light. The real skill lies in how you place these elements to shape the light, creating a portrait that’s not just flattering but also feels confident and genuine. Get this right, and you've laid the groundwork for any headshot style you can imagine.
Building Your Foundational Headshots Lighting Setup
Before we get into specific setups like Rembrandt or clamshell, let's talk about the gear. A solid lighting kit isn’t about having the most expensive strobes on the market; it’s about understanding what each piece does and why you’re using it. Think of it like a chef's knife set—each blade has a purpose.
Portrait lighting has come a long way. Early photographers had one source: the sun. They'd place subjects near a window and hope for the best, using long exposures to capture that soft, diffused light. Thankfully, technology has given us a lot more control. You can see just how far things have come by exploring the history of headshots on headshotsnyc.com.
Key, Fill, and Beyond
Every lighting setup starts with the key light. This is your main light, your workhorse. It’s usually the brightest source and is responsible for defining your subject's features and establishing the entire mood of the shot. It's the light that creates the primary shadows you'll be working with.
That’s where the fill light comes in. Its job is to control the shadows cast by the key light. Want a bright, even, commercial look? Use a stronger fill. Going for something more dramatic and moody? Dial the fill way down or kill it completely. Often, a simple reflector is all you need, bouncing a little bit of the key light back into the shadows—no second powered light necessary.
The Power of Modifiers
The quality of your light—whether it’s hard and crisp or soft and flattering—comes down to your modifiers.
- Softboxes: These are the bread and butter of headshot photography. They produce a gorgeous, soft, diffused light that makes skin look incredible. You really can't go wrong with one.
- Umbrellas: A fantastic and budget-friendly alternative to softboxes. Shoot-through umbrellas give you a soft, direct quality, while bouncing light off a silver or white umbrella creates a broader, more room-filling light.
- Reflectors: Don’t sleep on reflectors. A simple piece of white foam core or a 5-in-1 collapsible reflector is one of the most powerful tools you can own. It can be your fill light, add a beautiful catchlight to the eyes, or just kick a little brightness into a specific spot.
One of the biggest mistakes I see beginners make is thinking more lights will magically create better photos. A single key light and a well-placed reflector can produce absolutely stunning, professional-level headshots. It’s about controlling the light you have, not just adding more of it.
Essential Headshot Lighting Gear Comparison
Choosing the right gear often comes down to budget and your specific needs. You don't need a Hollywood-level setup to get started. Here’s a breakdown of what you might consider at different levels.
| Gear Type | DIY/Budget Option | Mid-Range Kit | Professional Setup |
|---|---|---|---|
| Key Light | Natural window light; LED panel; speedlight | Godox AD200Pro; Profoto A2 | Profoto B10X; Broncolor Siros 800 L |
| Light Stand | Basic AmazonBasics stand | Manfrotto or Kupo C-Stand | Avenger or Matthews C-Stands |
| Modifier | DIY foam core reflector; cheap shoot-through umbrella | Glow EZ Lock Softbox (36") | Profoto RFi Softbox; Westcott Eyelighter |
| Fill Source | White foam core or 5-in-1 reflector | Second speedlight with small softbox | V-Flat or second strobe with large modifier |
| Trigger | On-camera flash commander | Godox XPro or Profoto Connect | Profoto Air Remote or Broncolor RFS 2.2 |
Ultimately, your foundational kit is what allows you to make deliberate, creative choices. And as technology keeps moving forward, even the definition of a "kit" is changing. Some great resources discuss topics like How AI is Replacing Expensive Equipment for Studio Photography.
Of course, if you'd rather skip the gear entirely, you can now get professional headshots with AI that convincingly replicate all of these classic lighting principles.
Getting Started: The Magic of One Light
You don’t need a trunk full of strobes to create a knockout headshot. Honestly, some of the most classic and compelling portraits you've ever seen were probably made with just a single light source. When you strip it all back to one key light, you're forced to master the fundamentals—the delicate dance of light and shadow that truly shapes a face.
The real power is in the precision. Shifting that one light just a few inches can completely change the vibe, taking a portrait from bright and approachable to moody and intense. These one-light patterns aren't just exercises; they are the bedrock of all portrait photography.
Think of it as a simple, foundational process. You always start with your main light, and then build from there.
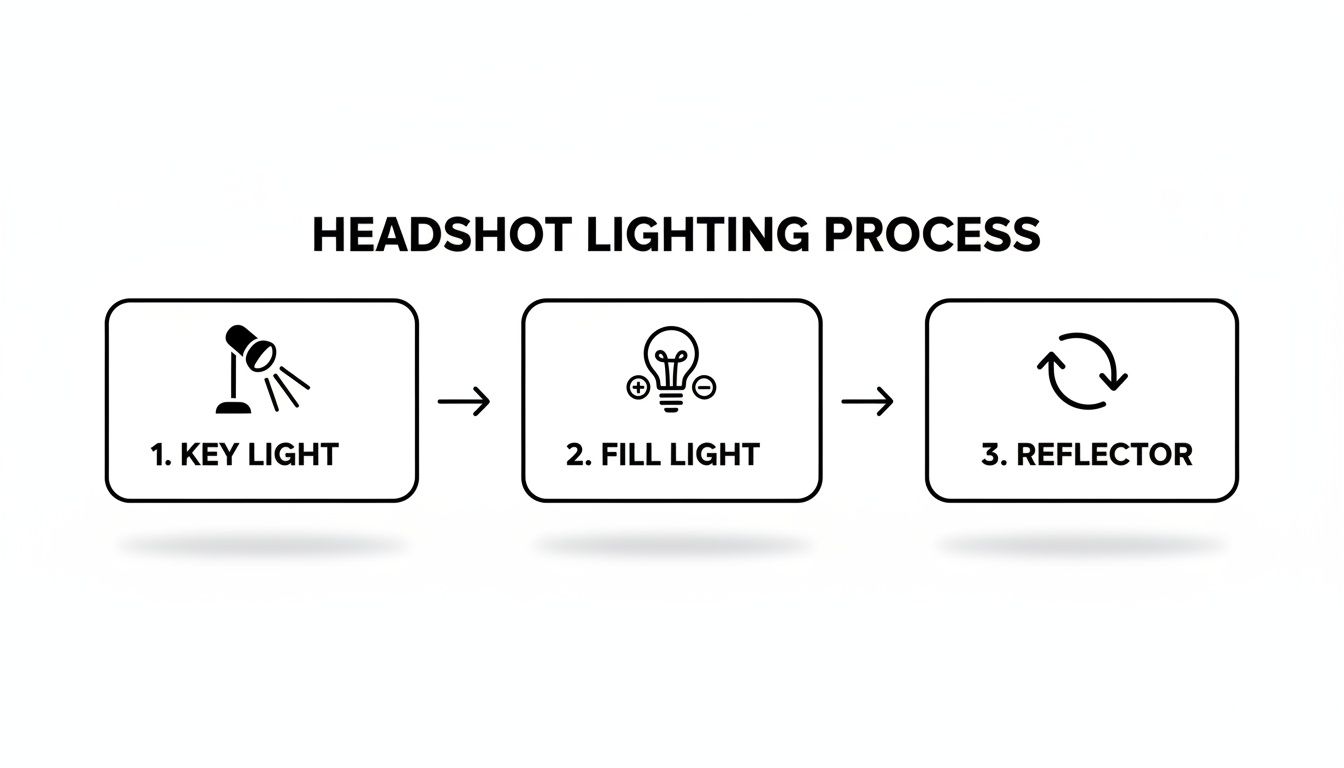
As the diagram shows, once your key light is set, you can introduce a fill light or a simple reflector to soften the shadows and fine-tune the look. But it all starts with that one, crucial light.
The Power of Rembrandt Lighting
Named for the legendary Dutch painter, Rembrandt lighting is all about creating drama and mood. The tell-tale sign is a small, inverted triangle of light on the cheek opposite your main light source. This little detail does wonders for adding depth and a sense of three-dimensionality to the face.
Here’s how to dial it in:
- Position your key light (a softbox is perfect for this) at roughly a 45-degree angle to your subject.
- Raise the light so it’s slightly above their head and angled down toward them.
- Watch the shadows closely. As you move the light, you’ll see that signature triangle form on their far cheek, right below the eye. The trick is to get the shadow from their nose to just touch the shadow on their cheek, enclosing the triangle.
A true Rembrandt triangle is no wider than the subject's eye and no longer than their nose. It’s this precision that gives the look its classic, painterly quality.
Loop Lighting: The Universal Go-To
If you only learn one lighting pattern, make it this one. Loop lighting is the workhorse of headshot photography because it’s incredibly flattering for almost everyone. It creates a small “loop” of shadow from the nose that points down toward the corner of the mouth, but doesn't connect with the main cheek shadow. This gives the face definition without the intensity of Rembrandt lighting, making it ideal for corporate and commercial work.
The setup is a subtle variation of Rembrandt. Just bring your key light a bit closer to the camera's position, somewhere between a 20 and 30-degree angle from your subject, and keep it just above eye level.
There’s a reason this has been a studio staple since the 1950s—it just works. In fact, many in the industry, including the Professional Photographers of America, estimate that this single pattern flatters about 95% of faces.
Split Lighting for High Drama
When you need a bold, high-contrast look that commands attention, split lighting is your answer. It’s a dead-simple setup that delivers a powerful, graphic effect by literally splitting the face into two distinct halves: one side lit, the other in shadow. This is a go-to for athletic portraits, artistic shots, or any character study that needs a heavy dose of intensity.
To get the look, place your key light directly to one side of your subject—a full 90-degree angle. The light should just skim across their face, illuminating one half perfectly.
You then have a choice: leave the shadow side completely dark for maximum impact, or bring in a white reflector (often called a "fill card") on the opposite side. Bouncing just a tiny bit of light back will open up the shadows enough to reveal some detail without killing the dramatic mood.
Using Multiple Lights to Create Depth
While you can get fantastic results with just a single light, adding more sources to your setup is where you really start to sculpt and polish an image. This is how you get that crisp, high-end feel you see in commercial and fashion work. It’s all about giving your subject shape and separating them from the background with precision.
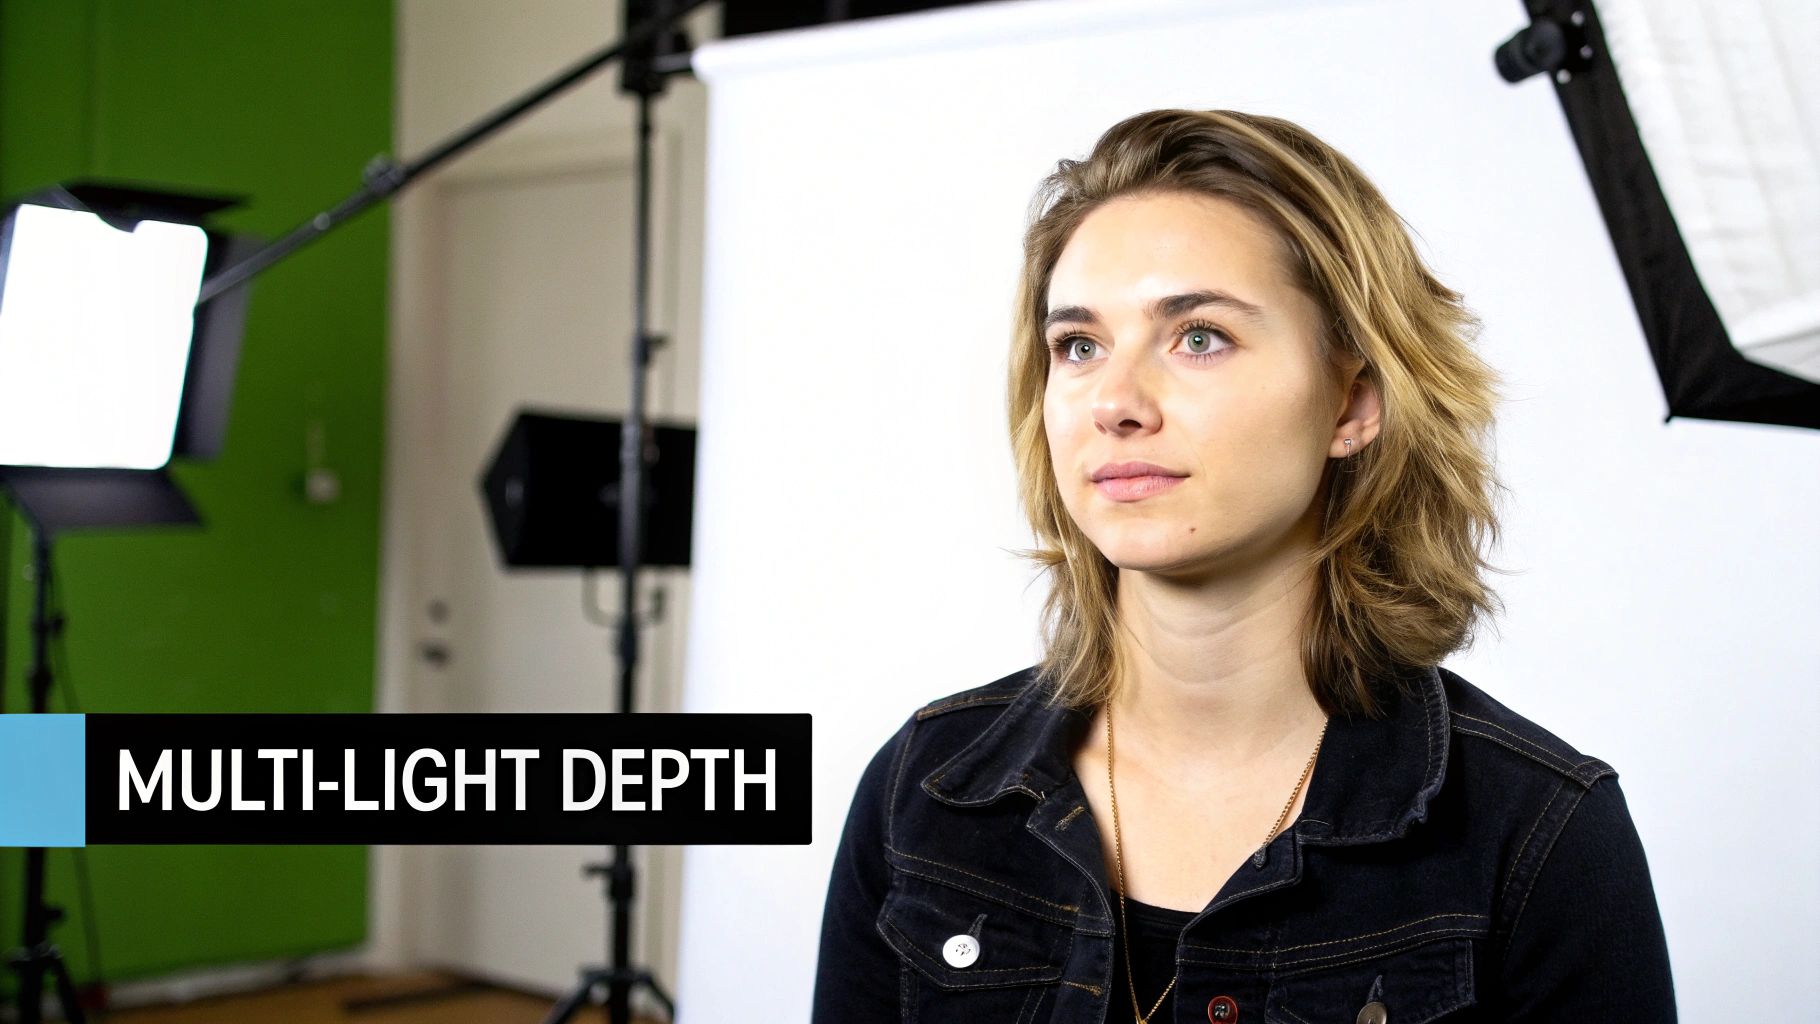
This isn’t just about flooding the scene with light. Each light has a specific job. One might be carving out the jawline, another adding a subtle sheen to the hair, and a third softening shadows. When they all work together, the look becomes incredibly professional and dynamic.
The Glamour of Butterfly Lighting
Butterfly lighting, sometimes called "paramount" lighting, is an absolute staple in beauty and fashion work. Why? Because it delivers a glamorous, symmetrical look that carves out cheekbones and looks incredibly elegant. Its name comes from the small, butterfly-shaped shadow it casts just under the nose.
Getting this look is actually pretty simple:
- Position your key light directly in front of your subject, but place it high up and angle it down at them—think about a 45-degree angle. This is what creates that signature shadow.
- Bring in a reflector (or a second light on very low power) just below your subject's face, angled up. This fill bounces light back into the shadows under the chin and eyes, softening everything for a clean finish.
The result is a bright, even light that’s incredibly flattering, especially for clients with defined bone structure. It’s my go-to for anyone who wants that polished, magazine-cover vibe.
Clamshell Lighting for Flawless Skin
If you need to create incredibly soft, flattering light that minimizes skin texture and blemishes, the clamshell setup is your best friend. It’s a favorite for beauty headshots because it literally wraps the face in light, killing harsh shadows and producing a radiant glow.
Imagine butterfly lighting, but instead of a simple reflector at the bottom, you use a second, powered light. The two lights create a "clamshell" shape around the face.
- Top Light (Key): Your main light source—a softbox or beauty dish is perfect—goes above the subject, angled down.
- Bottom Light (Fill): A second, less powerful light is placed directly below, angled up. A stripbox works great here.
The secret to a good clamshell is the power ratio. Your bottom light needs to be 1 to 2 stops dimmer than the top one. If it's too bright, you'll create that spooky, "telling a ghost story with a flashlight" look. Done right, you’ll see beautiful, round catchlights in the eyes and get that flawless skin effect.
Adding a Hair Light for Separation
That final touch that makes a headshot truly pop? Separating your subject from the background. A hair light, which you might also hear called a rim light or kicker, is designed to do just that.
You’ll place this third light behind your subject—often on a boom arm high above or just out of frame—and angle it to skim across their hair and shoulders. This creates a subtle, bright outline that lifts them away from the backdrop, adding a professional, three-dimensional quality to the image. You don't need much power here; a little kiss of light is all it takes to keep your subject from blending into a dark background.
Of course, light isn't the only tool for creating depth. To really make your subject stand out, you also need to master depth of field and control exactly what’s in focus.
Beyond the Basics: Advanced Lighting and Common Pitfalls
Once you've mastered the classic lighting patterns, it's time to start really shaping the mood of your images. This is where you move from just taking a picture to telling a story, gaining full creative control to turn a simple headshot into a powerful statement. Two of the most effective ways to do this are with high-key and low-key lighting—each designed to pull a completely different emotional response from the viewer.
A high-key headshots lighting setup gives you that bright, airy, and optimistic feel. It’s all about minimizing shadows and is a go-to for commercial, beauty, or lifestyle headshots. The goal here is to blow out the background to pure white while keeping your subject perfectly exposed. To pull this off, you’ll typically need at least two or three lights—one or two just for the backdrop to get it evenly lit, and another key light on your subject.
On the flip side, low-key lighting is pure drama, intensity, and mood. It carves your subject out of the darkness using deep shadows and high contrast for a cinematic, mysterious vibe. For this style, you’ll want a dark background (black or dark grey is perfect) and a single, hard-edged light source. Think a gridded softbox or a snoot, which lets you place light precisely on just parts of your subject’s face.
Lighting for Different Skin Tones
One of the most important skills you can develop is adapting your lighting to complement every complexion. Lighting is definitely not a one-size-fits-all game; what makes fair skin glow might not render deeper skin tones with the same richness. It really comes down to managing highlights and reflections.
Deeper skin tones are often more reflective, which means you need to be careful with your light source. I find that large, soft modifiers like a big octabox or a shoot-through umbrella work wonders. They create broad, flattering highlights instead of small, distracting specular "hot spots." You might also find yourself reaching for negative fill—using black cards or flags to absorb light—which helps add definition and prevents the light from wrapping too far around the face and flattening their features.
For lighter complexions that can easily get washed out, just be mindful that your key light isn't cranked up too high. Use your fill light sparingly to gently lift the shadows without killing the mood.
The goal is always the same: to shape the face with light and shadow in a way that is flattering and authentic. Adjusting your modifiers and ratios to complement your subject's features and skin tone is a mark of a true professional.
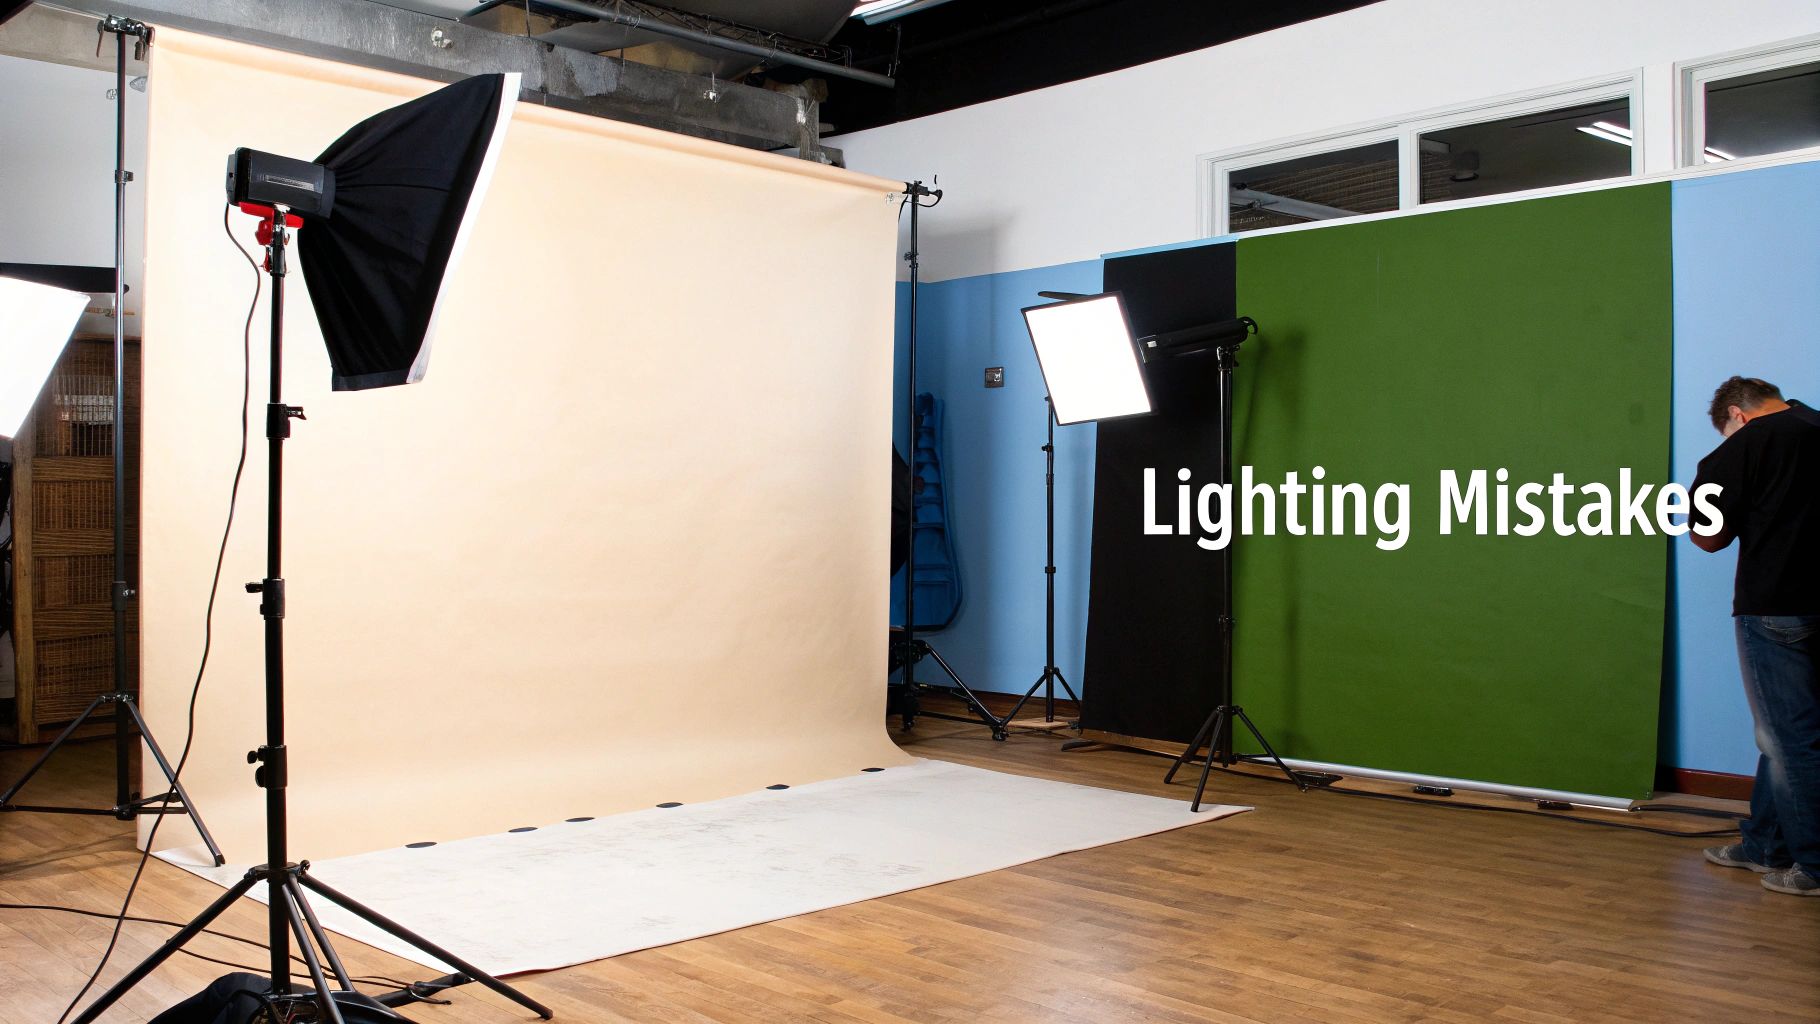
Common Lighting Mistakes to Sidestep
Even seasoned pros can fall into a few common traps. Knowing what to watch for can save you a ton of frustration and editing time later.
1. "Monster Lighting" from Below
Placing a key or fill light below your subject’s chin is almost never a good idea. It casts these strange, upward shadows that just look unnatural and spooky. As a rule, always keep your main light sources at or, more often, above your subject's eye level.
2. Overpowering the Fill Light
Remember, a fill light is there to soften shadows, not obliterate them. If your fill is just as bright as your key light, you'll end up with a flat, dimensionless portrait. I always start with my fill light at least one to two stops dimmer than my key light and adjust from there.
3. Forgetting the Catchlights
Catchlights are those little reflections of your light sources in a person's eyes, and they are critical for bringing a portrait to life. Without them, the eyes can look dull and vacant. If you position your lights well, you should see a single, distinct catchlight in the "10 o'clock" or "2 o'clock" position. It's a small detail that makes a huge difference.
For more tips on refining your photography and even exploring AI-driven solutions, check out our other guides and insights on the Photo AI Studio blog.
How to Get Perfect Lighting with AI Headshots
Let's say you need a studio-quality headshot, like, yesterday. You don't have the gear, the time, or the budget for a full-blown photoshoot. This is where modern AI tools have really changed the game, giving you a way to replicate those classic lighting patterns without ever stepping into a studio.
Platforms like Photo AI Studio are built on massive libraries of professionally shot portraits. The AI has essentially "learned" what makes a Rembrandt or loop lighting setup look the way it does. It understands the subtle play of light and shadow, and it can realistically apply that knowledge to your face. Instead of wrestling with strobes and reflectors, you're just a few clicks away from a perfectly lit portrait.
Giving the AI a Good Starting Point
The secret to a fantastic AI-generated headshot isn't complicated: you just need to give it good reference photos. The AI needs clear, well-lit shots of you to work its magic. The easiest way to do this is to take a few selfies in a room with soft, even light. Standing and facing a large window is usually your best bet.
Try to sidestep these common pitfalls with your reference shots:
- Harsh, one-sided shadows: Don't have a bright lamp or window directly to your left or right.
- Backlighting: Make sure the brightest light source isn't behind you, as it will throw your face into silhouette.
- Blurry or grainy photos: Always use your phone’s main camera on the back—it's much higher quality than the front-facing selfie cam.
Think of your reference photos as the raw ingredients. The better they are, the more professional your final AI headshot will look.
As you can see, the AI can generate a huge variety of styles and lighting setups from a few simple starting images. It can place you in different environments and make sure the lighting looks completely natural for that setting.
Telling the AI What You Want
Once your photos are uploaded, the real fun begins. You can steer the AI with simple text prompts to get the exact lighting you have in mind. For example, you could ask for a "corporate headshot with soft loop lighting against a grey backdrop" to get that timeless, approachable look.
Feeling a bit more dramatic? Try prompting for "Rembrandt lighting" or a "low-key portrait with a single side light." The AI knows exactly what these terms mean and will create the specific shadow patterns and mood you're going for.
This process essentially makes you the photographer, without needing a single piece of equipment. It's a quick and incredibly effective way to get a polished look. If you're curious to see it in action, you can play around with our free professional headshot generator and create a new image in minutes.
Your Headshot Lighting Questions Answered
Even with the best guide in hand, questions always pop up when you're in the thick of a shoot. I get it. Let’s walk through some of the most common hurdles photographers hit with headshot lighting, so you can get unstuck and back to creating great images.
What’s the Most Flattering Light for Headshots?
While "flattering" is in the eye of the beholder, I've found that Loop lighting is the safest bet for a classic, professional headshot. It's my go-to for a reason.
By placing your key light just above eye level and at a 30-45 degree angle, you get that telltale little "loop" shadow from the nose. It adds just enough dimension to define the facial features without looking overly dramatic, and it works on just about any face shape. If you’re aiming for something more glamorous or beauty-oriented, Butterfly lighting is fantastic for carving out cheekbones.
Can I Really Get Pro Results with Just One Light?
Absolutely. In fact, I'd encourage it. Some of the most iconic and powerful headshots are made with a single light source.
Rembrandt, Loop, and even Split lighting can be pulled off beautifully with just one key light. The secret weapon? A simple white reflector. Grab a piece of foam board and place it on the opposite side of your subject to bounce a little light back into the shadows. This one-light-plus-reflector combo is not only budget-friendly but is a masterclass in learning how to truly shape light.
Don't underestimate the power of simplicity. Mastering a single light and a reflector will teach you more about the craft than jumping into a complicated multi-strobe setup ever could.
How Do I Kill the Glare on Glasses?
Ah, the dreaded glasses glare. It happens when your light source reflects directly off the lens and into your camera. The fix is all about changing the angle of that reflection.
Here’s what I do:
- Lift the key light. Raising it higher will push the reflection downward, out of your camera's line of sight.
- Move the light further to the side. Sometimes, just increasing the horizontal angle is enough.
- Have your subject make a tiny adjustment. Asking them to slightly turn their head or dip their chin can solve it in an instant.
It’s usually a small tweak, but it makes all the difference.
What’s the Real Difference Between Hard and Soft Light?
It all comes down to the size of your light source relative to your subject. That’s it.
A small light source, like a bare on-camera flash, produces hard light. You’ll get sharp, defined shadows and every little bit of skin texture will be on full display.
A large light source, like that same flash firing through a big softbox, creates soft light. This wraps around your subject, creating soft, feathered shadows that are much more forgiving on skin. For most corporate and professional headshots, soft light is the standard for a clean, polished look.
Ready to create flawless headshots without touching a single light stand? With Photo AI Studio, you can generate studio-quality images with perfect, professionally replicated lighting in seconds.


